
Willow mittensr
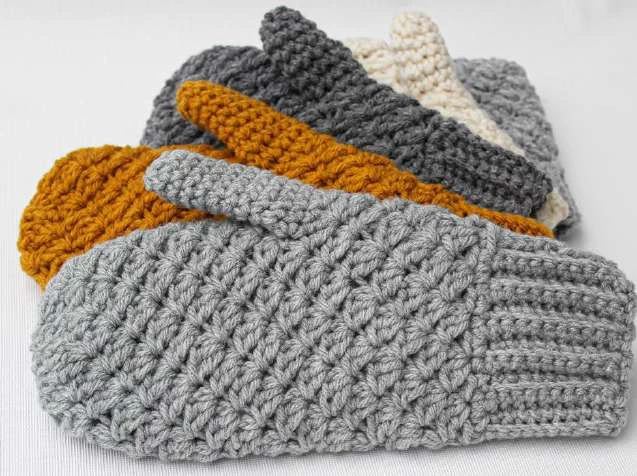
WILLOW Mittens
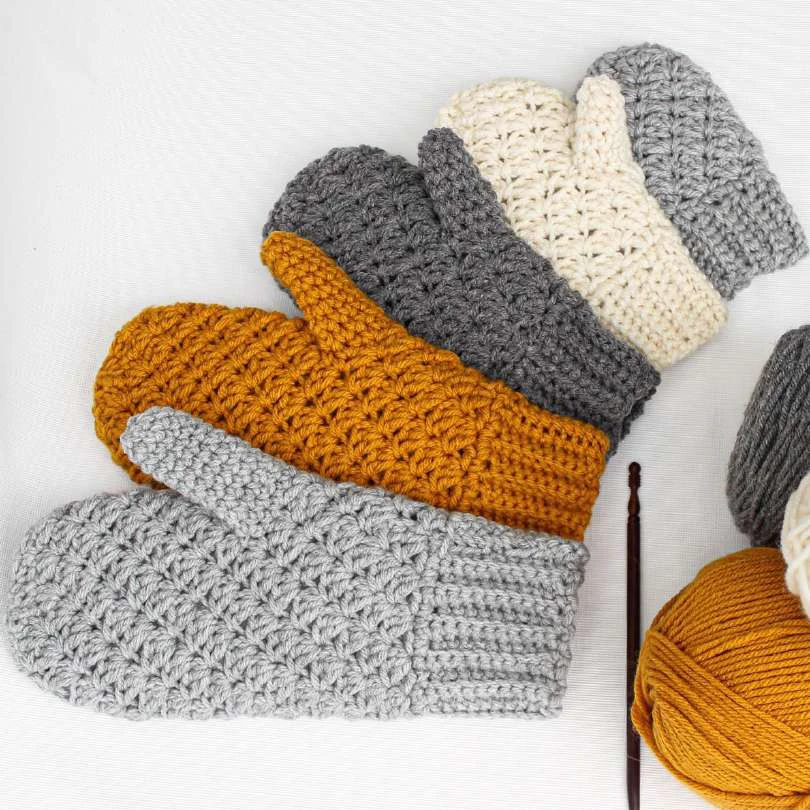
WILLOW Mittens
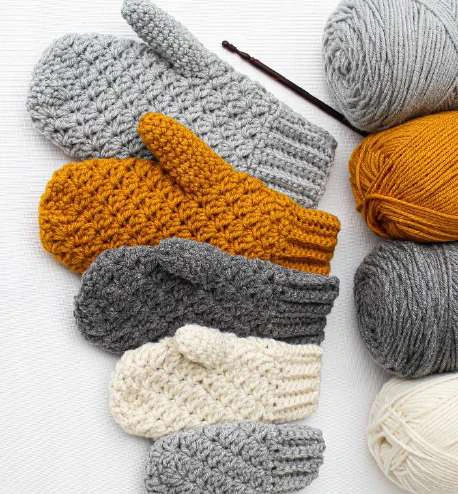
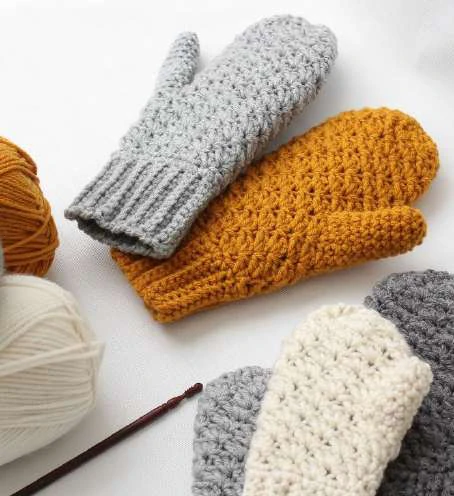
WILLOW Mittens
Materials:
– any worsted weight yarn/# 4: 120[130, 150, 170, 180]yds
– G-6 /4.25mm crochet hook
Gauge: 15SC/4” – Adjust your hook sizes to meet the gauge if needed.
Legend:
Ch-chain, St(s)-Stitch(es), SlSt-Slip stitch, SC-Single Crochet, DC-Double Crochet
SC2tog= SC decrease : insert hook into next st, YO and pull through st (2 loops on hook), insert hook into
next st, YO and pull through st (3 loops on hook), YO and pull through 3 loops
Fan = (SC, DC, DC) all in the same stitch
Number within < > shows the total number of stitches/ fan you should have after that row/round.
5 SIZES: Baby, Toddler, Child, Teen/ Adult, Large Adult
So let’s get started!
These mittens are worked in 3 steps – the pattern contains three sections:
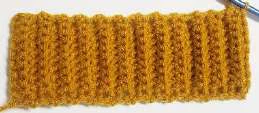
1- the cuff- is worked flat
2- the body of mittens – worked in the round -is started along the edge of the cuff
3- the thumb (the baby mittens are thumbless)
Make 2 mittens: both mittens are worked in the exact same way, including the thumb shaping.
CUFF
-Directions are given for size Baby and the changes for Toddler, Child, Teen/Adult, Adult L are in
parentheses, so: Baby [Toddler, Child, Teen/Adult, Adult L].
Chain 8[9, 10, 11, 12], leaving a long tail (10inches) to seam the edges.
Row 1: SC in 2nd ch from hook and in each ch across, turn. < 7[8, 9, 10, 11]>
Row 2: Ch 1( does not count as a stitch), SC in first st, BLSC in each of next 5[6, 7, 8, 9] sts,
SC in last st, turn < 7[8, 9, 10, 11]>
To obtain a nice edge, I prefer to make a standard SC( under both loops) in first and in the last st.
Rows 3 – 18[ 20, 22, 26, 28] – repeat Row 2.
You must have 18[ 20, 22, 26, 28] Rows. Fold cuff in half and join with a slip stitch, the last
stitch with the first stitch of Row 1, to form the cuff. Do not cut the yarn.
Continue with the body of mitten – in the top
side of the ribbing.
BODY
– worked in the round, onto the edge of the ribbed cuff.
– do not turn at the end of the rounds.
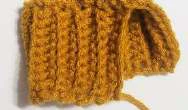
Round 1: Ch 1, working in row-end stitches of cuff, work evenly SC around the cuff edge,
to obtain a total of 21[ 24, 27, 33, 36]SC, as follow:
Baby ( Toddler) size: ch1, *SC in each of the next 5 (4) sts, 2SC in the next st*, repeat
from *-* around, join with a Slst in Ch1. < 21(24) SC>.
Child ( Teen/ Adult) size: ch1, 1SC ( 2SC) in first st, (SC in the next 3sts, 2SC in the next
st) x 5(6) times, SC in last st, join with a Slst in Ch1. < 27(33) SC>.
Large Adult size: ch1, (SC in next st, 2SC in the next st)x 2 times, *SC in the next 3 sts,
2SC in the next st* , repeat from *-*around, join with a Slst in Ch1. < 36 SC>.
WILLOW Mittens
The next rounds are worked in spiral (no slip stitch at the end of the round). Use stitch marker
to keep track of start/end of rounds.
Round 2: Fan in first st, skip 2sts, * Fan in next st, skip 2 sts* repeat *-*around,
< 7[8, 9, 11, 12]) Fan>
Round 3: Fan in first SC of previous round (move st marker up as you work), skip next 2 DC.
Continue with Fan in each SC of next fans. ( make a fan in SC and skip the 2DC, around).
< 7[8, 9, 11, 12]) Fan >
–
From now on,
– each Fan is worked in SC of Fan of previous round, and the DC are skipped, unless otherwise specified.
Continue depending on size:
Baby size
Round 4-10: Repeat Round 3. <7 Fan>
Round 11-12: SC2tog around, in continuous rounds. Join with a slip st at the end of last
row. < 6 SC>.
Fasten off, leaving a 5”-6” tail for weaving in. The Baby mitten should now be finished.
Toddler [Child, Teen/Adult, Adult L] sizes
-The following directions are given for size Toddler and the changes for Child, Teen/Adult, Adult L are
in parentheses, so: Toddler [Child, Teen/Adult, Adult L].
Round 4- 5[ 6, 7, 7]: Repeat Round 3 < 8[ 9, 11, 12] Fan >
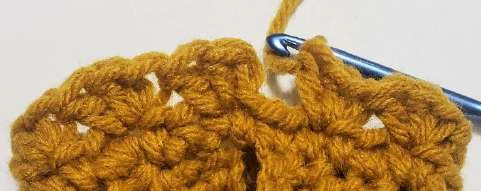
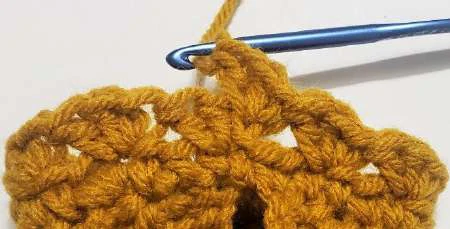
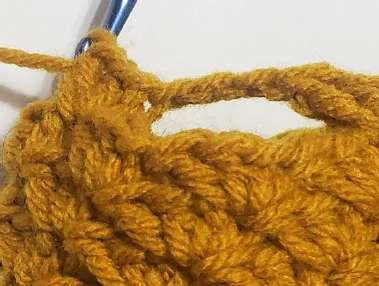
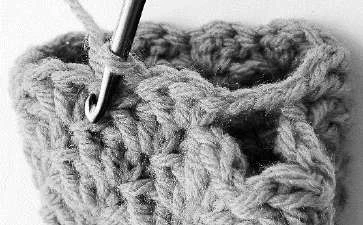
In next round, make the opening for the thumb:
Round 6[7, 8, 8]: Fan in first SC of previous round, skip the 2 DC,
SC in the SC of the next fan, chain 3,
skip the 2 DC and the next 2 Fan ( for thumb hole),
continue with Fan in each SC of next fans.
< 5[ 6, 8, 9] Fan and 1 SC before the Chain3>
At the end of Round 2, Skip the last 2 sts
Fan
Skip the 2 DC
Fan in first SC
Skip 2 Fans
Skip 2 DC
Ch 3
SC in SC

WILLOW Mittens
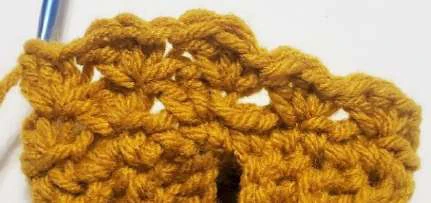
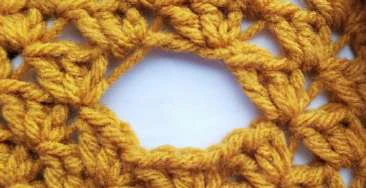
Round 7[8, 9, 9]: Fan in first SC of previous round, skip the 2 DC, Fan in the in the SC
before the Chain3, Fan in the second chain of Chain3, Fan in each SC of next fans.
< 7[8, 10, 11] Fan>
Round 8[9, 10, 11] -12[ 14, 17, 18]: Fan in each SC < 7[8, 10, 11] Fan>
Round 13[ 15, 18, 19]-14[ 16, 19, 20]: SC2tog around, in continuous rounds. Join with
a slip st at the end of last row. 6[ 6, 8, 9 SC]. Fasten off, leaving a 5”-6” tail for weaving in.
See thumb instructions below.
THUMB
Round 1: Pull up a loop on the mitten side of the hole, ch1 and SC in the same space,
4[4, 5, 5]SC across the top of thumb hole,
1SC into the space on the other side of thumb hole,
4[5, 5, 6]SC across the bottom of thumb hole.<10[11, 12, 13]SC>
Do not join, the next rounds are worked in spiral
(no slip stitch at the end of the round).
Round 2 – 5 [6, 9, 10]: SC in each SC around. <10[11, 12, 13]SC>.
Round 6 [7, 10,11]: SC2tog around, SC in last stitch for sizes Child
and Adult L. Join with a slip st.
Fasten off, leaving a 4”-5” tail for weaving in.
ASSEMBLY
– Using the long tail of the cuff section, seam the edges of the cuff by whip stitching through
the SC and the base of the starting chain. Secure and weave in ends.
-Use a tapestry needle to gather the end of the mitten and the end of the thumb closed: go
through the front loops only of every stitch around and weave in. Secure the tail.
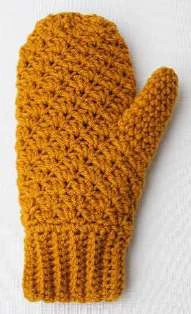
Congratulations!
You have your
WILLOW mittens!
Fan in SC Fan in the 2nd ch
Fan in SC before Ch3
Recommended Digital Products

The Ultimate Beginner’s Crochet Guide: Master 45+ Essential Techniques & Practical Projects
$5.99

From Loop to Perfection: The Ultimate Step-by-Step Crochet Master Guide
$9.99
The Ultimate Crochet Handbook: Essential Techniques, Color Theory & 80+ Step-by-Step Patterns
$19.99
Master the Art of Crochet from Scratch – Ultimate Digital Guide with 8 Step-by-Step Projects!
$19.99
Get this Crochet Pattern as a Free PDF
Enter your email to receive the PDF associated with this article.
Leave a Reply