
Snail Amigurumi
Crochet pattern
Snail
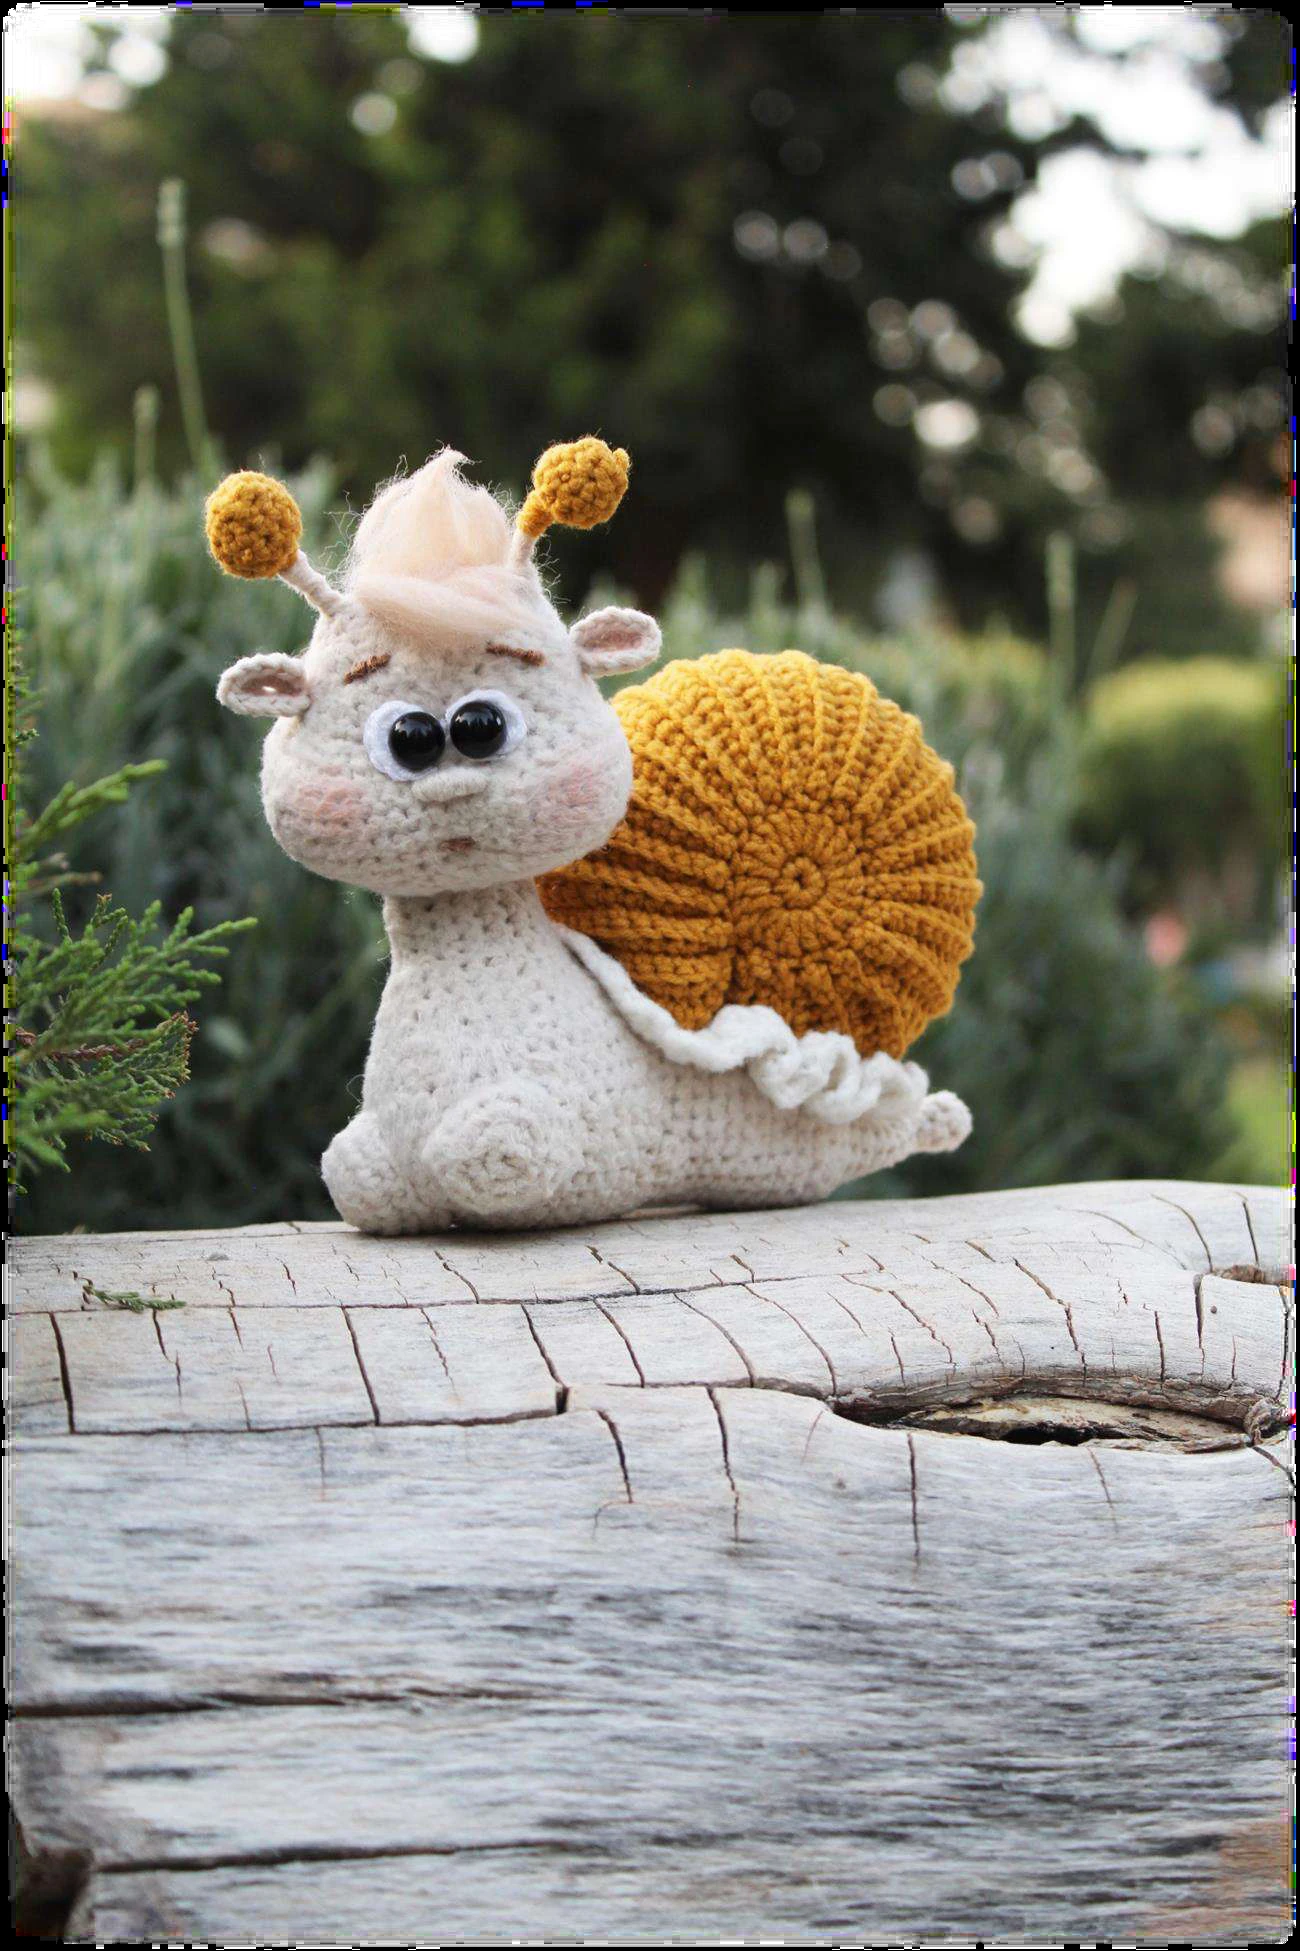



Dear crochet lovers,
Thank you for purchasing my pattern! I
hope you find this pattern easy and enjoy
the whole process of crocheting.
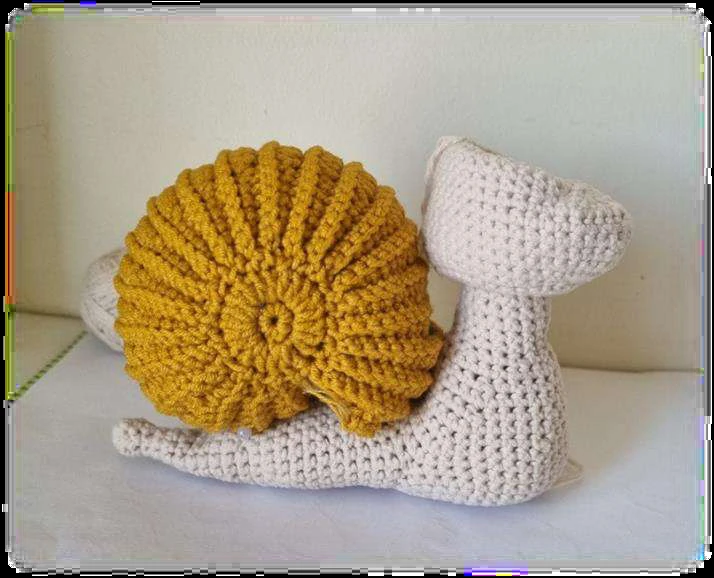
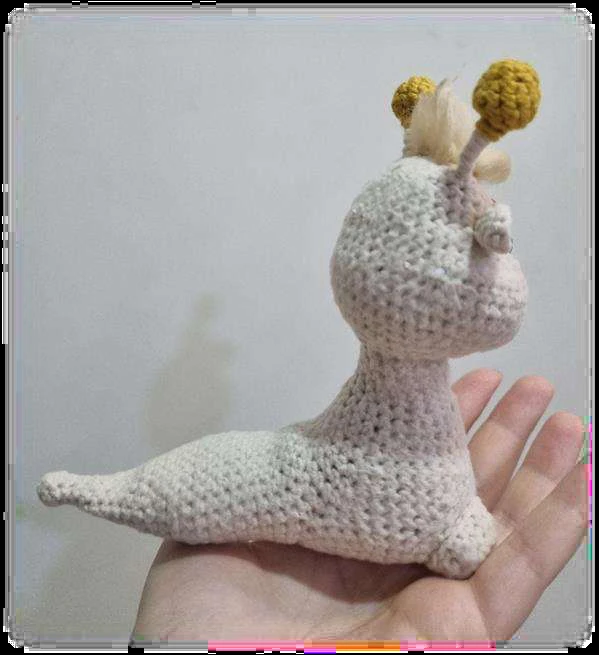
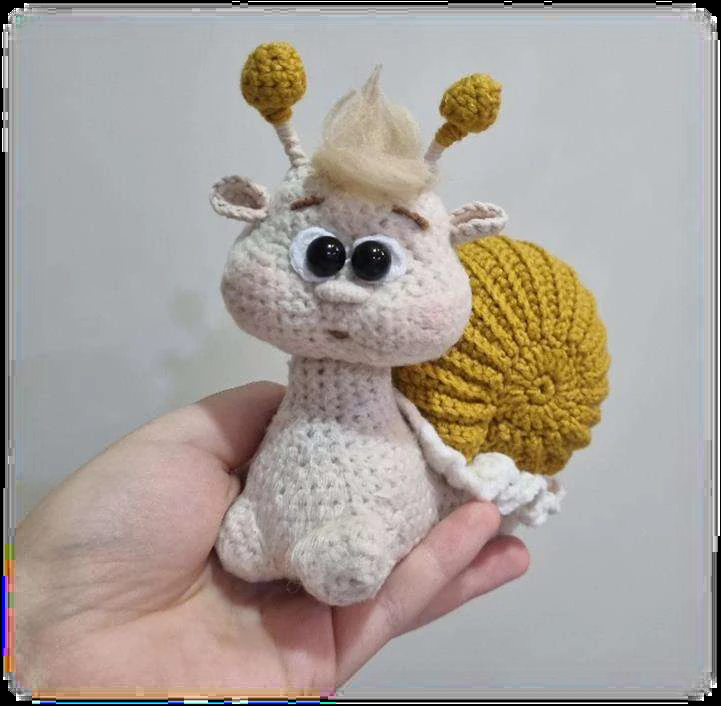
Today, I invite you to crochet a snail toy
using only one crochet hook. You will make
a funny toy by following this crochet
pattern.
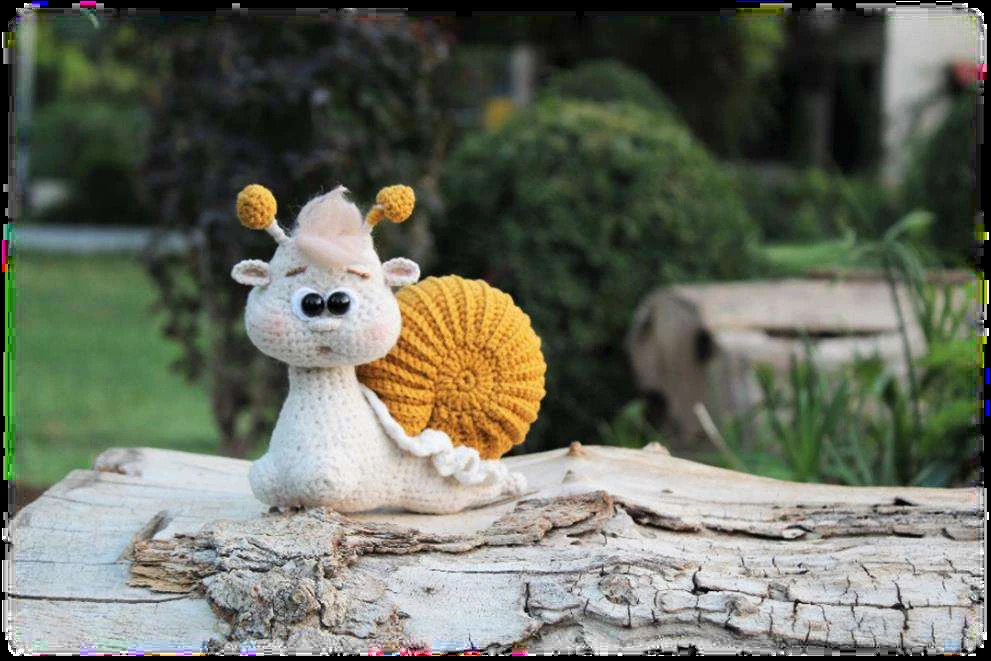
The finished product using the materials
stated in this pattern is ~5.1 inches / 13
cm long and ~5.1 inches / 13 cm in height
(with antennas).
It consists of 19 pages and is accompanied
by more than 60 photographs.
The snail is crocheted as one piece. You
sew only the shell, ears, and paws.
This pattern is a work of authorship and intends only for personal use. Full
or partial reproduction and distribution, sales, and publications on the Internet
are forbidden!!!
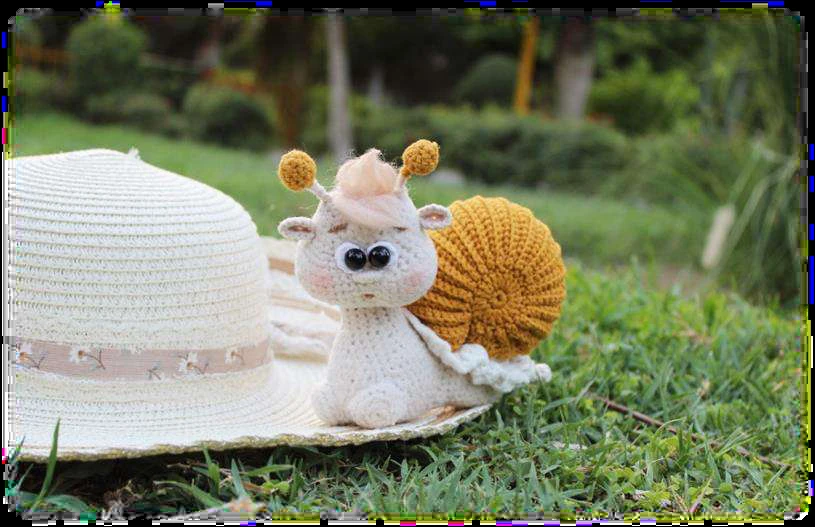
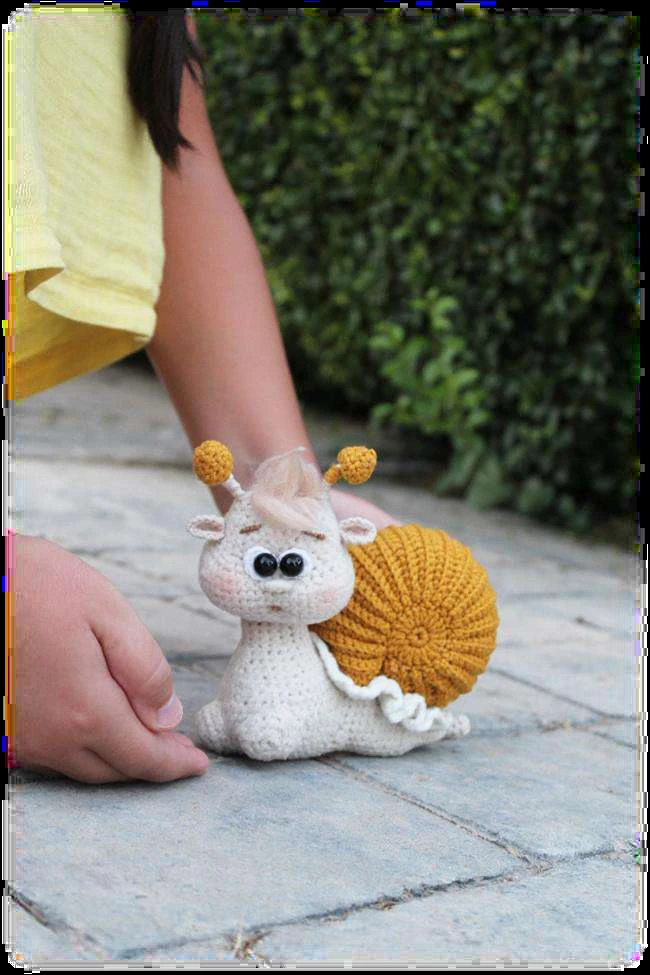
INDEX:
About the pattern……………..…… 2
Index ………….………………………… 3
The required materials .…………. 4
Abbreviation (US) ……….………… 4
Snail
Shell ……………………………..……… 5
Eyes ………………………………….… 12
Body ………………………….…….…. 13
Neck ……………………………………. 14
Head ………….……………………….. 15
Tentacles ….………………………… 16
Ears ……………………………………. 16
Paws …………………….…………..… 17
Foot ……………………………………. 17
Assembly …….………………….…… 18
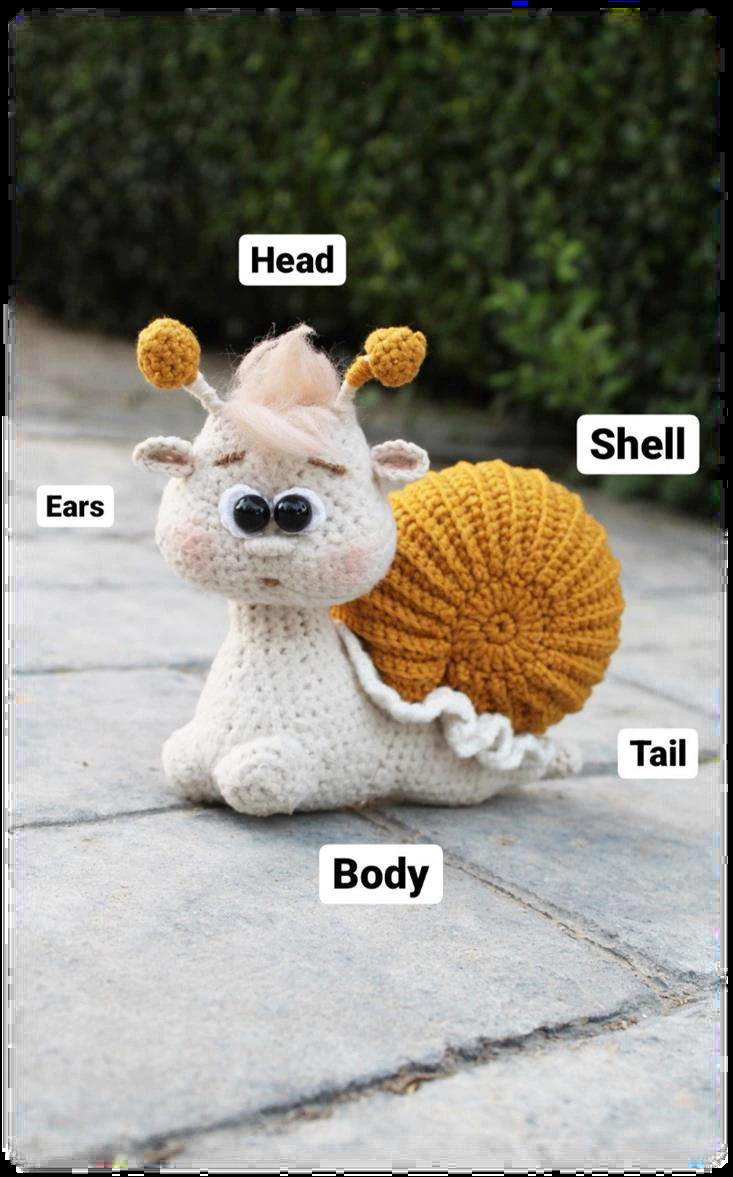
THE REQUIRED MATERIALS:
1.Yarn
Adelia Kiss (50g – 145 m, 100%; polyester), color 03 light beige 1 skein for a
body;
YARNART Jeans (50 g, 160 m, 55% cotton, 45% polyacrylic) color 84
mustard, 1 skein for a shell, and cups of the antennas;
A little bit of white yarn for the whites and foot;
2. 2 mm crochet hook;
3. Stuffing material;
4. Stitch marker, tapestry needle, embroidery needle, scissor, rouge, wire (D-
1.2 mm), and adhesive tape;
5. Brown embroidery thread for eyebrows and a mouth;
6. Safety eyes or eye beads D=10 mm (2 pcs);
7. Wool in light beige color (you may use beige yarn) for hair.
CROCHET ABBREVIATIONS (US):
MR – magic ring
Rnd – round
ch – chain
dec – decrease (2 sc together)
inc – increase (2 sc in one stitch)
sc – single crochet
DC – double crochet
TR – treble crochet
HDC – half double crochet
sl st – slip stitch
BLO – back loops only
* – repeat as instructed
The number in the brackets is the number of stitches in the round.
Shell
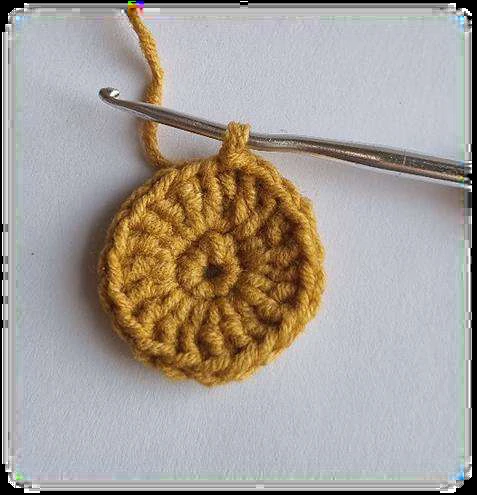
With mustard No. 84 and a 2 mm crochet hook. Make 2.
Rnd 1: 6 into MR, 1 sl st in the first stitch, chain 3 (6)
Rnd 2: 3 DC in the first stitch, (3 DC in each stitch)*5, 2 DC in the first stitch,
where we crocheted 3 chains at the beginning of the round, sl st. (20)
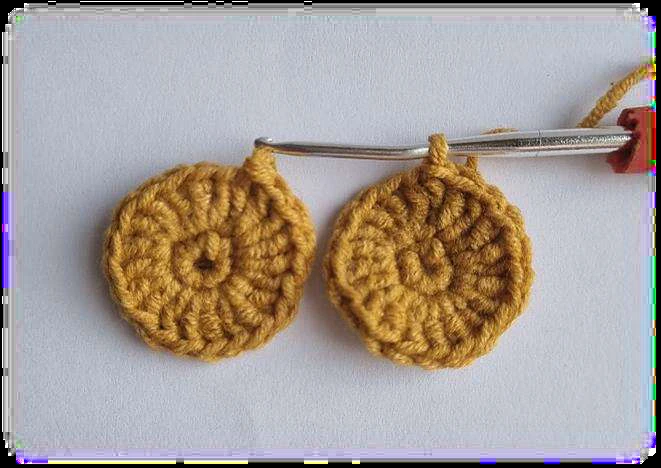
Break yarn and secure it. Hide the yarn tail.
Crochet the second part similarly but do not break yarn.
Continue crocheting:
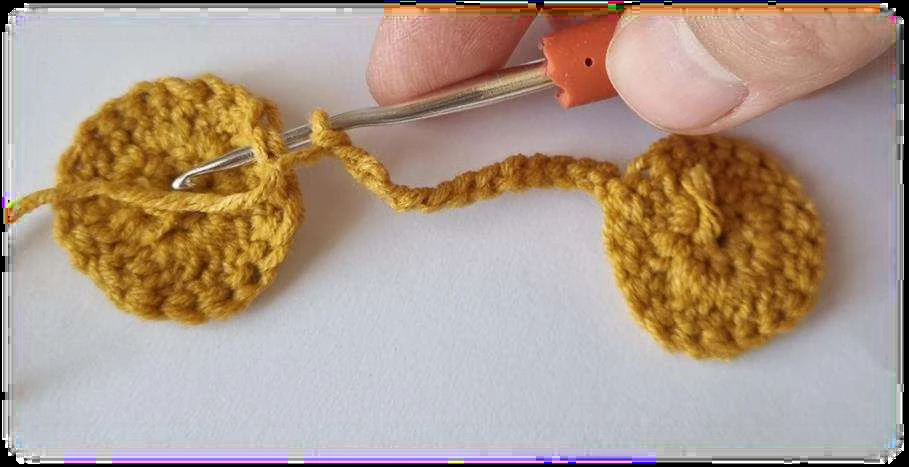
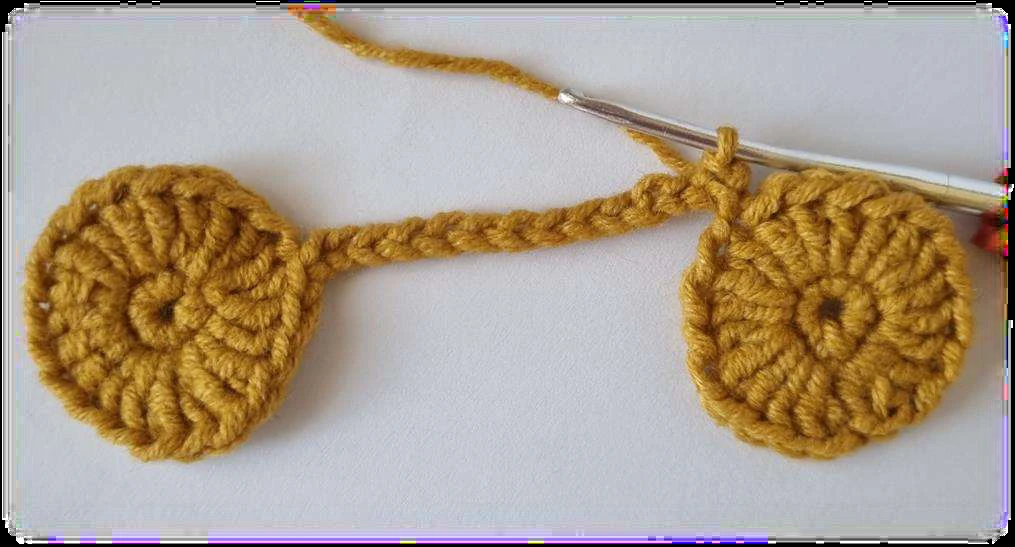
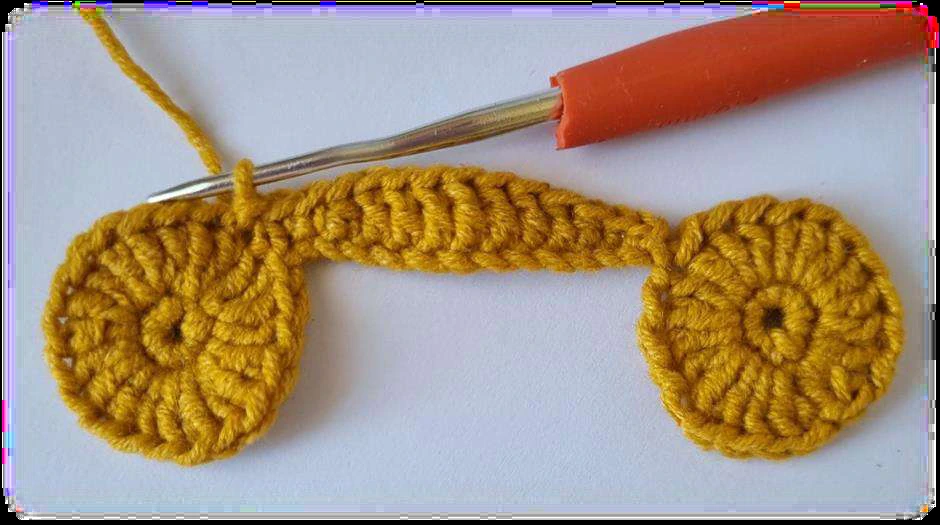
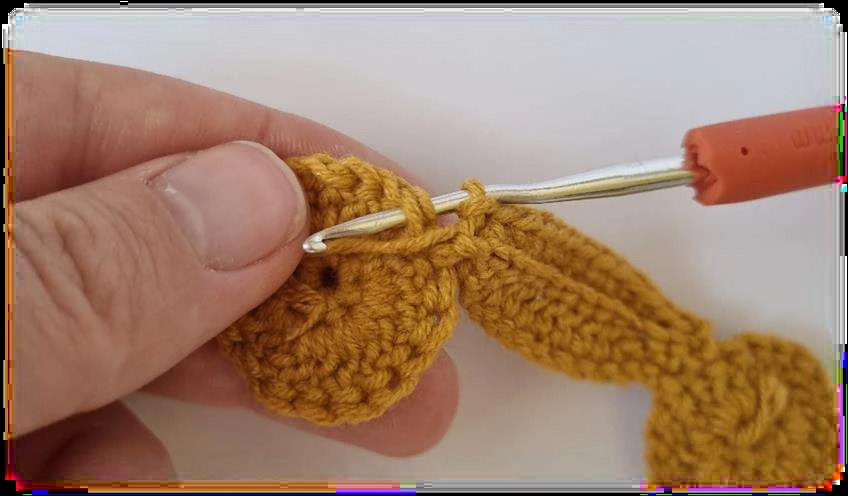
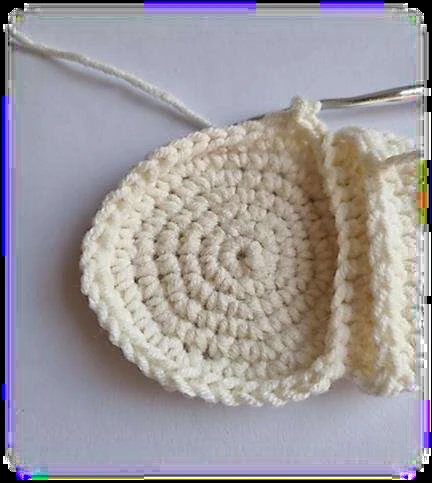
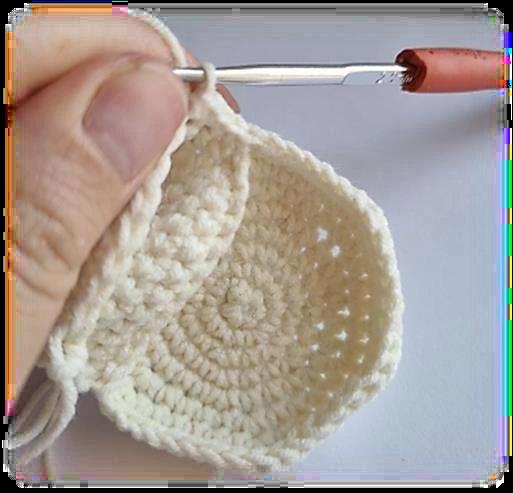
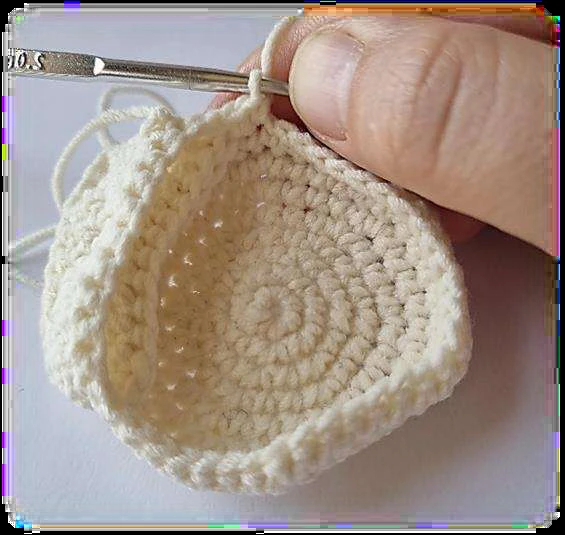
Chain 13 and attach the chain foundation to any stitch of the first circle
with a slip stitch. To do this, you must insert the hook from the right side of
the circle, as shown in the photo below. Bring the working yarn to the wrong
side of the circle. Grab the working yarn and pull it through the loops on the
hook, making a slip stitch. Chain 1. Turn.
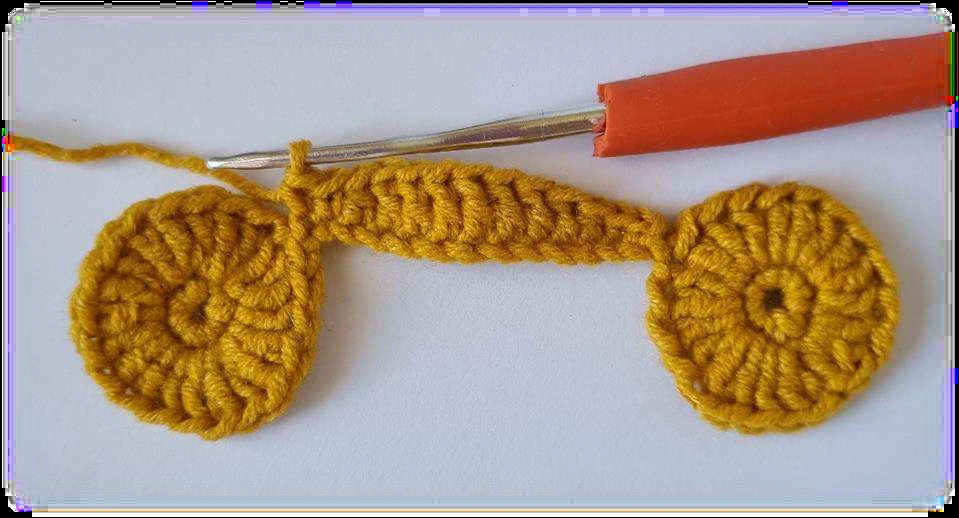
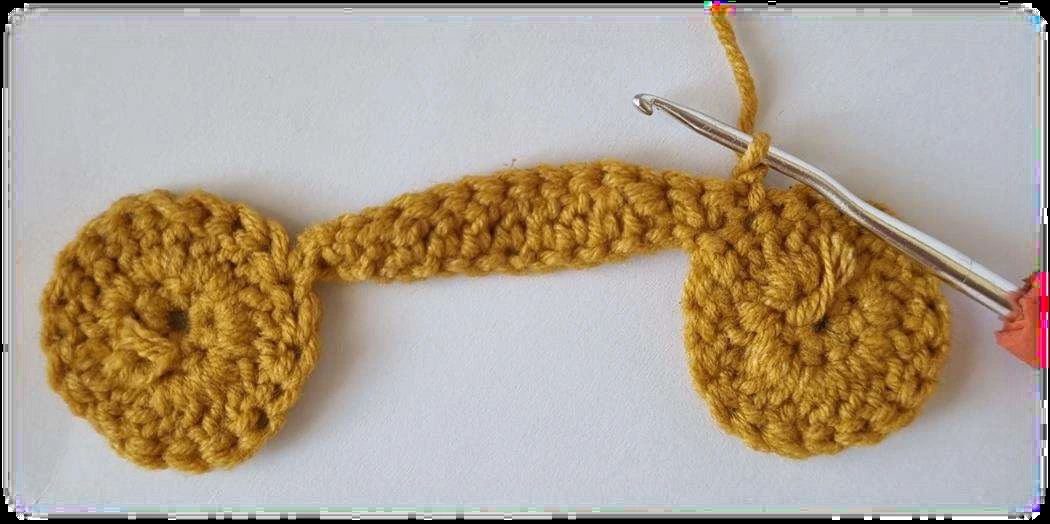
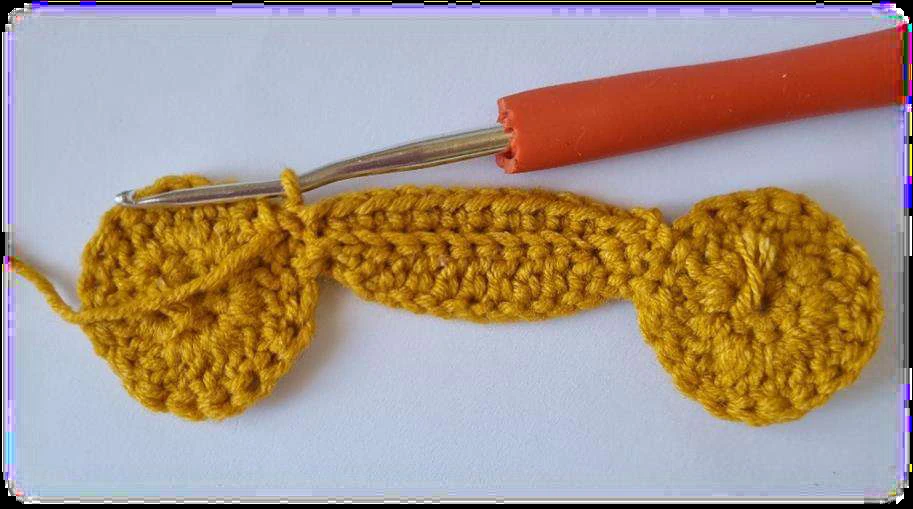
Continue crocheting to the chain foundation on the right side, as shown in the
photo below:
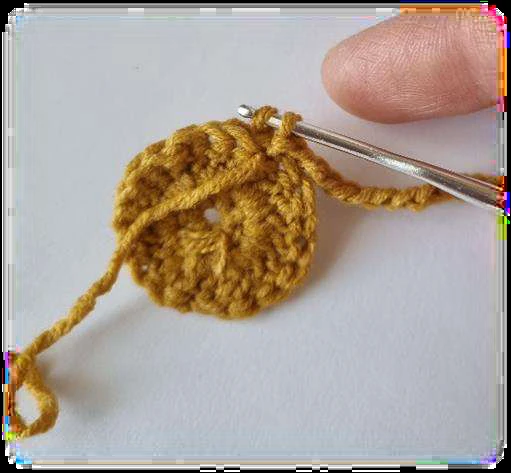
Start crocheting in the 2nd chain from the hook.
Rnd 1: 1 sl st, sc, HDC, 7 DC, HDC, sc, 1 sl st. Attach the first line of the shell in
the next stitch of the circle with sl st as usual, as shown in the photo. Chain 1,
turn (13)
See what the part looks like after we crocheted the first round and joined the
circle with sl st:
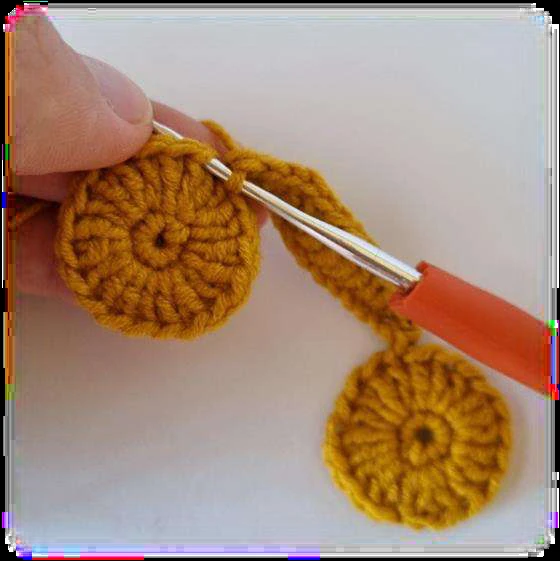
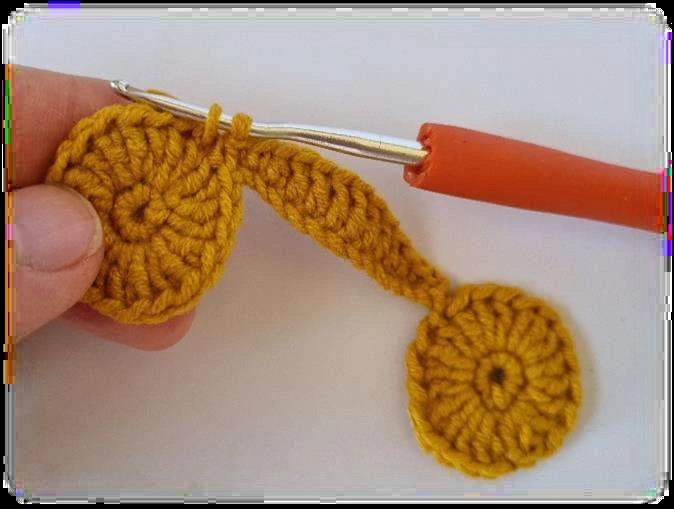
We turned and chained 1. Continue crocheting on the wrong side:
Continue crocheting all next rounds in the 3rd stitch from hook and work
through back loops only (BLO).
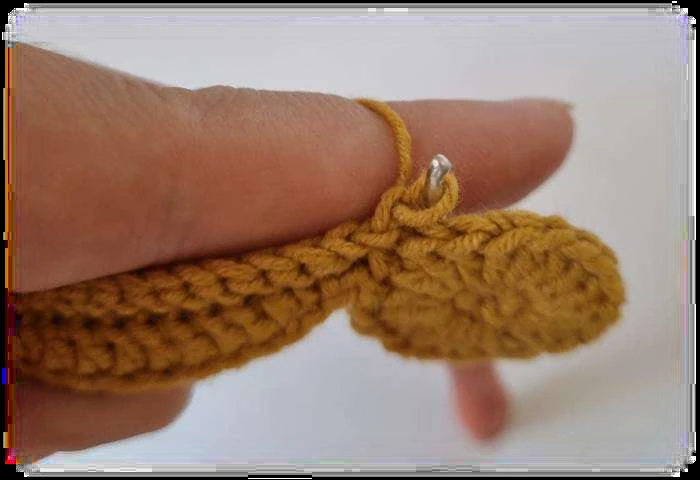
Rnd 2: BLO: 1 sl st, 11 sc, 1 sl st, attach in the next stitch of the circle with 1 sl
st, as indicated above (insert the hook from the right side of the circle, hold the
working yarn on the wrong side and pull it through the loops on the hook,
making a slip stitch). Chain 1, turn. (13)
Start crocheting each round in
the 3rd stitch from hook
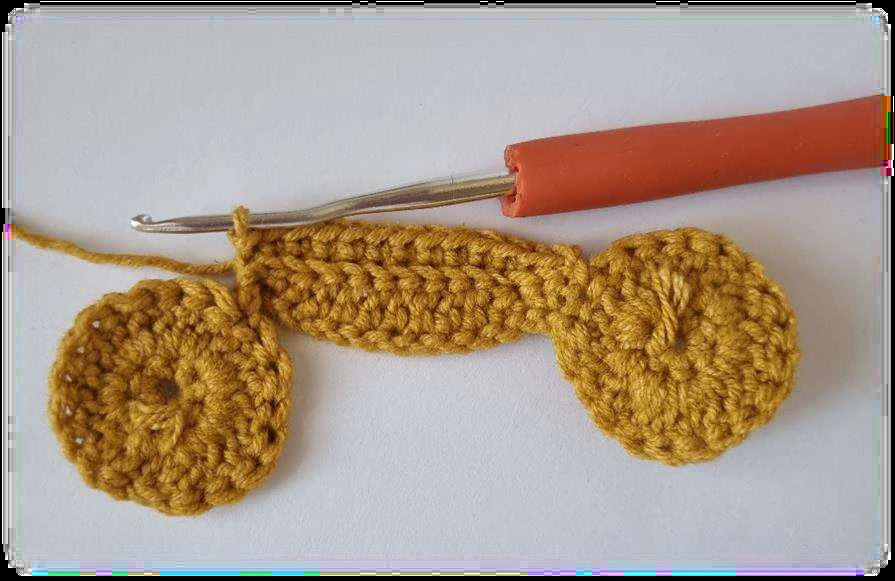
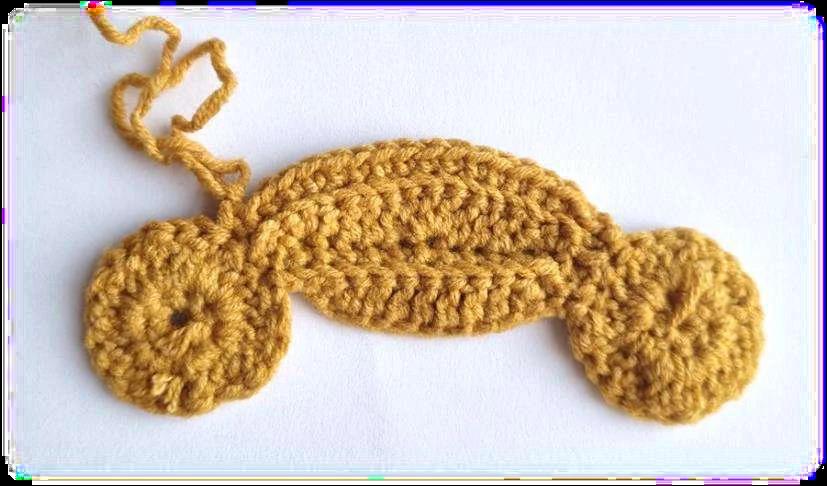
See what the ready part looks like:
We made sl st, chained 1, and turned the work. In the next round, start
increasing the number of stitches.
Continue crocheting the next round on the right side:
Rnd 3: BLO: 1 sl st, 2 sc in 1 stitch, HDC, 3 DC, 3 DC in 1 stitch, 3 DC, HDC, 2 sc
in 1 stitch, 1 sl st. Attach the piece in the next stitch of the circle with sl st as
usual. Chain 1, and turn the work. (17)
Continue crocheting on the wrong side.
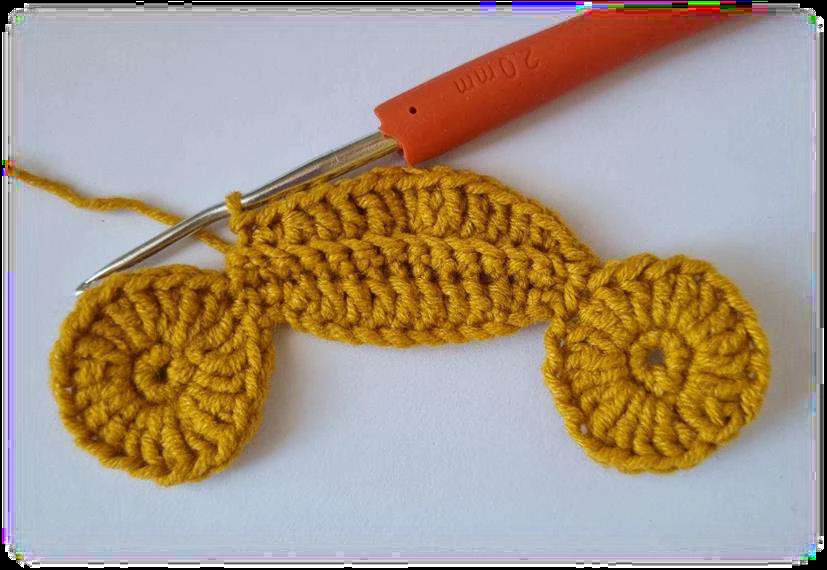
Crochet all even-numbered rounds similarly: slip stitch, the required number
of sc, and, end with sl st. Do not forget to start in the 3rd stitch from hook.
Rnd 4: BLO: 1 sl st, 15 sc, 1 sl st, attach the piece in the next stitch of the circle
with sl st as indicated above, chain 1, and turn (17)
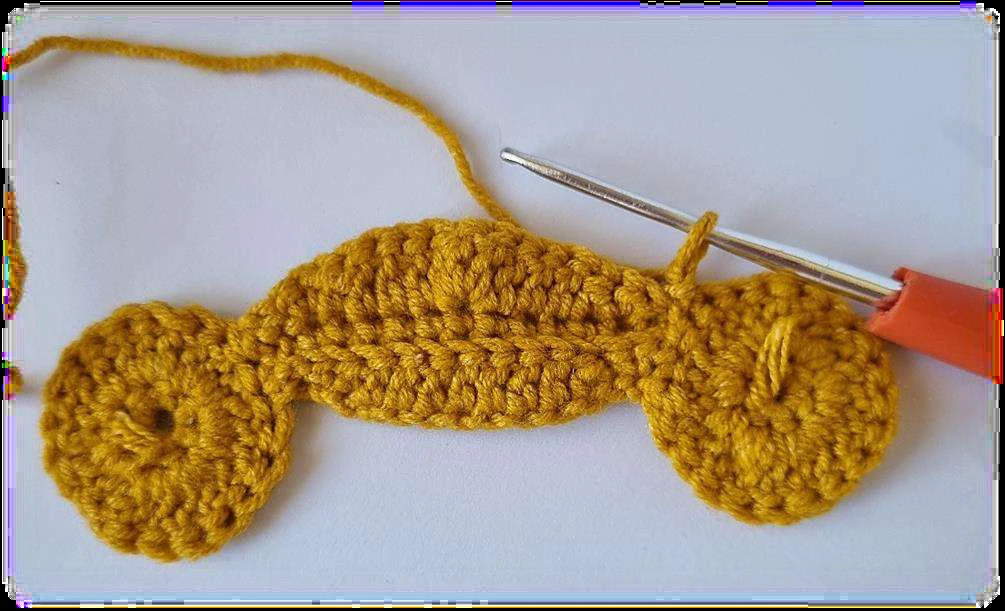
Rnd 5: BLO: 1 sl st, 2 sc in 1 stitch, 1 sc, HDC, 9 DC, HDC, 1 sc, 2 sc in 1 stitch, 1
sl st. Attach the piece in the next stitch of the circle with sl st as usual. Chain 1,
and turn the work (19)
Rnd 6: BLO: 1 sl st, 17 sc, 1 sl st, attach the piece in the next stitch of the circle
with sl st as indicated above, chain 1, and turn (19)
Rnd 7: BLO: 1 sl st, 2 sc in 1 stitch, 2 sc in 1 stitch, 1 sc, HDC, 9 DC, HDC, 1 sc, 2
sc in 1 stitch, 2 sc in 1 stitch, 1 sl st. Attach the piece in the next stitch of the
circle with sl st as usual. Chain 1, and turn the work (23)
Rnd 8: BLO: 1 sl st, 21 sc, 1 sl st, attach the piece in the next stitch of the circle
with sl st as indicated above, chain 1, and turn (23)
Rnd 9: BLO: 1 sl st, 5 sc, HDC, 9 DC, HDC, 5 sc, 1 sl st. Attach the piece in the next
stitch of the circle with sl st as usual. Chain 1, and turn the work (23)
Rnd 10: BLO: 1 sl st, 21 sc, 1 sl st, attach the piece in the next stitch of the circle
with sl st as indicated above, chain 1, and turn (23)
Repeat 9-10 rounds 10 times.
Rounds 11-30: repeat rounds 9-10.
Note: the right side of the circles is facing outward and the wrong side of the
circles is facing inward.
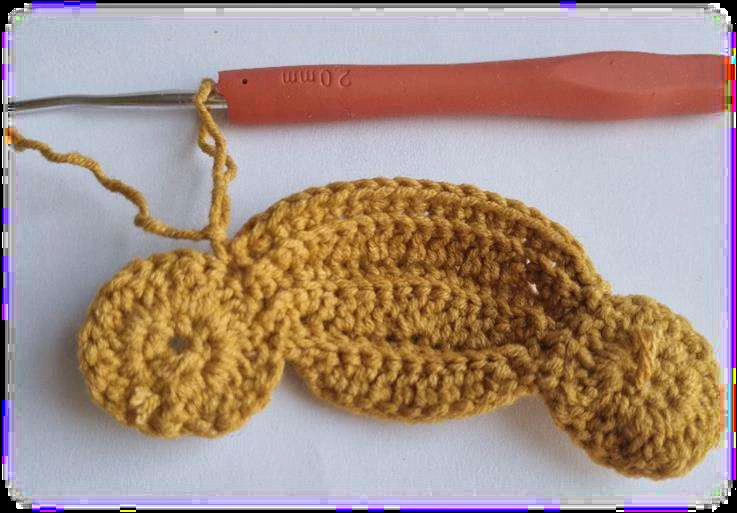
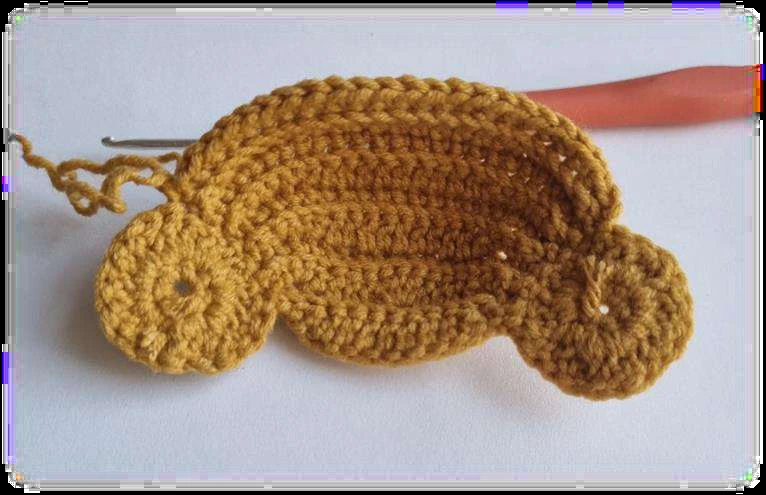
We have crocheted 16 double rounds if you count from the first round.
From the next round, start increasing the number of stitches.
Rnd 31: BLO: 1 sl st, 2 sc in 1 stitch, 4 sc, HDC, 9 DC, HDC, 4 sc,2 sc in 1 stitch, 1
sl st. Attach the piece in the next stitch of the circle with sl st, chain 1, turn (25)
Rnd 32: BLO: 1 sl st, 23 sc, 1 sl st, attach the piece in the next stitch of the circle
with sl st, chain 1, turn (25)
Rnd 33: BLO: 1 sl st, 6 sc, HDC, 9 DC, HDC, 6 sc, 1 sl st. Attach the piece in the
next stitch of the circle with sl st, chain 1, turn (25)
Rnd 34: BLO: 1 sl st, 23 sc, 1 sl st, attach the piece in the next stitch of the circle
with sl st, chain 1, turn (25)
Rnd 35: BLO: 1 sl st, 6 sc, HDC, 4 DC, 3 DC in 1 stitch, 4 DC, HDC, 6 sc, 1 sl st.
Attach the piece in the next stitch of the circle with sl st, chain 1, turn (27)
Rnd 36: BLO: 1 sl st, 25 sc, 1 sl st, attach the piece in the next stitch of the circle
with sl st, chain 1, turn (27)
Rnd 37: BLO: 1 sl st, 6 sc, HDC, 11 DC, HDC, 6 sc, 1 sl st. Attach the piece in the
next stitch of the circle with sl st, chain 1, turn (27)
Rnd 38: BLO: 1 sl st, 25 sc, 1 sl st, attach the piece in the next stitch of the circle
with sl st, chain 1, turn (27)
Rnd 39: BLO: 1 sl st, 6 sc, HDC, 11 DC, HDC, 6 sc, 1 sl st. Attach the piece in the
next stitch of the circle with sl st, chain 1, turn (27)
Rnd 40: BLO: 1 sl st, 25 sc, 1 sl st, attach the piece in the next stitch of the circle
with sl st, chain 1, turn (27)
Rnd 41: BLO: 1 sl st, 6 sc, HDC, 11 DC, HDC, 6 sc, 1 sl st. Attach the piece in the
next stitch of the circle with sl st, chain 1, turn (27)
Rnd 42: BLO: 1 sl st, 25 sc, 1 sl st, attach the piece in the next stitch of the circle
with sl st, chain 1, turn (27)
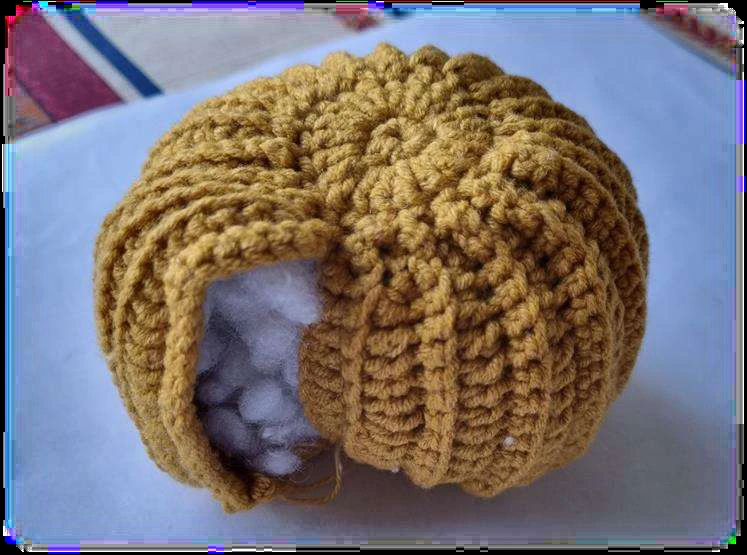
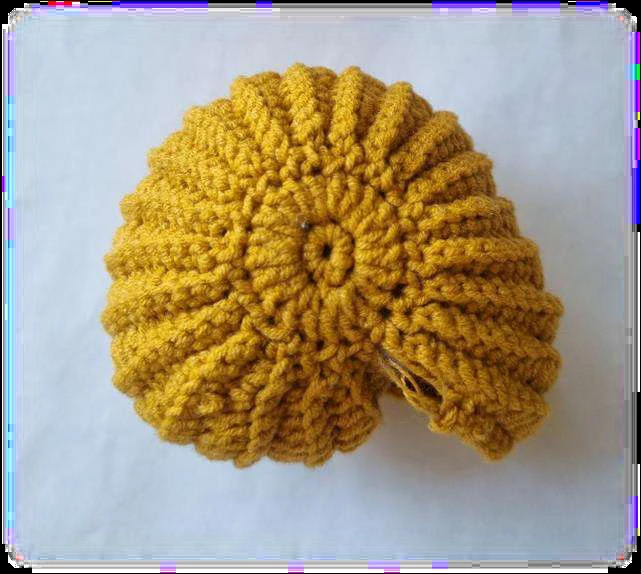
Attach the piece of the last 4 rounds in the first stitch of the circle and crochet
as rounds 39-40.
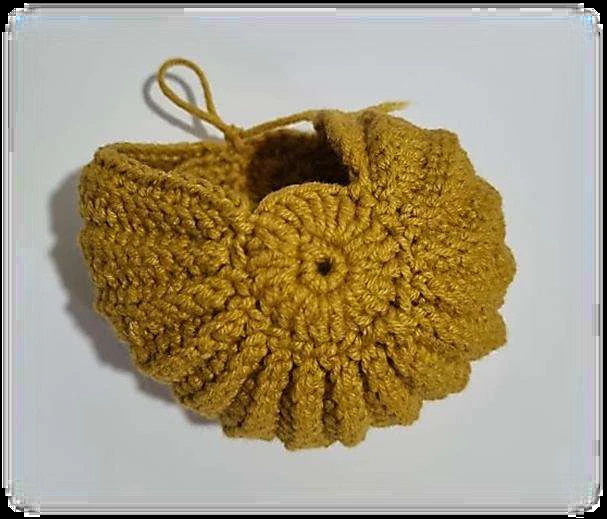
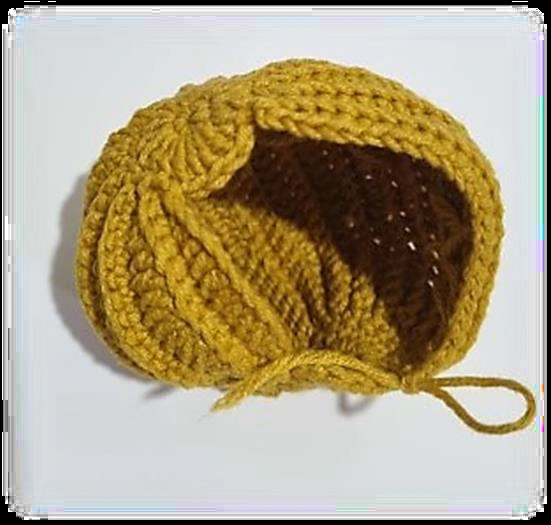
Break yarn and secure it, leaving a long yarn tail for sewing. Stuff the shell with
fiberfill.
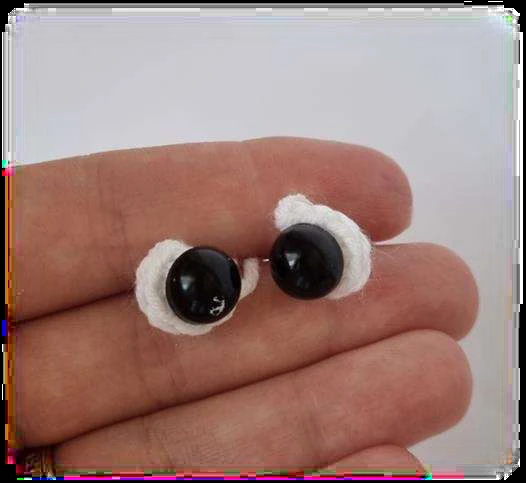
Eyes (white) make 2
With white yarn and a 2 mm crochet hook.
Rnd 1: 6 into MR (6)
Tighten the ring gently.
Insert the safety eye into the ring and do not
tighten strongly, as shown in the photo.
Break yarn, leaving a short tail for sewing to the
head.
Crochet the second eye similarly. Put the ready
eyes aside. Start crocheting the body.
Body
With light beige No. 03 and a 2 mm crochet hook.
Tail (the first part)
Rnd 1: 6 into MR (6)
Rnds 2-3: 6 sc (6)
Rnd 4: 2 sc, 1 inc, 2 sc, 1 inc (8)
Rnd 5: 3 sc, 1 inc, 3 sc, 1 inc (10)
Rnd 6: 4 sc, 1 inc, 4 sc, 1 inc (12)
Rnd 7: 5 sc, 1 inc, 5 sc, 1 inc (14)
Rnd 8: 6 sc, 1 inc, 6 sc, 1 inc (16)
Rnd 9: 7 sc, 1 inc, 7 sc, 1 inc (18)
Rnd 10: 8 sc, 1 inc, 8 sc, 1 inc (20)
Rnd 11: 9 sc, 1 inc, 9 sc, 1 inc (22)
Rnd 12: 10 sc, 1 inc, 10 sc, 1 inc (24)
Rnds 13-23: 24 sc (24) -11 rounds
Break yarn and secure it.
Stuff the tail with fiberfill gently.
Body (the second part)
With light beige No. 03 and a 2 mm crochet
hook.
Rnd 1: 6 into MR(6)
Rnd 2: (6 inc)*6 (12)
Rnd 3: (1 sc, 1 inc)*6 (18)
Rnd 4: (2 sc, 1 inc)*6 (24)
Rnd 5: (3 sc, 1 inc)*6 (30)
Rnd 6: (4 sc, 1 inc)*6 (36)
Rnd 7: (5 sc, 1 inc)*6 (42)
In the next round, start joining the tail and circle (body) together. Fold both
parts with the right side facing each other and start crocheting 12 through both
loops of the tail and body together at once, continue crocheting 30 sc to the
body.
Rnd 8: 12 sc through both stitches of the tail and body together, 30 sc to the
body (42)
In the next round, continue crocheting 12 sc to the outer side of the tail and 30
sc to the circle (body).
Rnd 9: 12 sc to the outer side of the tail, 30 sc (42)
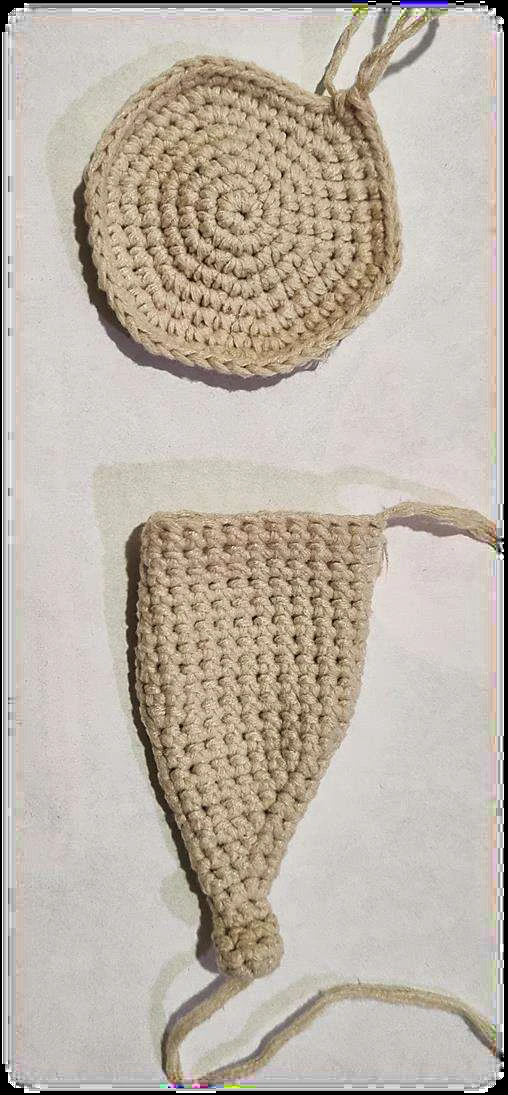
The bottom part of the tail and body together: The upper part of the tail:
Rnds 10-13: 42 sc (42) 4 rounds
Rnd 14: 19 sc, 1 dec, 19 sc, 1 dec (40)
Rnd 15: (8 sc, 1 dec)*4 (36)
Rnd 16: (7 sc, 1 dec)*4 (32)
Rnd 17: (6 sc, 1 dec)*4 (28)
Rnd 18: (5 sc, 1 dec)*4 (24)
Rnd 19: (4 sc, 1 dec)*4 (20)
Rnd 20: 8 sc, 1 dec, 8 sc, 1 dec (18)
Neck
Rnds 21-23: 18 sc (18) 3 rounds
Do not forget to stuff the body.
Crochet shift stitches.
The beginning of the new round must be in the middle of the front part of
the neck. I crocheted 10 sc and put the marker.
1. We joined the tail and
body together (crocheted
12 sc through both loops)
2. Continue crocheting
to the body
We
finished
crocheting 30 sc
to the body
Start crocheting
to the outer side
of the tail
2 parts are joined. Continue
crocheting in a circle.
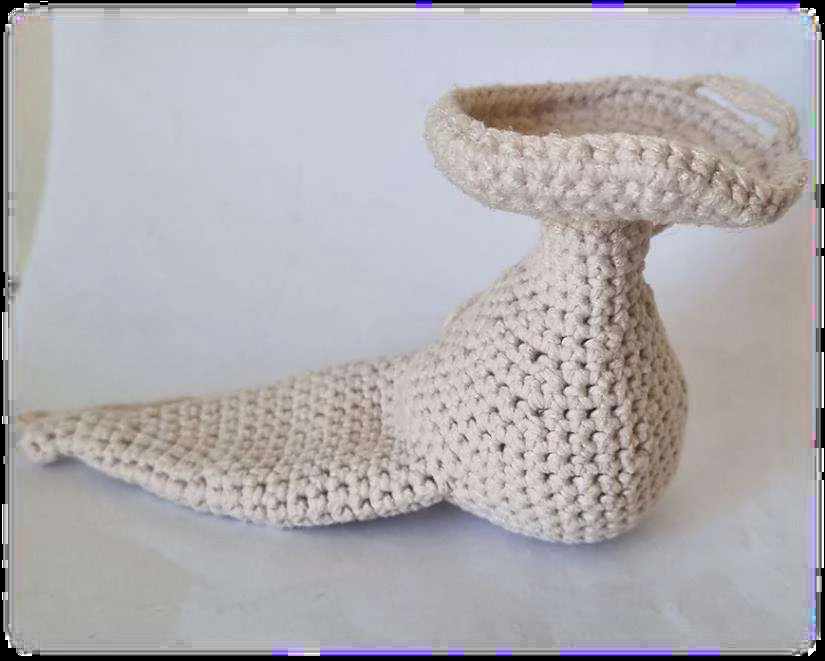
Head
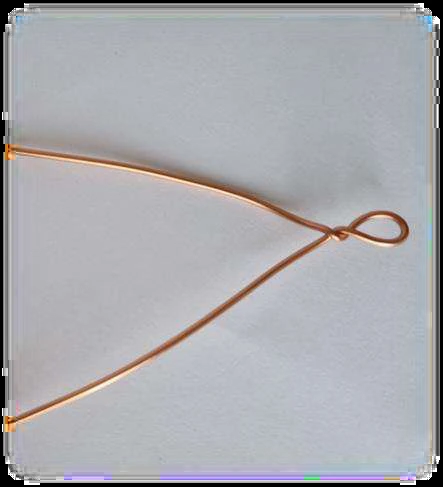
Make the wireframe for the neck and antennas before you start crocheting the
head. Cut a 20 cm/7.8 inches piece of wire.
Fold the wire in half and put it aside.
Rnd 24: (2 sc, 1 inc)*6 (24) through front
loops only
Rnd 25: (3 sc, 1 inc)*6 (30)
Rnd 26: (4 sc, 1 inc)*6 (36)
Note: crochet increases for the cheeks in
the next round. The marker is in the
middle on the front side of the head!
Crochet shift stitches if needed.
Rnd 27: 2 sc, 6 inc, 20 sc, 6 inc, 2 sc (48)
Rnds 28-33: 48 sc (48) 6 rounds
Rnd 34: 2 sc, 6 dec, 20 sc, 6 dec, 2 sc (36)
In round 36 insert the eyes and secure
them from inside. I install the eyes and sew
the whites to the ready stuffed head later.
Rnds 35-38: 36 sc (36)
Rnd 39: (4 sc, 1 dec)*6 (30)
Rnd 40: 30 sc (30)
Rnd 41: (3 sc, 1 dec)*6 (24)
Rnd 42: 24 sc (24)
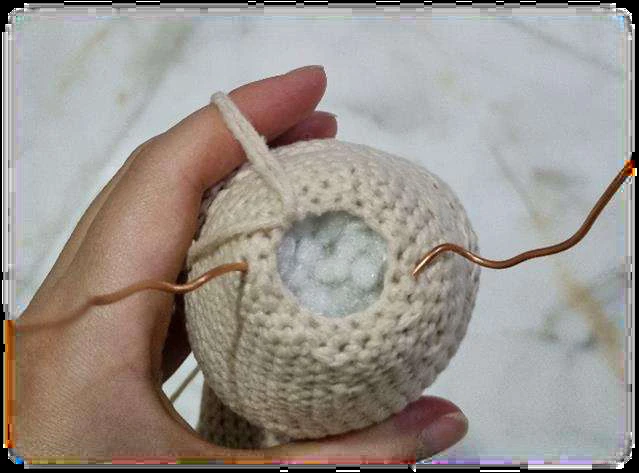
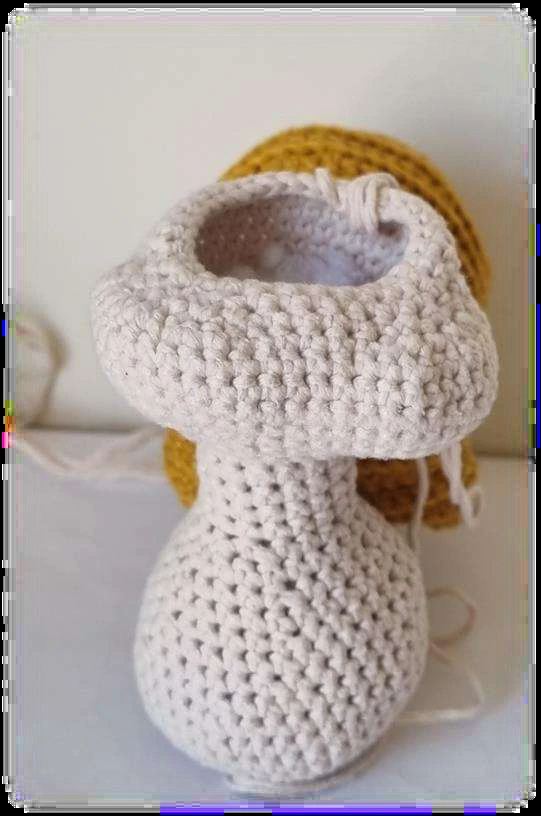
Insert the wireframe into the head and neck. Stuff the head and neck with
fiberfill firmly. Draw out the ends of the wireframe to the sides in round 42. The
distance between the antennas is 10-12 sc.
Marker
Rnd 43: (2 sc, 1 dec)*6 (18)
Rnd 44: (sc, 1 dec)*6 (12)
Rnd 45: 6 dec (6)
Break yarn and tighten the hole
with a tapestry needle. Hide the
yarn tail inside the head.
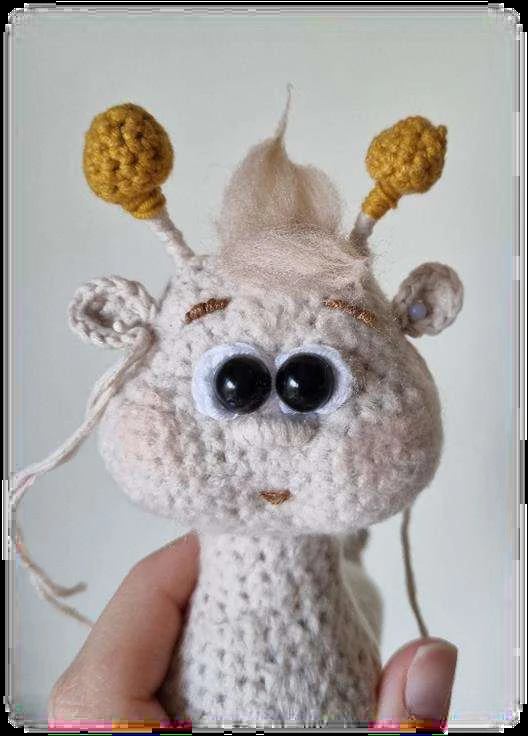
Antennas
Attach light beige yarn to the head
and secure it from inside. Cut the
ends of the wireframe if they are
long. Bend the ends and secure them with adhesive tape. Wrap the beige yarn
around the wireframe moving upward. Break yarn and tie it into a knot. Repeat
with the other antenna.
Cups for the antennas (make 2)
With mustard yarn and a 2 mm crochet hook.
Rnd 1: 6 into MR (6)
Rnd 2: 6 inc (12)
Rnds 3-5: 12 sc (12)
Stuff gently.
Rnd 6: (1 sc, 1 dec)*6 (6)
Break yarn and tighten using a tapestry
needle.
Hide the yarn tail inside.
Crochet the second cup similarly.
Put the cups onto the ends of the wireframe
and sew them. Hide the beige yarn tails from
the antennas inside the cups.
The antennas are ready.
Ears (make 2)
With light beige yarn and a 2 mm crochet hook.
Rnd 1: 6 into MR (6)
Rnd 2: 6 inc (12)
Break yarn, leaving a tail for sewing to the head.
Crochet the second ear similarly.
Pin the ears on the sides of the head under the antennas between rounds 37-38
of the head and sew on.
Paws (make 2)
With light beige yarn and a 2 mm crochet hook.
Rnd 1: 6 into MR (6)
Rnd 2: 6 inc (12)
Rnd 3: (1 sc, 1 inc)*6 (18)
Rnd 4: 18 sc (18)
Break yarn, leaving a long tail for
sewing to the body.
Crochet the second paw similarly.
Pin the paws to the bottom of the
body and sew them.
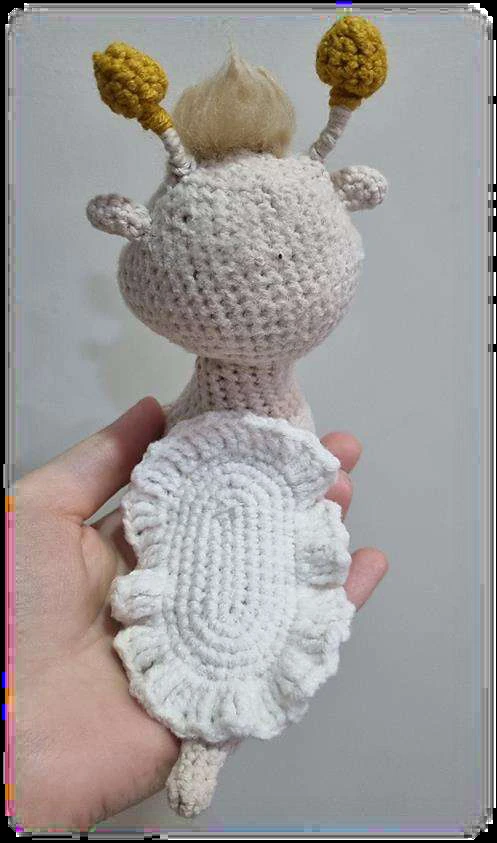
Foot
With light beige yarn and a 2 mm crochet hook.
Rnd 1: chain 9, start crocheting in the second chain from hook 7 sc (one sc in
each stitch), 5 sc in the last chain foundation, turn and continue crocheting on
the other side of the chain 7 sc, 5 sc in the last chain foundation (24)
Rnd 2: 7 sc, inc, 1 sc, inc, 1 sc, inc,7 sc, inc, 1 sc, inc, 1 sc, inc (30)
Rnd 3: 7 sc, inc, 2 sc, 2 inc, 2 sc, inc, 7 sc, inc, 2 sc, 2 inc, 2 sc, inc (38)
Rnd 4: 7 sc, inc, 3 sc, inc, 2 sc, inc, 3 sc, inc, 7 sc, inc, 3 sc, inc, 2 sc, inc, 3 sc, inc
(46)
Rnd 5: 7 sc, inc, 4 sc, inc, 4 sc, inc, 4 sc, inc, 7 sc, inc, 4 sc, inc, 4 sc, inc, 4 sc, inc
(54)
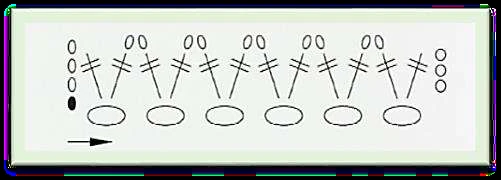
Frill
Continue crocheting as following
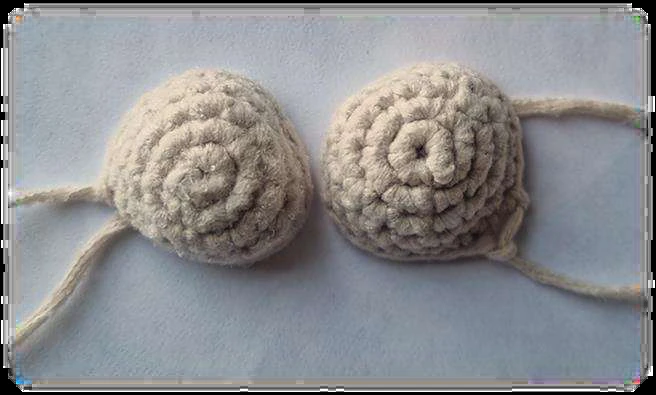
the chart below:
Rnd 6: chain 3, *2 TR in one stitch, chain 2* – repeat from * to * to the end of the
round.
Fasten off and break yarn.
Hide the yarn tail.
Assembly
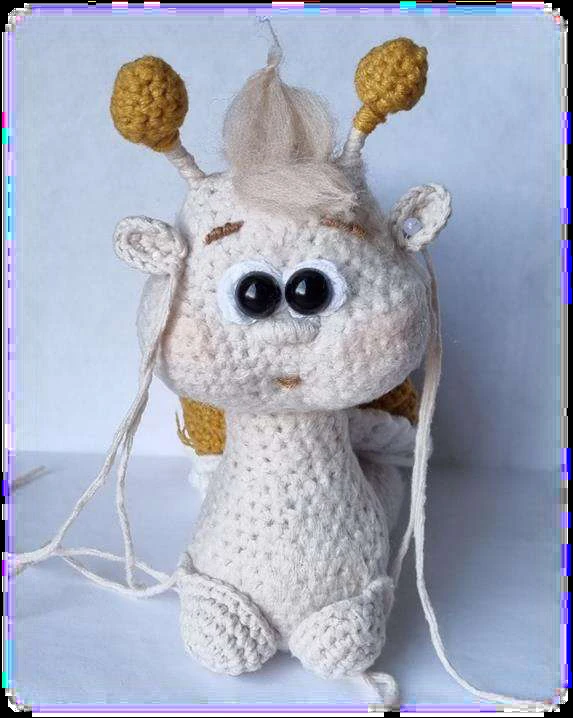
Sew the foot to the body as shown in the photo:
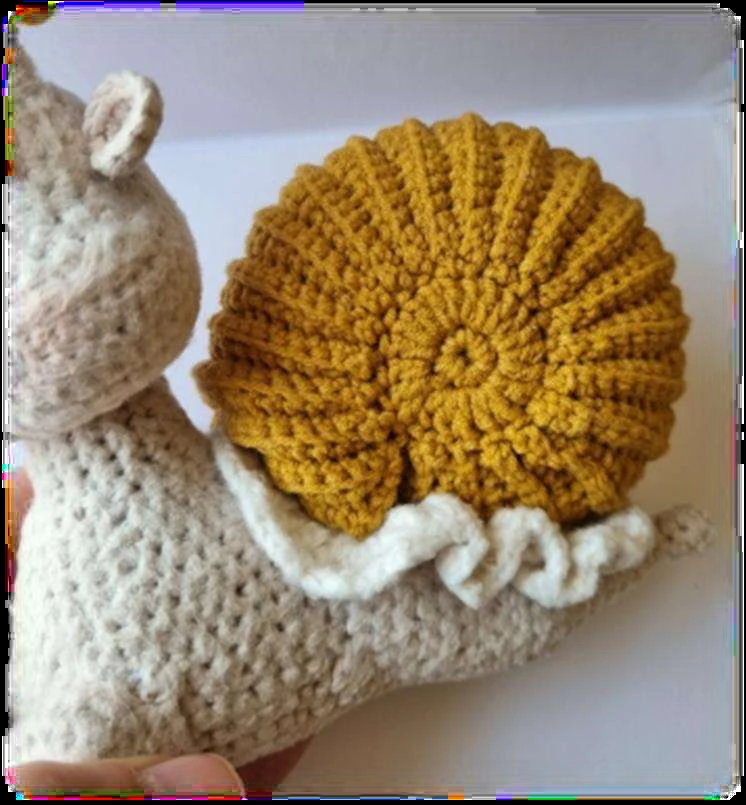
Pin the shell to the body and foot and sew them together, sewing the sides of
the shell:
Sew the paws if you did not do it before.
Insert the eyes between rounds 36-
37 of the head and sew the whites.
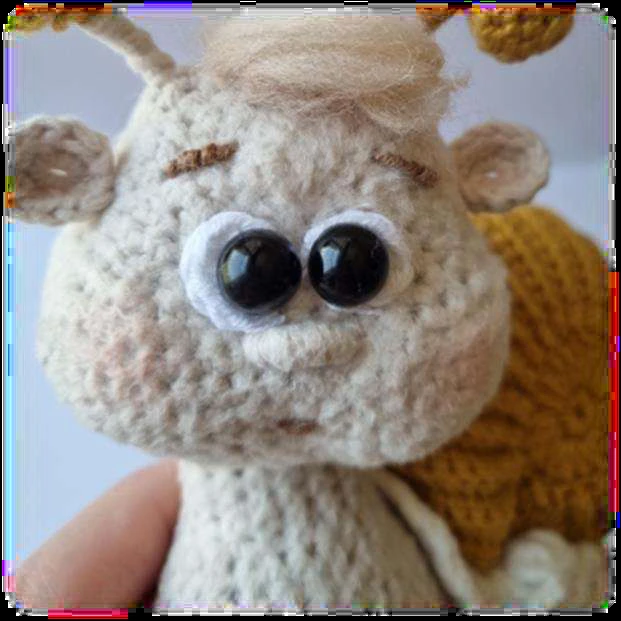
Embroider the eyebrows with
brown thread, as shown in the photo.
Do not cut thread and move it to the
mouth point in the center of the 29th
round of the head. Make 1 stitch (the
length of the stitch is 1-2 sc) and
draw out the needle to the top of the
head. Pull the thread gently, sculpting
the mouth socket. Fasten off and cut it.
Embroider the nose under the eyes with light beige yarn. First, make 2-4
horizontal stitches and 5-6 vertical stitches around previous stitches of the
nose.
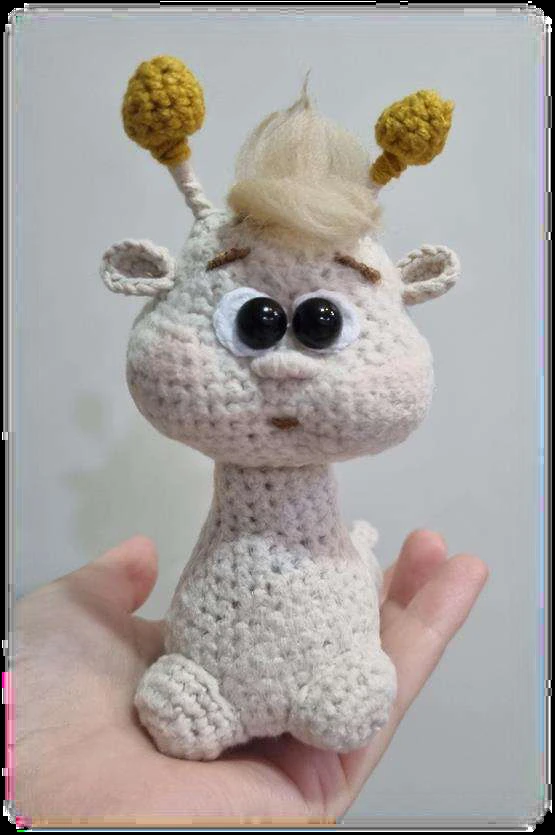
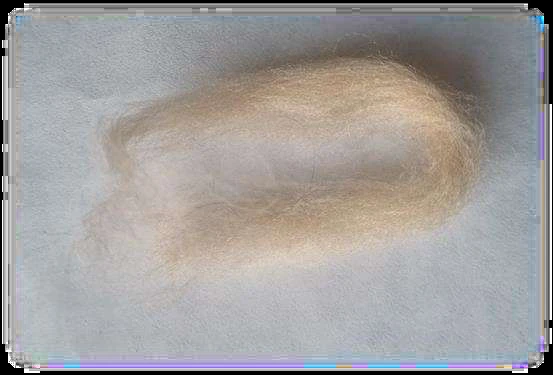
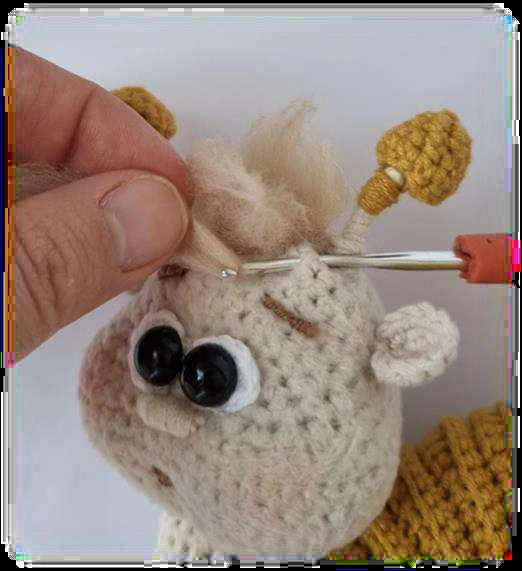
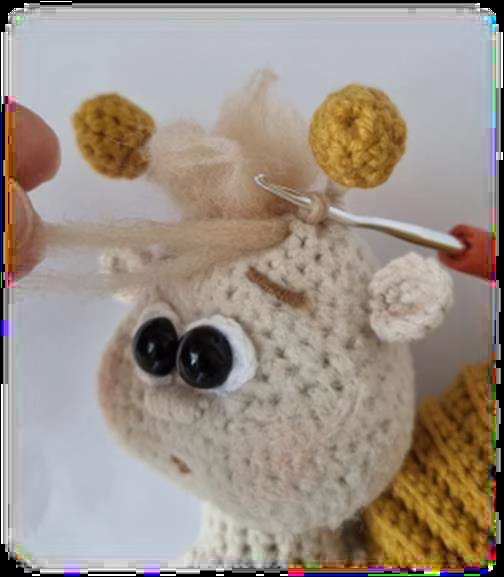
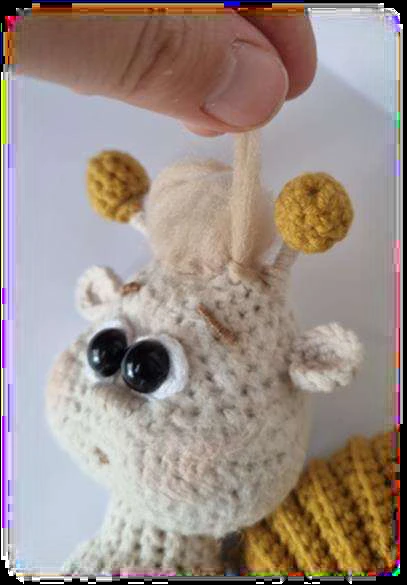
Hair. Use a piece of beige wool for making the
hair. Also, you may use any yarn to your taste
and fluff it.
Take 4 cm/ 1.5 inches long piece of wool.
Divide it into 6-8 pieces and attach them to the
top of the head with a crochet hook, as shown
in the photos. Trim the ends of the wool and
divide the hair into two parts (bangs + the hair
on the top). Twist the ends of the hair with the fingers.
Put some rouge on the cheeks and inside the ears (optionally).
Our snail is finished!
Recommended Digital Products
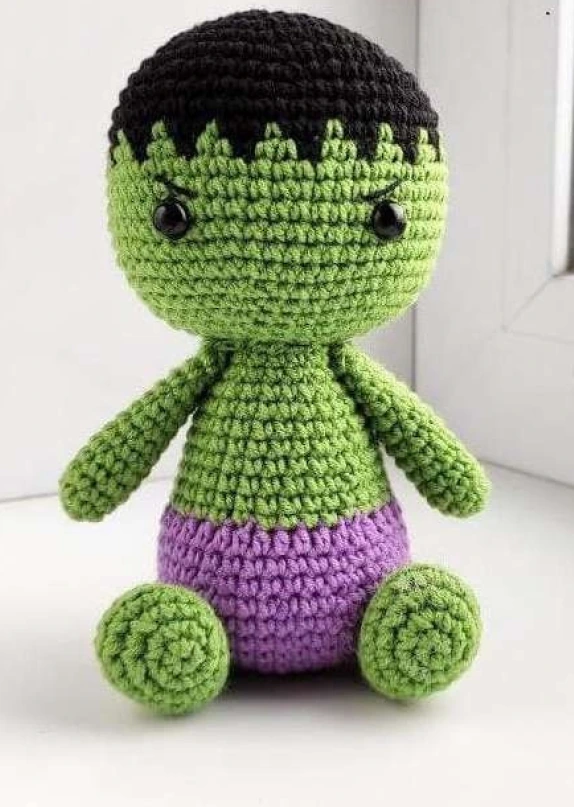
Baby Superhero Amigurumi Crochet Pattern PDF | Easy Little Green Monster Plush Toy Pattern | DIY Chibi Superhero Plushie
$4.99
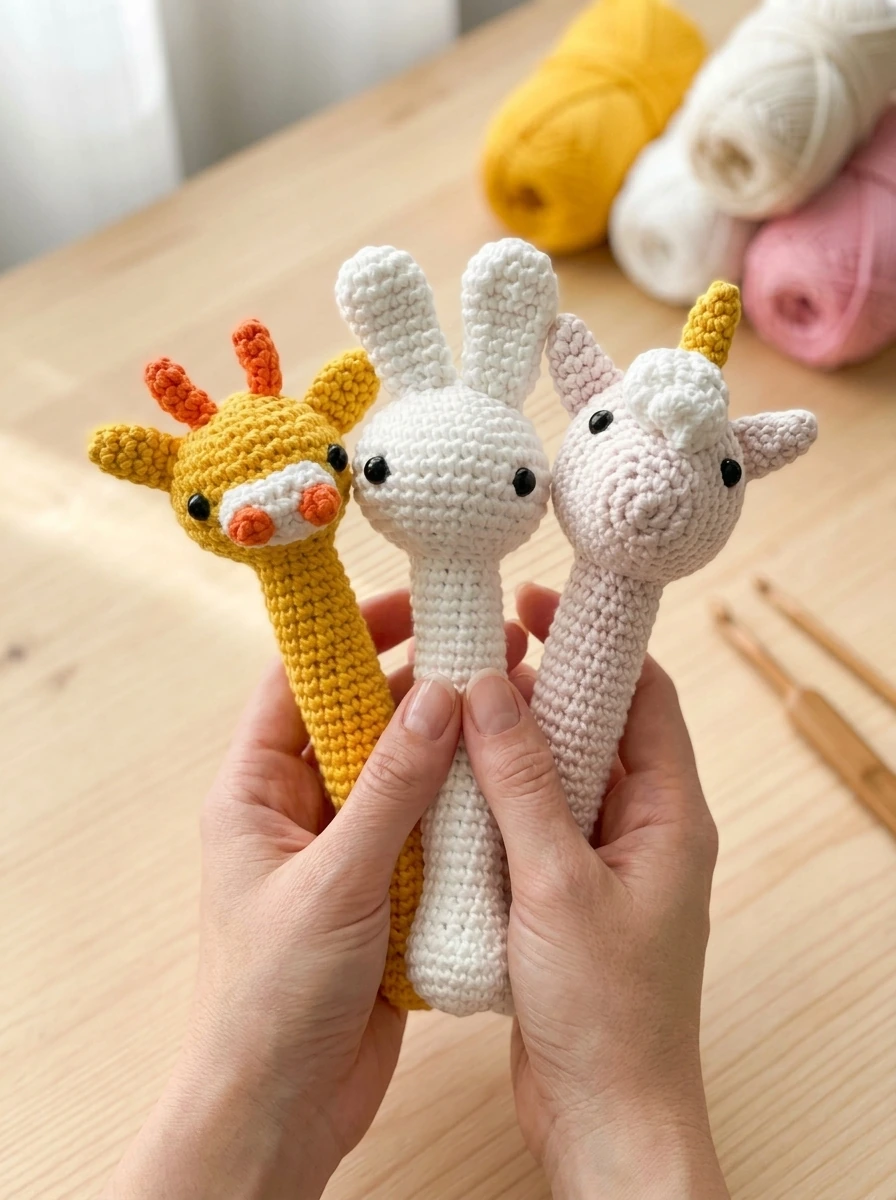
Crochet Baby Rattle PDF Pattern – Amigurumi Stick Toy Set (Bunny, Giraffe, Unicorn)
$4.99
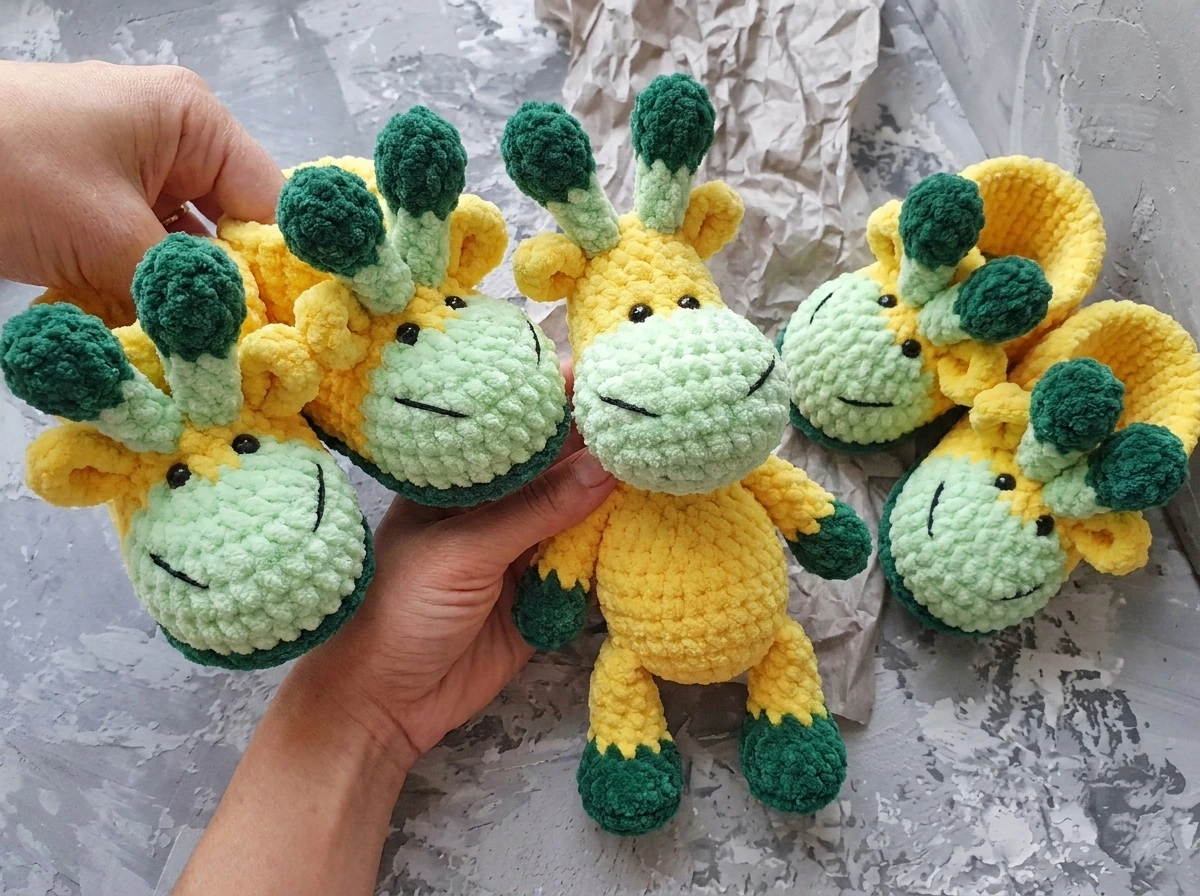
Crochet Baby Animal Booties PDF Pattern – Plush Amigurumi Shoes (Unicorn, Giraffe, Deer, Penguin)
$4.99
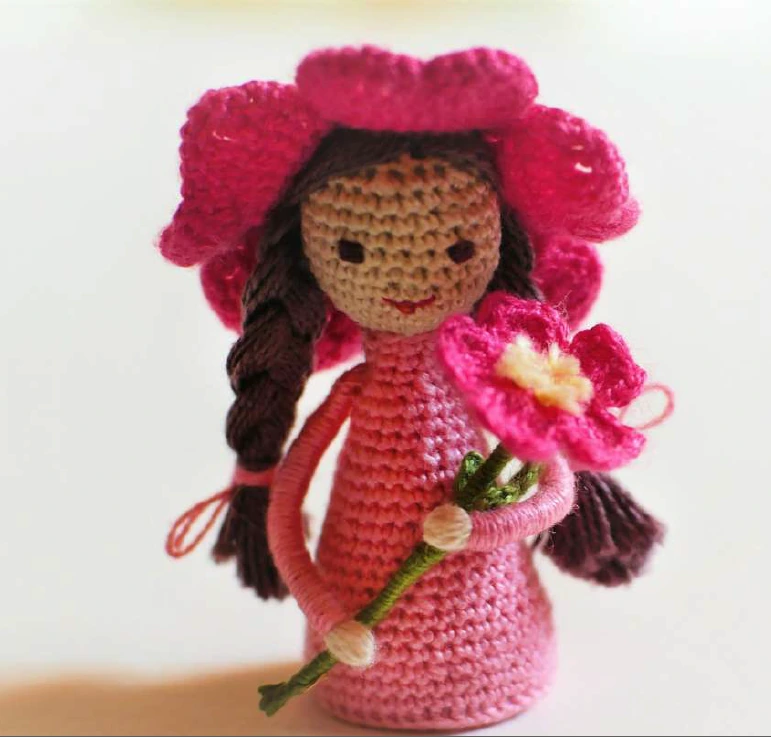
Wild Rose Fairy Amigurumi Crochet Pattern – Detailed PDF Guide with Charts
$2.99
Get this Crochet Pattern as a Free PDF
Enter your email to receive the PDF associated with this article.
Leave a Reply