
Happy Turtle rose
Rose Turtle Pattern
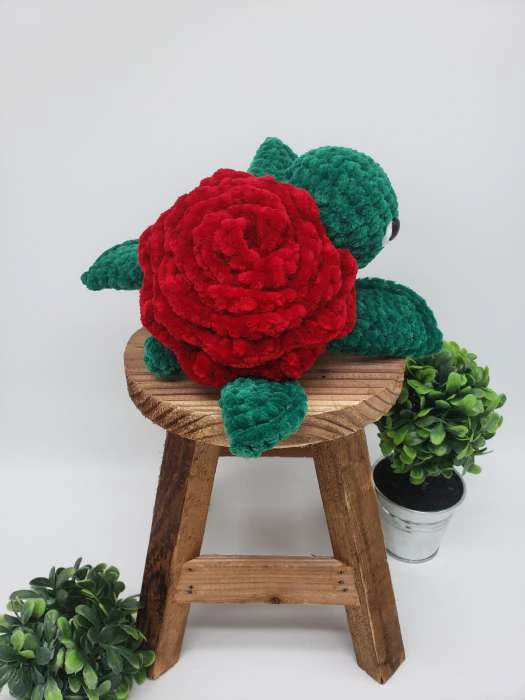
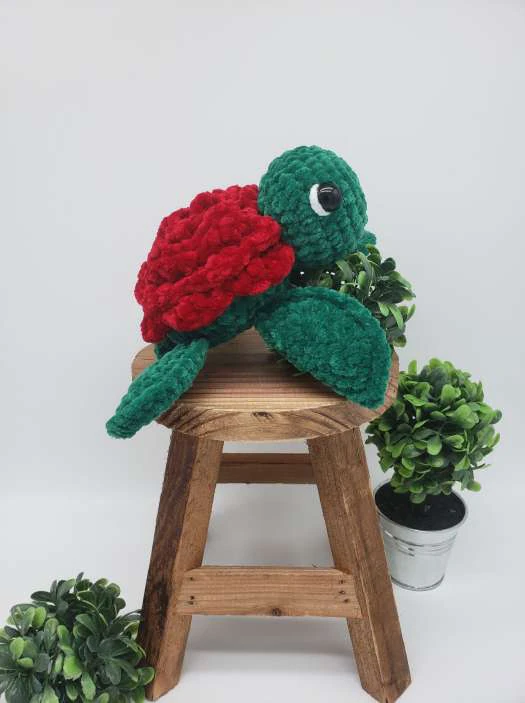
Rose Turtle Pattern
Supplies
Hook: 4.5mm
Yarn: Size 5-6 Bulky Yarn
~ Premier Parfait Chunky (Size 6): Emerald, White
~ Yarn Bee Velvety Smooth (Size 5): Red
Note: Premier Parfait Chunky and Yarn Bee Velvety Smooth are very similar in size even
though they are labeled different weights, I would consider them both to be size 5.
Safety Eyes: 14mm
Tapestry Needle
Scissors
Poly-Fil for stuffing
Finished Size:
Approximately 6 inches long, 6.5 inches wide, 3 inches tall
Abbreviations:
(US Terms)
CH: Chain
MR: Magic Ring
SC: Single Crochet
DC: Double Crochet
HDC: Half Double Crochet
TC: Triple/Treble Crochet
INC: Increase
DEC: Decrease
FLO: Front Loops Only
BLO: Back Loops Only
SS: Slip Stitch
St: Stitch
R: Row
FO: Finish Off
(#): # of stitches in the round
Note: If you are not used to using “Fluffy/Chunky” yarn, I suggest using stitch markers to help
you find your stitches and/or rows until you have practiced enough to be able to “feel” for them.
Rose Turtle Pattern
Front Legs
Using Emerald
(Make 2)
R1: 8SC in MR
R2: Inc (16)
R3: SC, Inc (24)
R4: 3SC, Inc (30)
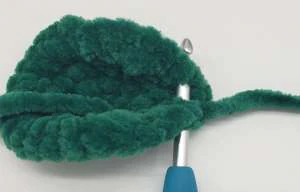
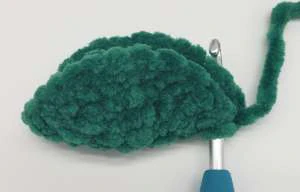
Fold your circle in half to make a half circle.
Working around the half circle and through both sides, SC through both stitches. Continue until
you reach the end of the half circle.FO, there is no need to leave a tail for sewing, you will SC
the legs into a round of the body.
Back Legs
Using Emerald
(Make 2)
R1: 8SC in MR
R2: Inc (16)
R3: SC, Inc (24)
Working around the half circle and through both sides, SC through both stitches. Continue until
you reach the end of the half circle.
FO, there is no need to leave a tail for sewing, you will SC the legs into a round of the body.
Tail
Using Emerald
R1: 6SC in MR
R2-4: SC (6)
SS, FO, there is no need to leave a tail for sewing, you will SC the tail piece into a round of the
body.
Head
Using Emerald
R1: 8SC in MR
R2: Inc (16)
R3: SC, Inc (24)
R4: 3SC, Inc (30)
R5-7: SC (30)
R8: 3SC, Dec (24)
R9: SC, Dec (16)
SS, leave a long tail for sewing. I leave about 8-9 inches to be safe, but I usually have a lot left
over.
Add eyes and stuff the head. I added my eyes at around rows 5-6 and about 9-10 stitches apart.
Shell/Body
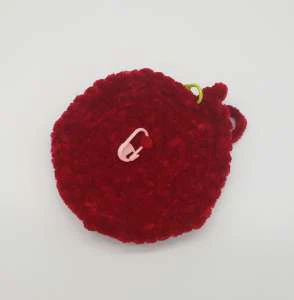
The top of the shell is all worked in the BLO (back loops only) of the previous round. The petals
are formed in the front unworked loops once the top of the shell is completed.
Using Red
R1: 8 SC in MR
R2: Working in BLO: Inc (16)
*I highly suggest stitch markers to mark your front loops, at least one in the front loop of the first
stitch of each row.
R3: Working in BLO: SC, Inc (24)
R4: Working in BLO: (SC, Inc, SC)*8 (32)
R5: Working in BLO: 3SC, Inc (40)
R6: Working in BLO: (5SC, Inc, 2SC)*5 (45)
Color change to green
R7: Working in BLO: SC (45)
We will now make the petals. Drop your working yarn, the rest of the body will be finished after
we complete the petals.
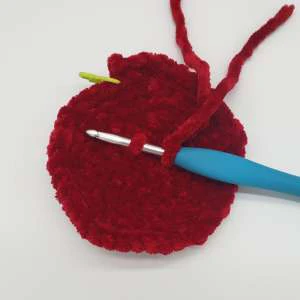
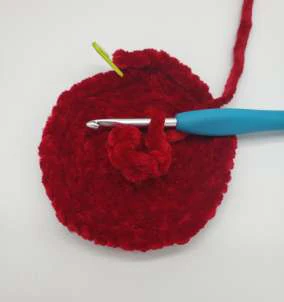
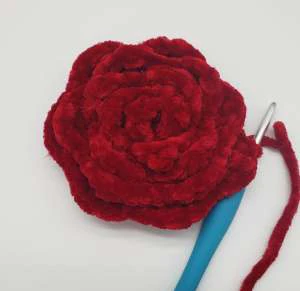
Petals: To make the petals, you will be working in a continuous spiral on top of the shell in the
unworked front loops of each round.
Grab your red yarn and attach it with a SC in the very first unworked front loop of row 2.
Working into the remaining front loops repeat the following pattern until you reach the last front
loop:
HDC, DC, TC, DC, HDC, SS
**Please note, you should be careful not to miss any stitches, however, this is a very forgiving
sequence of stitches so if you miss a loop/double up a loop anywhere it is not a huge deal. No
two flowers are the same, so it is ok if your turtle is unique! If you find you have missed a
stitch/stitches just end the round on whichever stitch you have left and complete a SS in the
ending stitch as well. If you find you have stitches remaining you can continue the sequence
until you reach the end or you can SS until the end, whichever you prefer.
FO, weave in the ends.
The remaining steps of the body will be worked normally, through both loops.
Picking up where you left off with your green yarn.
R8: 3SC, Dec (36)
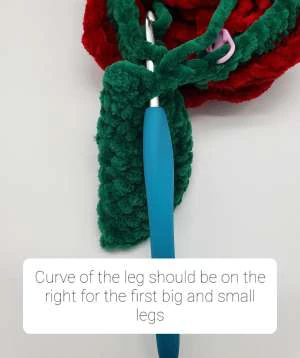
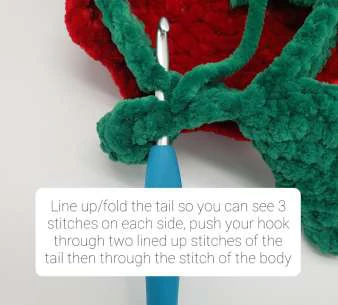
R9: Grab your legs and tail, this is the row you will SC your pieces into. You place your pieces in
front of the stitches of the body, pushing your hook through the leg/tail first then through the
body stitch.
–
4SC
–
Grab the first big leg, attach using 3SC (refer to photo for placement, the curve of the leg
should be on your right).
–
5SC
–
Grab the first small leg, attach using 2SC (refer to photo above for placement, the curve
of the leg should be on your right).
–
3SC
–
Grab your tail and using 3SC attach the tail (see photo for placement).
–
3SC
–
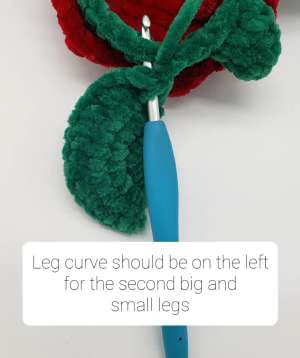
Grab the second small leg, attach using 2SC (refer to photo below for placement, the
curve of the leg should be on your left).
–
5SC
–
Grab the second big leg, attach using 3SC (refer to photo above for placement, the
curve of the leg should be on your left).
–
3SC
(36)
R10: SC, Dec (24)
Stuff the body to your desired firmness.
R11: SC, Dec (16)
Add any additional stuffing.
R12: Dec (8)
SS, cut yarn leaving a short tail to sew the hole closed. Weave the yarn tail back and forth into
the stitches around then pull tight to close. Tie to secure and weave the rest of the yarn tail into
the body.
Finishing Details
Sew the head onto the body. I sew mine in the middle of the front two legs, half way over the
rose and half over the bottom portion of the body, this help cover your color changes.
Eye Detail: If you would like the white detail on the eye, grab your white yarn and embroider a
line up the side of the eye. Insert your needle at the middle bottom of the safety eye and bring it
up to the top middle of the safety eye, it will tend to curve around the safety eye when you pull it
tighter.
Recommended Digital Products

The Ultimate Beginner’s Crochet Guide: Master 45+ Essential Techniques & Practical Projects
$5.99

From Loop to Perfection: The Ultimate Step-by-Step Crochet Master Guide
$9.99
The Ultimate Crochet Handbook: Essential Techniques, Color Theory & 80+ Step-by-Step Patterns
$19.99
Master the Art of Crochet from Scratch – Ultimate Digital Guide with 8 Step-by-Step Projects!
$19.99
Get this Crochet Pattern as a Free PDF
Enter your email to receive the PDF associated with this article.
Leave a Reply