
Goose Mittens
Measurements
Goose Mittens
Sizes
Custom sizing (Gauge not necessaryl
Gauge
20 sis X 1 rows • 20·
Level: beginner
Custom sizing, this pattern will show you how to make any young teen/adult size you need1 (Vou can experiment
using a smaller hook size and a lighter weight yarn to make mittens for small children)
Abbreviations
• FO • fasten off
• MR • Magic Ring
• ch• Chain
• dec – decrease
• inc – increase
• rep • repeat
• se – single crochet
• st • stitch
• sts • stitches
Materials
• 1 skein (364 yards) of worsted weight yarn in orange (Using Iwo strands at once)
• 1 skein (364 yards) of worsted weight yarn in white (Using Iwo strands at once)
• Yarn Needle
• 12mm flat back safety eyes (or black buttons) ·vou will want to choose as size that looks best
for your sized mitten, the test mittens are a size teen/women's sma11·
• J-6mm hook
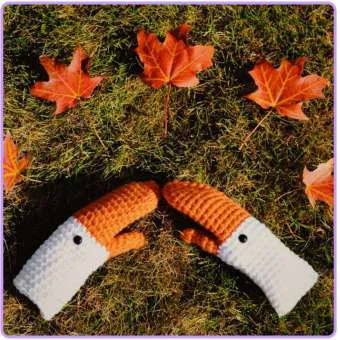
GOOSE MITTENS – CROCHET PATTERN – PERSONAL
USE ONLY
BEFORE WE BEGIN:
These mittens will be made to fit the wearers hands. Vou will be creating
these mittens from the top down in the round. At the end of the round,
you will not be joining stitches CIi is worked in a spiral, as done in
amigurumi projects). Afterwards, you will create the thumb white
attaching it to the glove.
MAKING THE TOP OF THE MITTEN:
With 2 Strands of Orange:
Star! 10 se in a magic ring (10)
Sc around (10)
Sc around (10) ·weave in magic ring end'
Inc in each st around (20)
See how the glove is fitting so far, if you have medium to Large size hands,
you may want to do several more rounds of (se in st, inc in nextl repeat
around
5-14
Sc around (20)
After reaching the proper width for your hand, continue to make rounds of
se until the glove reaches the crook of your hand. (If you slip on the
mitten, it should be jus! touching the space in between your thumb and
index finger)
Thumb hole round: Sc in the first stitch of the round. chain 6' ·not too loose or
tight'. skip the next Iwo stitches in the round and se in the next st. Sc a round
until you get back to that first stitch that had the chain 6. Fasten off. weave
ends.
Note: Vou can chain more stitches in an even number to create a Larger
thumb hole
MAKING THE LOWER HAND AND WRIST OF THE
MITTEN:
With 2 Strands of White:
Slip si and then se into that same si 3 sis away from the thumb hale. IYou can
choose anywhere in the round if you would like, this color change will be
hardly visible.) Sc around. 1241
You may notice a gap al the beginning of this next round from where the
color change happened. We are going to star! this next round without any
joining, jus! se in the first stitch (skip the slip sil and se a round. (241
Sc around 1241
Note: From here on forward with the pattern, you can continue to sc
around without any decreasing to have looser fitting mittens. Or, you can
choose to shape them by decreasing as they go down your hand and your
wrist for a snug fit. (Test mittens are made with a snug fit). So, wherever
you see fit to make the mitten tighter, repeat for each round (Sc in 2sts,
decrease in next st)
(Sc in 2sts, decrease in nexll 118)
20-28
Sc around 118)
Fasten off. You can add some ribbing to the end of the mitten if you wish.
MAKING THE THUMB:
With 2 Strands of Orange:
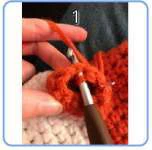
Flip glove inside out, and you will be crocheting from the inside of the
circle (See image)
Slip si yarn into any chain around the thumb hole. Sc in the same st. Then in
traditional and non-traditional spaces. work 12 sts around. 112)
2-3
Sc around
See how the thumb hole is fitting so far, if you have medium to large size
hands and Long fingers, you may want to do a few more rounds of se. Stop
making se rounds when you reach slightly past your thumb knuckle.
Decrease in au sts 16)
If you added more chains than 6 when you made the thumb hole,
continue to decrease in each st until you reach 6 sts in the round.
5-7
Sc around (6)
Fasten off and weave top of thumb shut.
PLACING THE EYES:
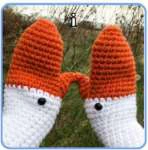
Flip the glove right side out and place your goose eyes (Can be flat back
eyes that are then melted at the sharp end, also buttons, or small
crocheted circles) on the inner corner of the glove, with the test gloves,
the eyes were placed between the 2nd and 3rd round of white.
The mittens are complete1 Honk!
Recommended Digital Products

The Ultimate Beginner’s Crochet Guide: Master 45+ Essential Techniques & Practical Projects
$5.99

From Loop to Perfection: The Ultimate Step-by-Step Crochet Master Guide
$9.99
The Ultimate Crochet Handbook: Essential Techniques, Color Theory & 80+ Step-by-Step Patterns
$19.99
Master the Art of Crochet from Scratch – Ultimate Digital Guide with 8 Step-by-Step Projects!
$19.99
Get this Crochet Pattern as a Free PDF
Enter your email to receive the PDF associated with this article.
Leave a Reply