
Cinta Bag
CINTA BAG
CROCHET PATTERN
Ch – chain
Sc – single crochet stitch
Dc – double crochet stitch
Sc3tog – single crochet 3 together
Dc3tog – double crochet 3 together
Sl st – slip stitch
St(s) – stitch(es)
TO – turn over
(US crochet terms)
Crochet hook 4.5 mm
Cotton yarn in Medium weight (size 4)
The pictured bag was made in Sugar'n Cream
cotton yarn, 232m/ 150.7g
Loops & threads Heathered Tweed yarn,
held double, 535m/ 210g
Stitch marker
Ribbon
Materials
Abbreviations
Skilled level: Advanced beginner.
This pattern starts with the bottom, then the body
and the handle.
After that, adding the ribbon to the bag as the
final touch.
Watch the videos as they contain important
information and details that are helpful!!!
Use a stitch marker to keep the same amount of
stitches each row.
Crochet with your right side out for all parts,
meaning the tail from the foundation row is facing
left.
Ch 1 counts as turning chain and Ch 3 counts as 1
dc.
Ch 3 = 1 dc = 1 stitch
Ch 3 at the end of the row = 1st stitch for the dc
row.
In all dc rows, start from the 2nd stitch.
Weave in the loose ends as work progresses.
You can add a lining if using soft yarn so it doesn’t
stretch too much.
Description
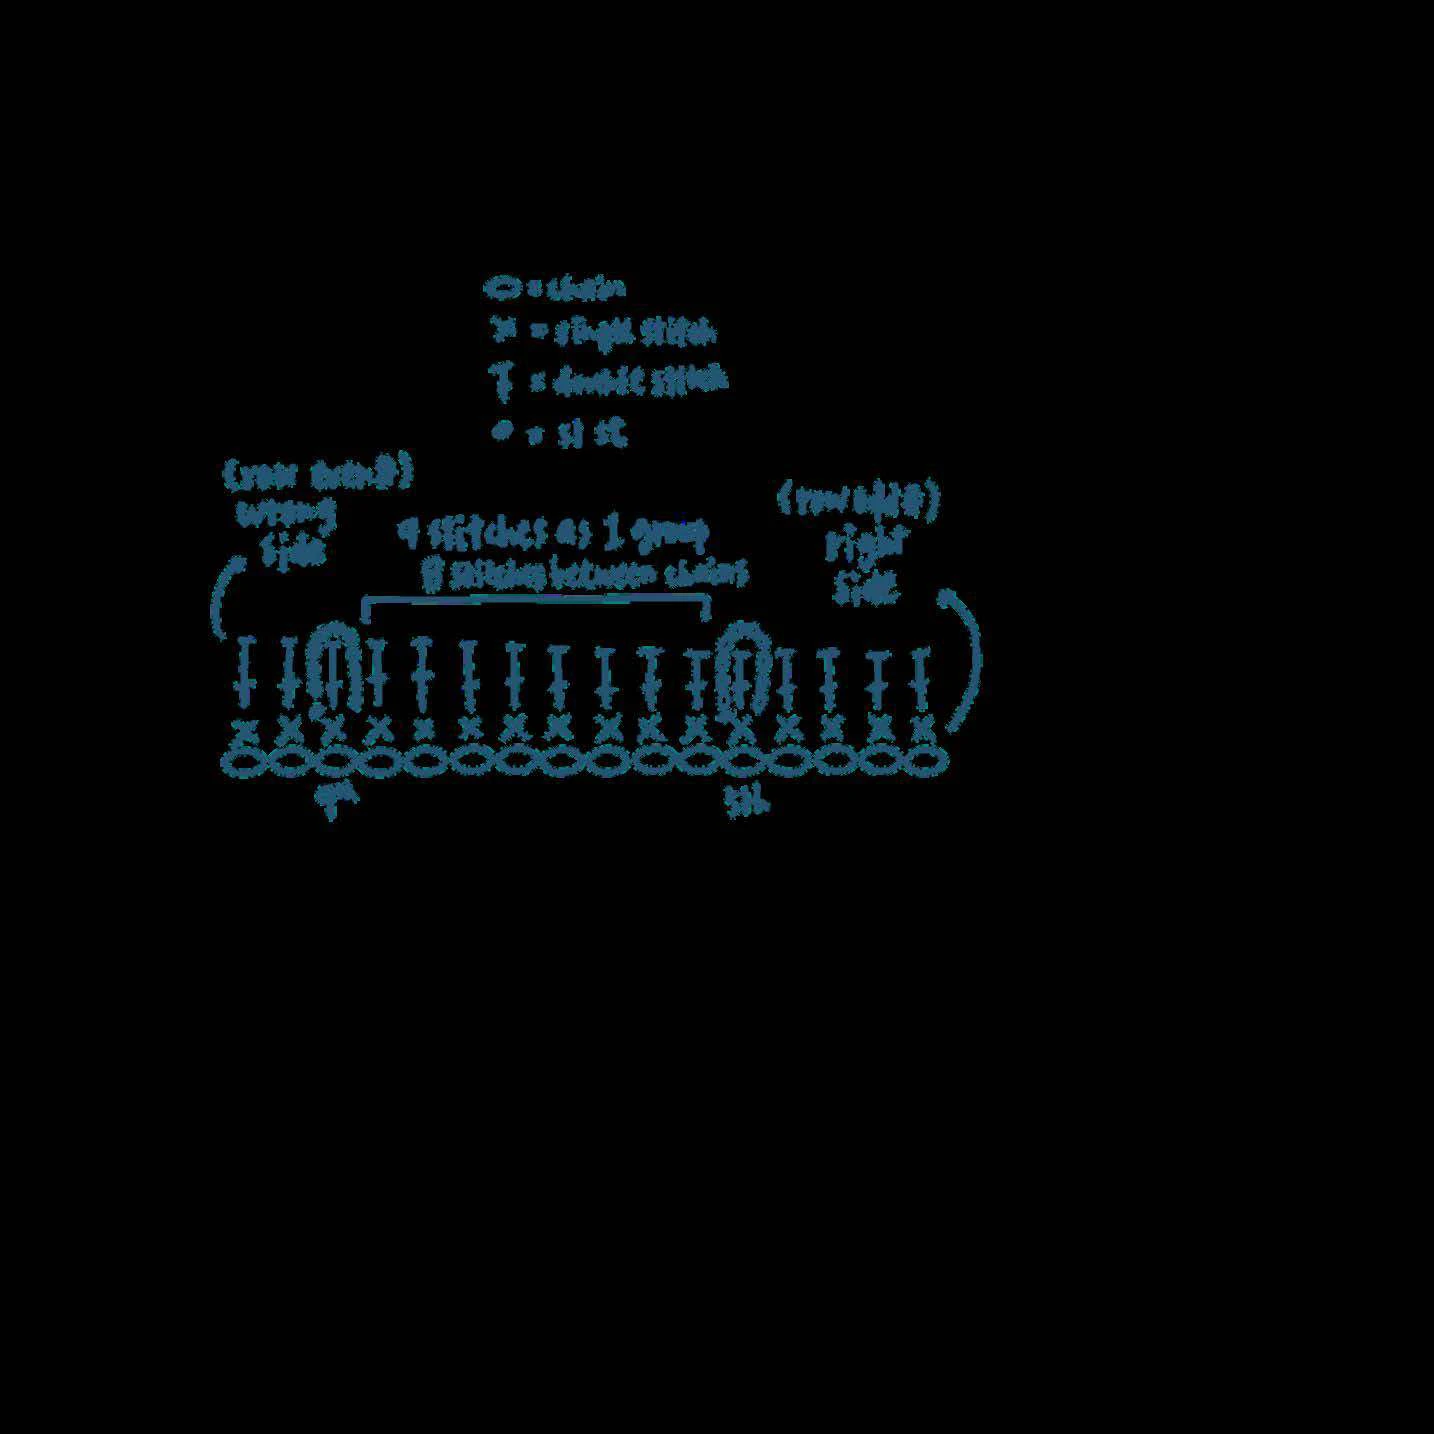
This is similar to the Jacob’s ladder stitch yet the
Jacob’s ladder stitch starts with dc and we start
with sc here.
The Jacob's ladder stitch is done in the multiples of
odd number. (In this case, we are working with the
multiples of 9, so 9 stitches as 1 group.)
For examples, if you want to make the bag in a
smaller size, work with multiples of 7. 7 stitches as 1
group. Then there should be 6 stitches between
the chains and ch 10 in the 7th stitch.
If you change the number of the stitches, change
the size of the bottom. (Inc or dec the number of
row)
Stitch
l i
On the other hand, if you want to make the bag
in a bigger size, work with the multiples of 11 (or
even bigger odd number). 11 stitches as 1 group.
Then there should be 10 stitches between the
chains and ch 10 in the 11th stitch.
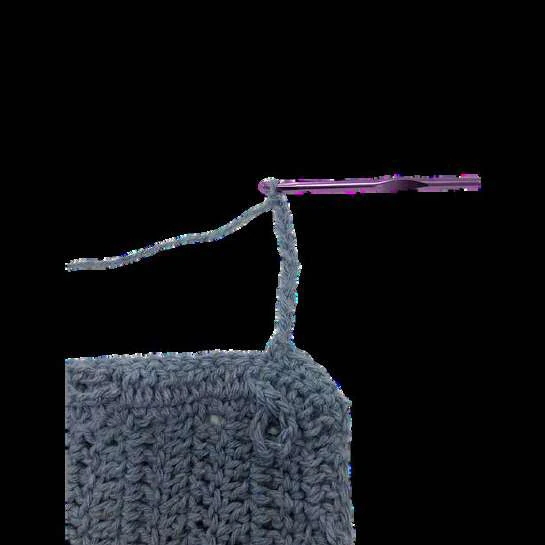
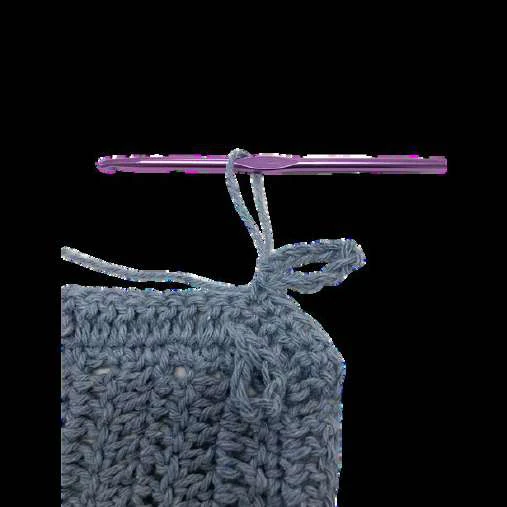
Ch 10
Push the hook through
the last sc like so when you
sl st after ch 10.
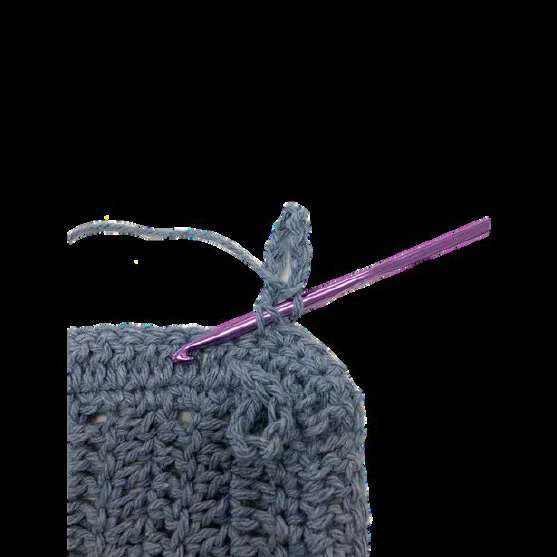
Yarn over your hook
and pull through all the
loops left on the hook.
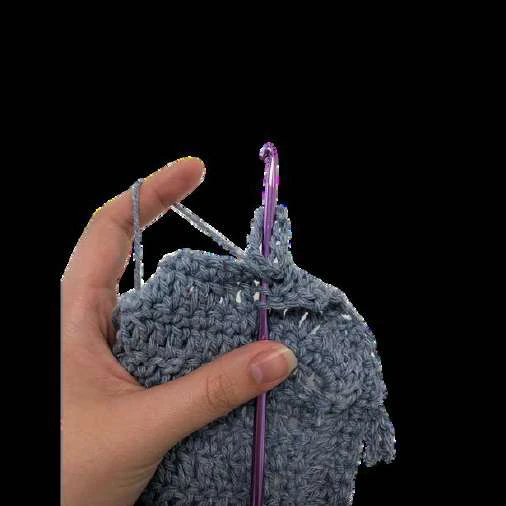
In the 2nd row, when dc on
the stitch with the chains,
yarn over, push the hook
from the back to the front,
and go through the middle
of the loop, then finish it like
a regular dc.
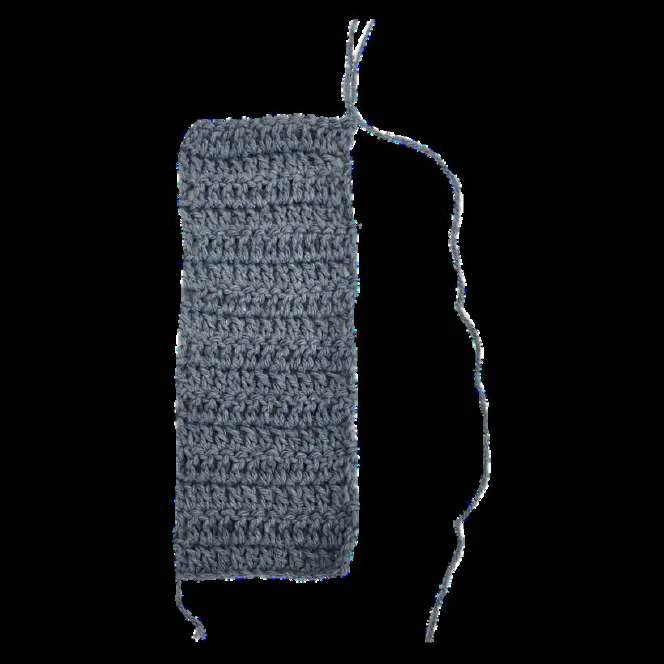
Foundation row: Chain 15.
Row 1: Dc in the 4th ch from
your hook, dc 11, ch 3 and TO.
Row 2: Dc 12 across the row, ch
3 and TO.
Repeat Row 2 14 more times,
for a total of 16 rows, and fasten
off.
Stitch count: 13 sts for each
row. (Including the ch 3)
Size would be around 8 cm x
21.5 cm.
Video of rows 1-2
Video of handle
Video of assembly
Video of ribbon
Here are all the videos included in the pattern. You
can also find them below.
Links
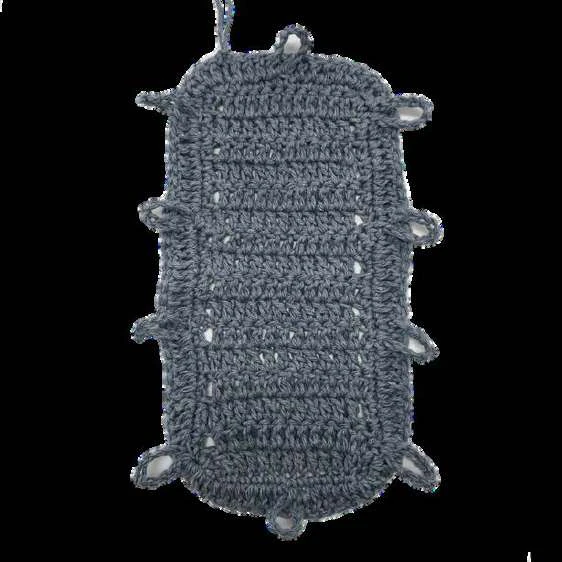
Attach your yarn to the 2nd stitch at the top left
corner with the right side facing up.
Video of rows 1-2
Row 1: Insert your hook and make a chain, sc in the
same stitch, then sc 4, “ch 10, sl st into the last sc
(5th sc), sc 9", repeat 8 more times for a total of 9
groups, ch 10, sl st into the last sc, sc 4, sl st, ch 3
and TO.
Stitch count: 90 sts for each row of the body,
with 10 groups of the stitch.
As there are no v stitches allocated along the
long edges of the bottom panel, sc in the
random holes on the side.
To place the stitches evenly, sc 2 for each row.
Body
e l
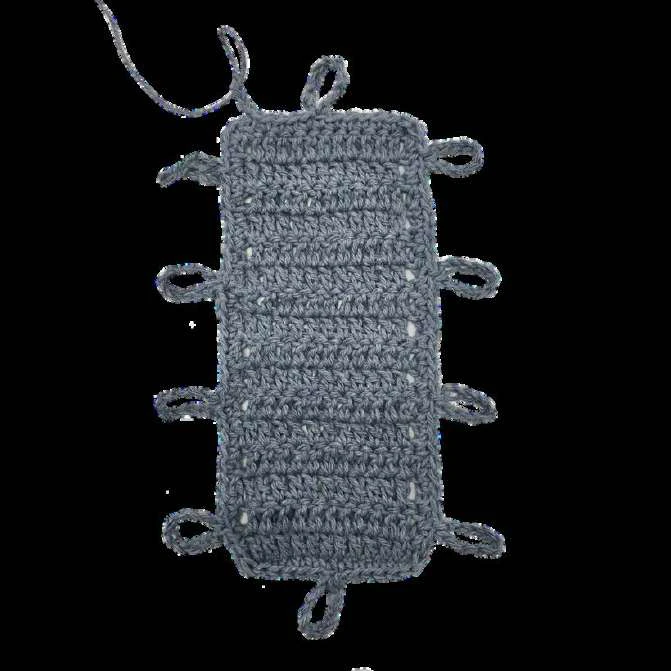
Row 2: Dc 89, sl st to the 3rd ch, ch 1 and TO.
Rows 3-16: Repeat rows 1-2 for 7 times. Total of 8
groups of rows 1-2. (Increase or decrease the
number of repeat to the desired height)
Make sure the stitches with the chains are
crocheted in the same column.
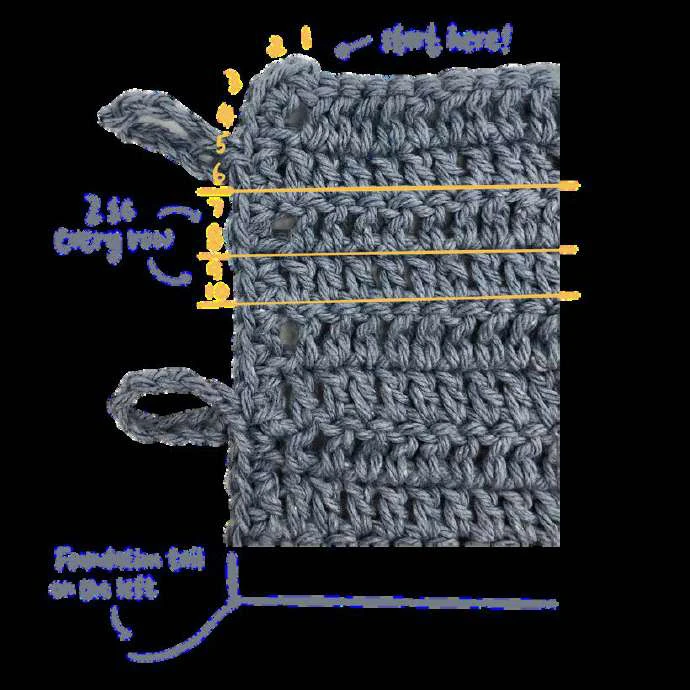
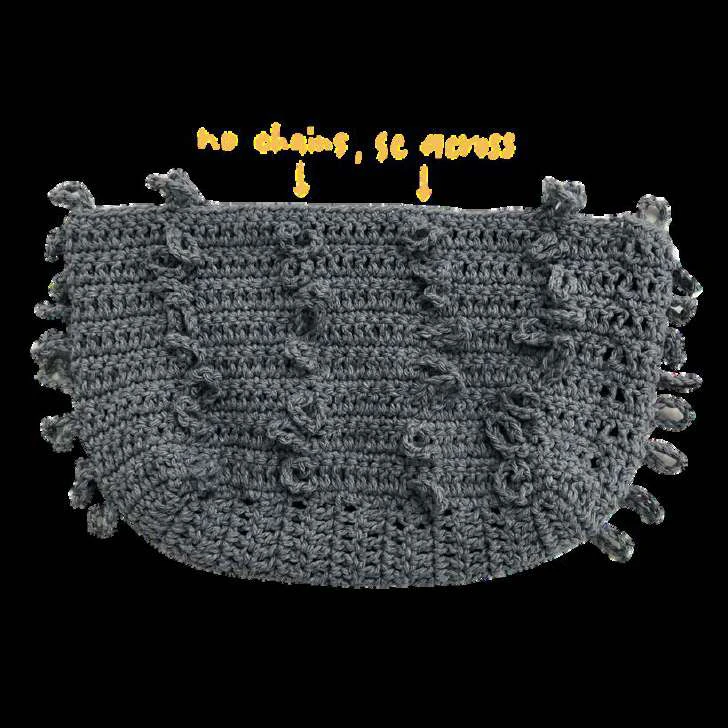
Row 17: Repeat row 1, but do not make the chains
for 4 columns in the centre, sl st and fasten off.
(Refer to the yellow arrows in the photo below)
Written instruction: Sc 5, ch 10, sl st into the
last sc, sc 27, “ch 10, sl st into the last sc, sc 9”
repeat 2 more times for a total of 3, sc 18, ch 10,
sl st into the last sc, sc 9, ch 10, sl st into the last
sc, sc 4, sl st and fasten off.
Size would be around 18 cm x 29 cm.
Body
Pic of row 2
Pic of row 17
e l
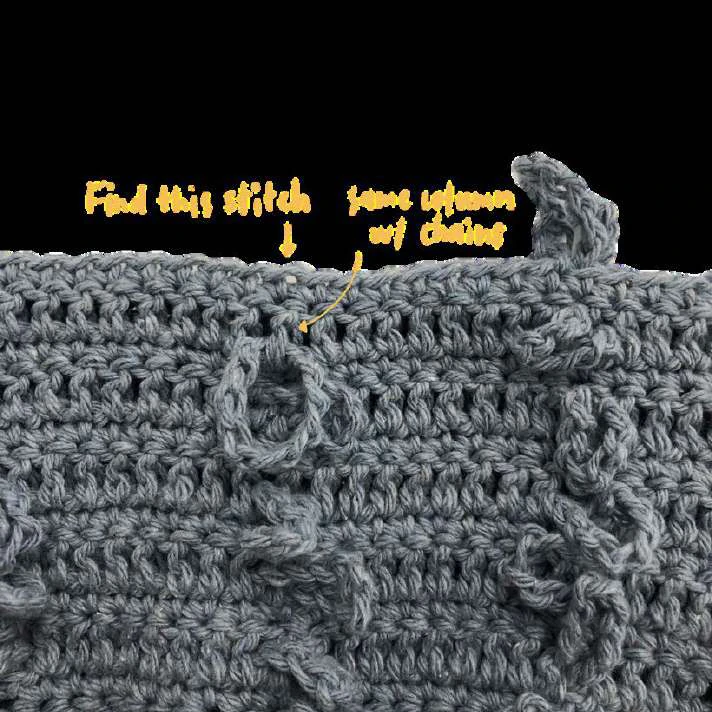
With the right side facing up, find the 3rd stitch in
the same column with the chains counting from the
left, then turn over and start with the wrong side
facing up. (Video of handle part)
Handle
Row 1: Insert your hook and ch 3, dc 36, ch 1 and TO.
(37)
Row 2: Sc3tog , sc 7, “ch 10, sl st into the last sc, sc
9", repeat 1 more time, ch 10, sl st into the last sc, sc
6, sc3tog, ch 3 and TO. (33)
Row 3: Dc3tog (ch 3 and 2 unfinished dc) , dc 27,
dc3tog, ch 1 and TO. (29)
Row 4: Sc3tog , sc 3, “ch 10, sl st into the last sc, sc
9", repeat 1 more time, ch 10, sl st into the last sc, sc
2, sc3tog, ch 3 and TO. (25)
Row 5: Dc3tog, dc 19, dc3tog, ch 1 and TO. (21)
_ k

Row 6: Sc3tog , sc 8, ch 10, sl st into the last sc, sc 7,
sc3tog, ch 3 and TO. (17)
Row 7: Dc3tog, dc 11, dc3tog , ch 1 and TO. (13)
Row 8: Sc3tog , sc 4, ch 10, sl st into the last sc, sc 3,
sc3tog, ch 3 and TO. (9)
Row 9: Dc 8, ch 1 and TO. (9)
Row 10: Sc 5, ch 10, sl st into the last sc, sc 4, ch 3 and
TO. (9)
Rows 11-12: Repeat rows 9-10 til your desired length of
handle. I repeated 7 times after rows 9-10.
Rows 25-26: Crochet 2 more rows of dc and fasten off.
Written instructions: Row 25: Dc 8, ch 3 and TO.
Row 26: Dc 8 and fasten off.
Repeat this handle part for the other side.
Handle
i x
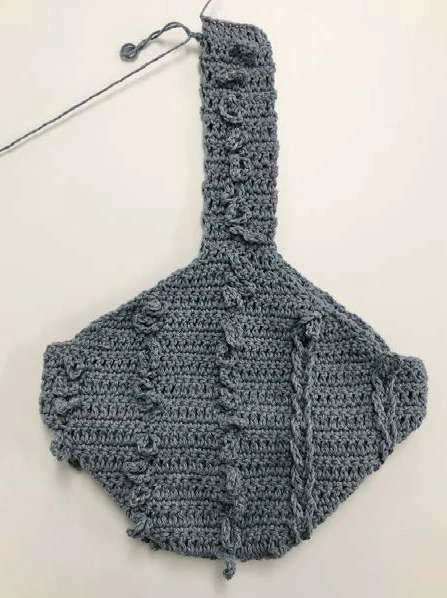
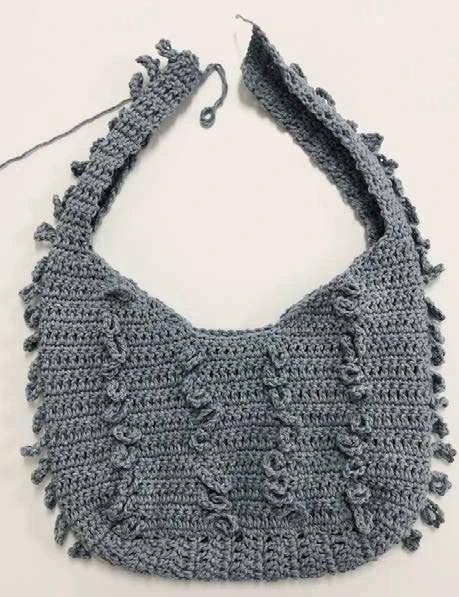
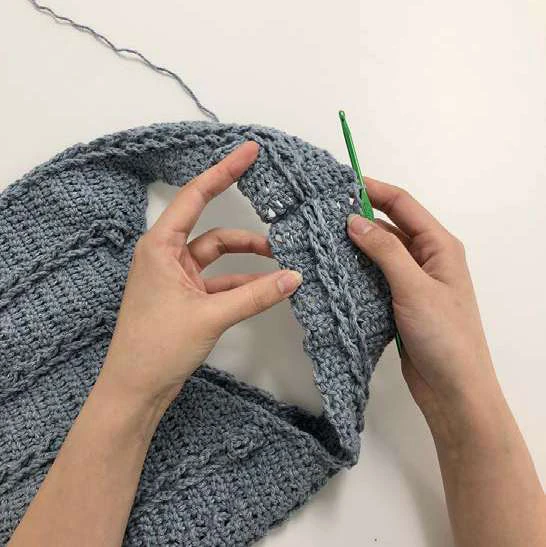
After you finish 2 handles, roll up all the chains.
Then you may sc/ sl st/ sew the handles together,
with wrong sides facing up.
Include the last 2 chains from both handles
when you connect the handles.
Do NOT cut off the yarn, ch 1, and sc across the
edges for both sides.
Remember to sc evenly.
After finishing one side, fasten off. Attach the yarn
to the other side where the handles are connected,
ch 1, sc across, and combine the chains.
Video of assembly
Assembly
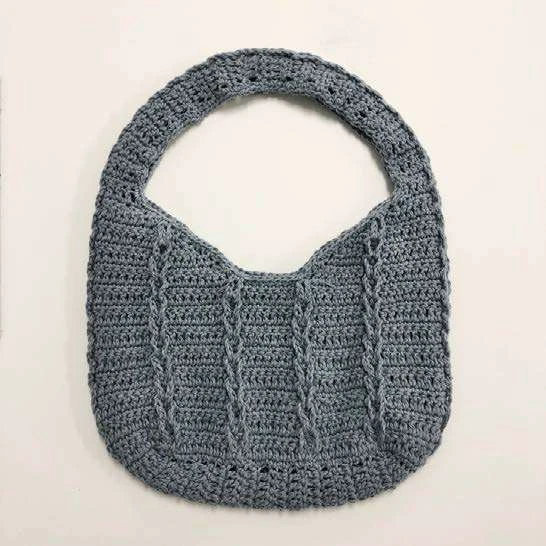
The handle and the bag should look like this after
assembly.
It’s time to add ribbon to
the bag! There are
various types of ribbons
in color, texture, and
width. You can also use
scrap fabric or laces.
Have fun with the mix
and match!!
Video of ribbon
Ribbon
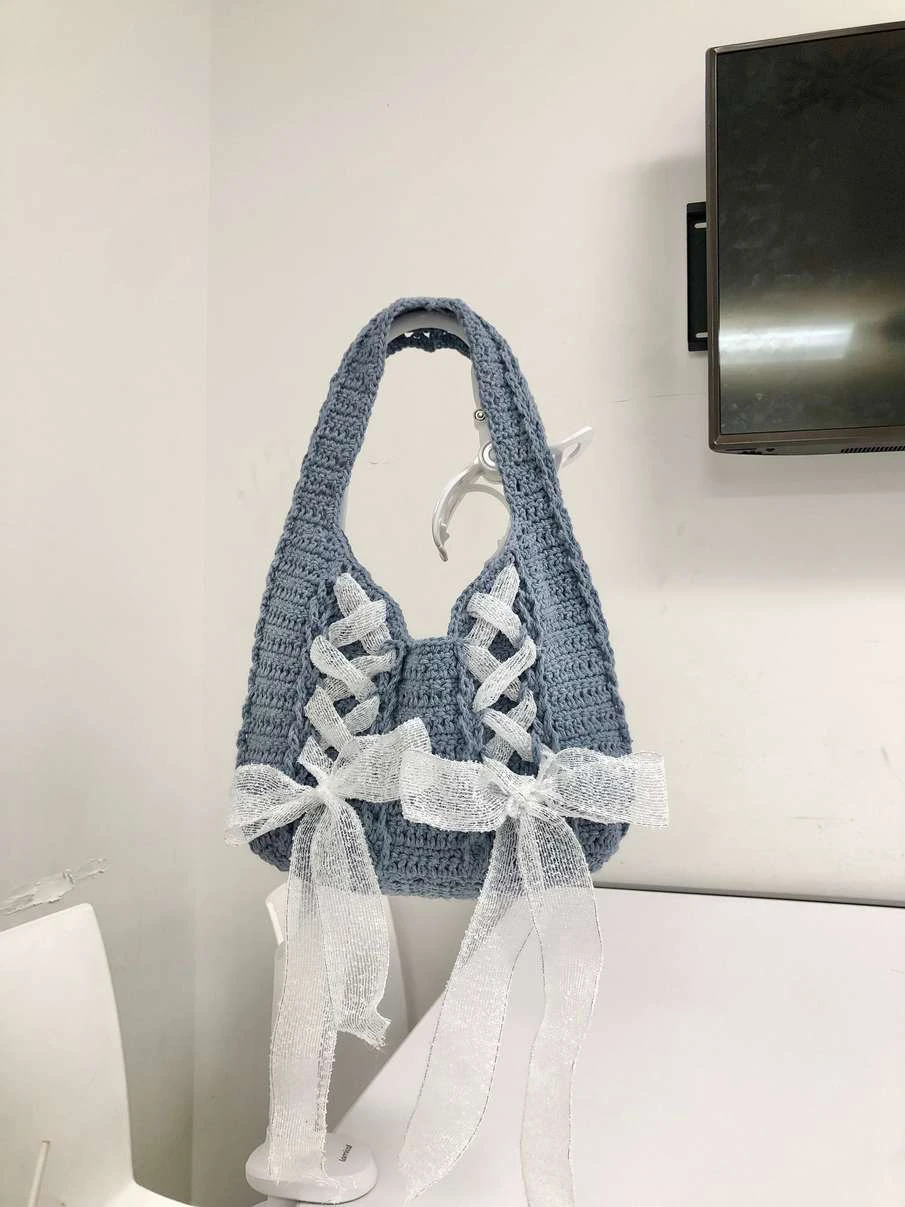
Size
Length – 41 cm
Width – 29 cm
Note : you might have
different measurements
for your bag depending
on your yarn and hook
used.
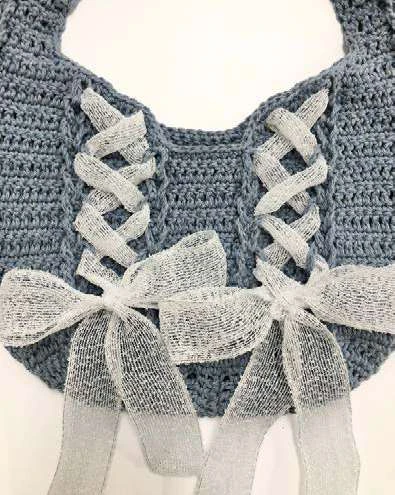
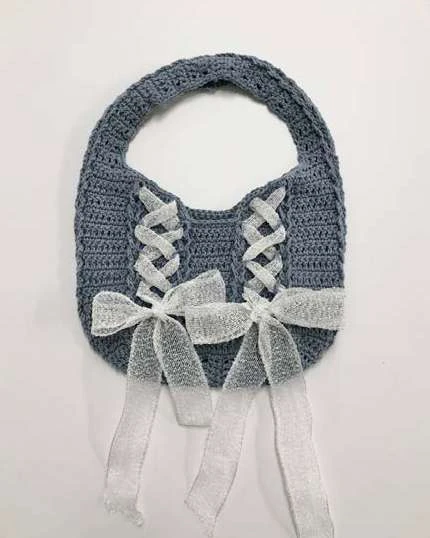
You are done!
Recommended Digital Products
Handmade Crochet Corset Belt Pattern Boho Chic Waist Cincher with Busk & Ribbon Lacing Intermediate Crochet PDF Pattern
$4.99
The Highline Wristlet Keychain Crochet Pattern: Quick, Textured & Market-Ready Accessory
$3.99

The Ultimate Beginner’s Crochet Guide: Master 45+ Essential Techniques & Practical Projects
$5.99

From Loop to Perfection: The Ultimate Step-by-Step Crochet Master Guide
$9.99
Get this Crochet Pattern as a Free PDF
Enter your email to receive the PDF associated with this article.
Leave a Reply