
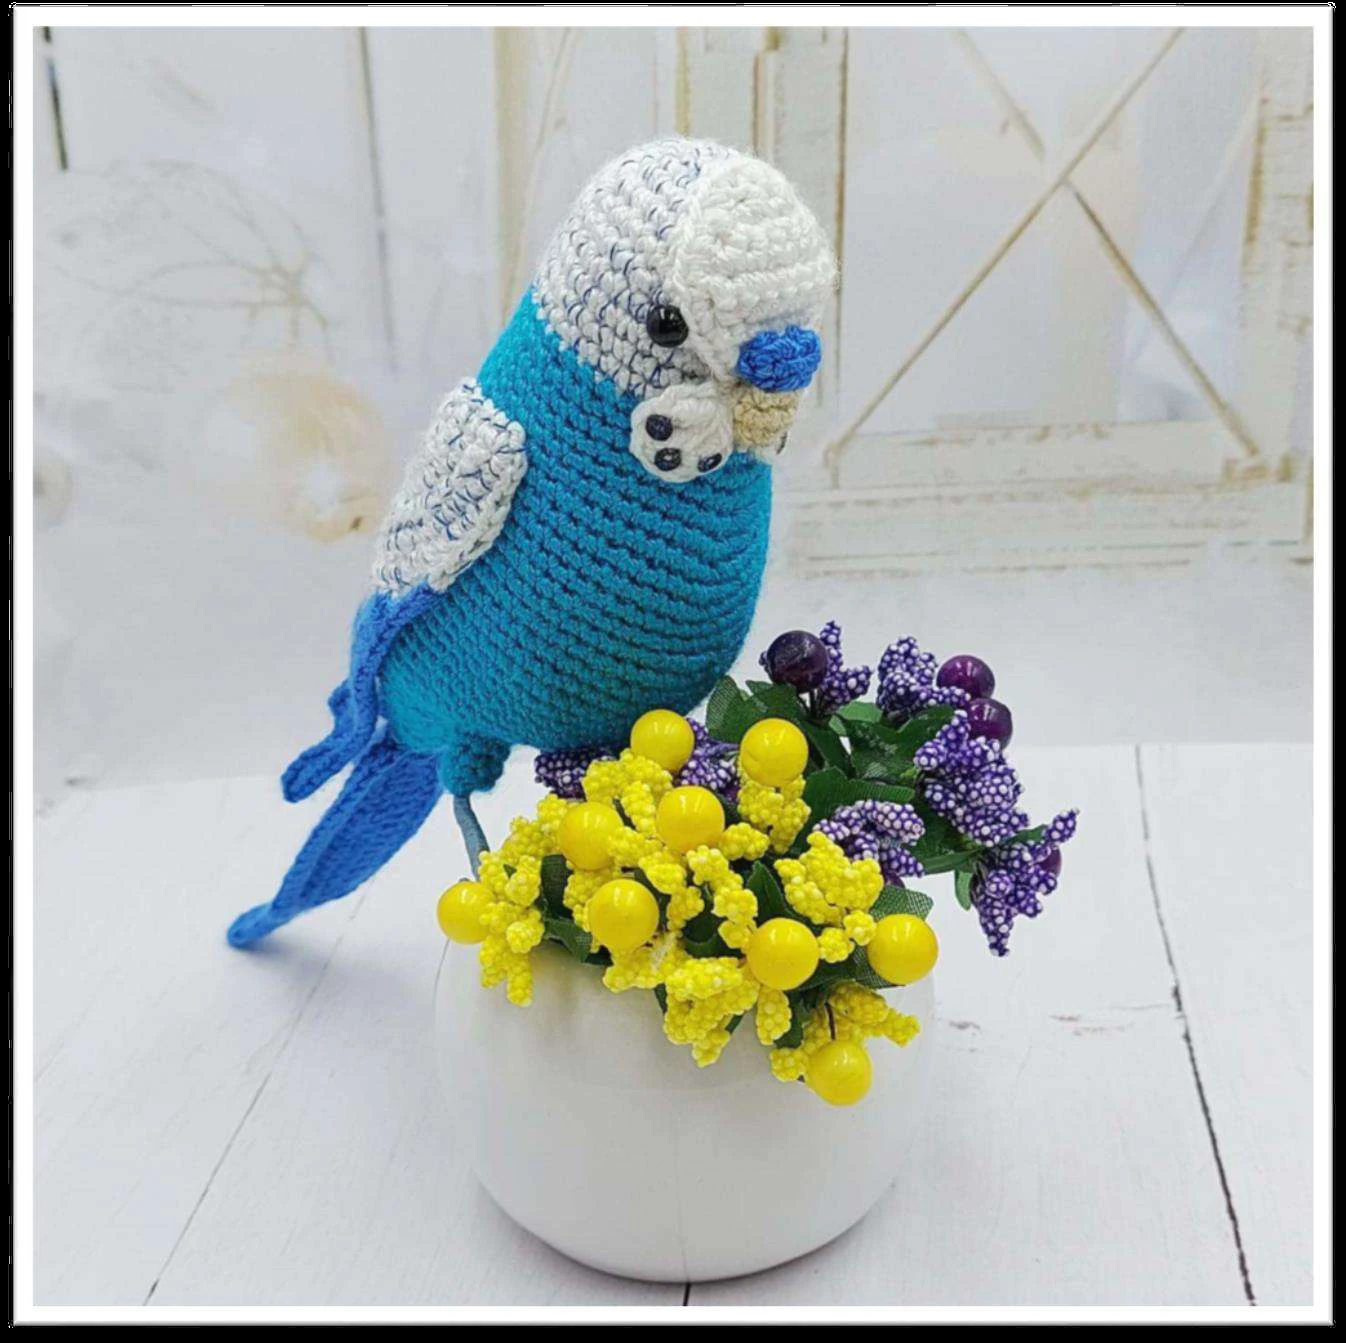
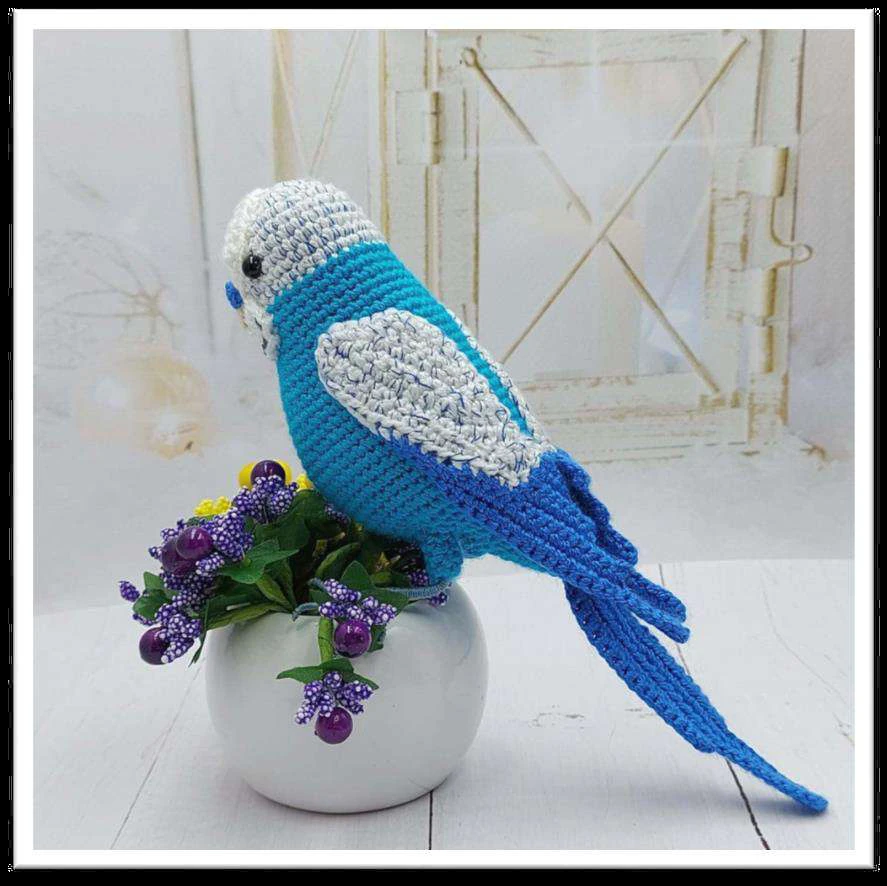
Budgerigar bird
The finished size for the budgerigar is 9.5 * 13.5 cm (3.7
* 5.3 inch). Please note that this size may vary depends on
the yarn and crochet hook size used.
Before you begin, please read the whole pattern carefully.
Page 2 of 20
Contents
Materials and tools: ………………………………………………………………………………………………………… 3
Abbreviations: ………………………………………………………………………………………………………………… 4
Parts of a toy:…………………………………………………………………………………………………………………. 4
Recommendations ……………………………………………………………………………………………………………. 5
Description ……………………………………………………………………………………………………………………… 5
Leg – make two…………………………………………………………………………………………………………….. 5
Head-body …………………………………………………………………………………………………………………… 7
Wings ………………………………………………………………………………………………………………………… 11
Feathers ……………………………………………………………………………………………………………………. 12
Tail …………………………………………………………………………………………………………………………….. 14
Forehead & cheeks…………………………………………………………………………………………………….. 15
Cere …………………………………………………………………………………………………………………………… 16
Beak …………………………………………………………………………………………………………………………… 16
Assembly and design of the toy ……………………………………………………………………………………. 17
Contact the author ……………………………………………………………………………………………………….. 18
Cheat sheet: How to close the work invisibly, round or spiral, without skipping the loop
………………………………………………………………………………………………………………………………….. 19
Page 3 of 20
Materials and tools:
YarnArt Etamin: 100% Acrylic, 180 m in 30 g (196 yds in 1.06 oz) – light blue-425,
blue-462, beige-448, white-421, grey-449 for the blue budgerigar, yellow-461,
green-438, blue-462, beige-448 for the green budgerigar. Consumption of the main
color – 6 g, additional – 3 g, and per gram of all the rest.
Steel crochet hook size 1.25 mm (#8 US) for Etamin; (that pattern
will use a hook size smaller than the yarn recommended so the stitches will be nice
and tight).
Fine navy blue/olive green bobbin thread.
Fiberfill for stuff.
A wooden skewer or a toothpick with a broken tips for stuffing.
Tapestry needle.
Scissors.
Round pliers and wire cutters.
Wire for needlework (you can use steel wire with a diameter of 0.5 mm or copper
wire 1 mm thick for feet and bead wire 0.5 mm thick for a frame in feathers);
Textile band-aid.
5 mm black half round beads – 2 PCS;
Moment Crystal Glue.
PVA Glue.
Sequins or beads for spots with a diameter of 2 mm – 6 PCS (you can embroider
spots or draw with a marker).
Thread
for
tightening the tail.
Page 4 of 20
Abbreviations:
MC – magic circle.
ch – chain.
sl st – slip stitch.
sc – single crochet.
hdc – half double crochet
dc – double crochet
htr – half treble crochet
tr – treble crochet
inc – increasing (2 sc in 1 stitch).
dec – decrease for the front loop
(take front loop for the first sc,
take front loop for the second
sc, yarn over and pull yarn
through all free loops on hook).
thru.dec – through decrease (pull
loop through the first sc, pull
loop through the second sc, yarn
over and pull yarn through all free loops on hook).
(…) * n – repeat instructions in brackets n times.
= n – number of loops in a row or in a round.
FLO – front loop only.
BLO – back loop only.
LO – loop offset. If you do not pay attention to the "loop offset" and work according to
the pattern, then the part can get a little curve. These are features of crocheting in a
spiral. In order to avoid the curvature, in addition to the round which we finished, we work
1 or 2 sc from the next row and do not count them, but simply move the marker 1 or 2 sc
to the left.
Parts of a toy:
Leg – 2 PCS
Head-body – 1 PCS
Wings – 2 PCS
Feathers – 2 PCS
Tail – 1 PCS
Forehead & cheeks – 1 PCS
Cere – 1 PCS
Beak – 1 PCS
Page 5 of 20
Recommendations
The legs will be involved in the process of making the body, so we will do them first.
The toy must be crocheted with tight stitches. Avoid small holes when
stretching crochet fabric. If there are tiny holes, use a smaller hook size.
Stuff the body while crocheting. Don’t use the stuffing material too
sparingly. The frame should not be felt through the stuffing.
The row start marker runs in the center of the front of the figure.
Description
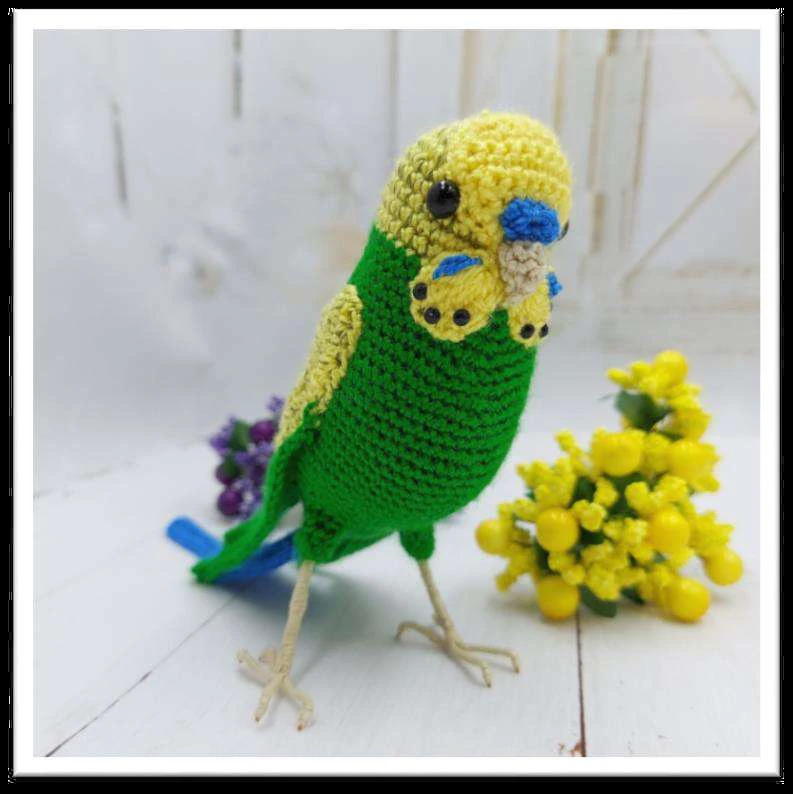
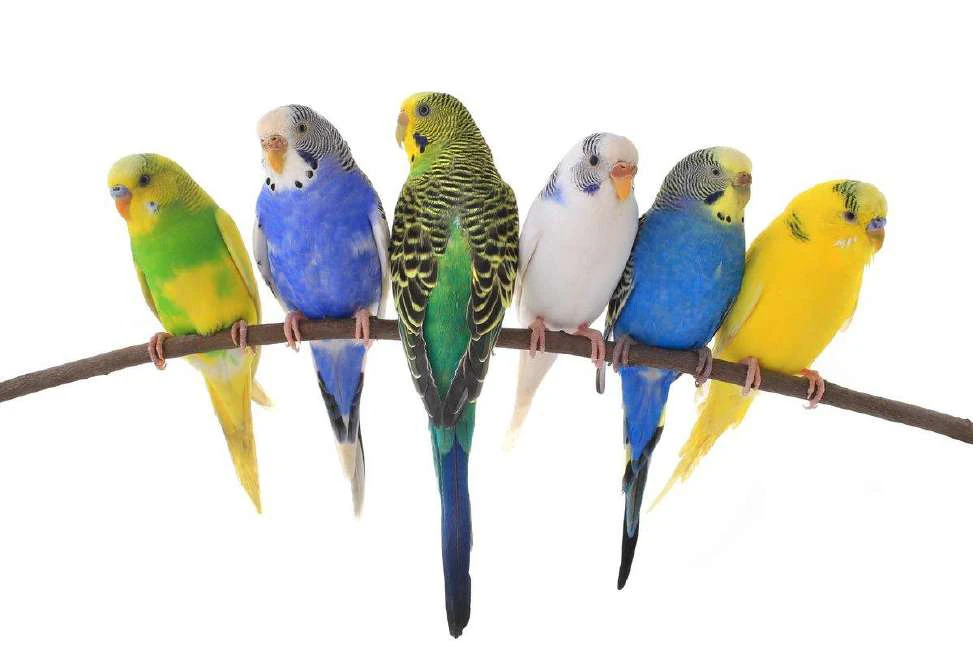
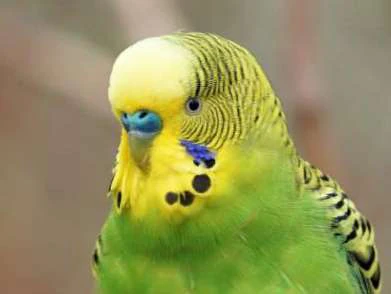
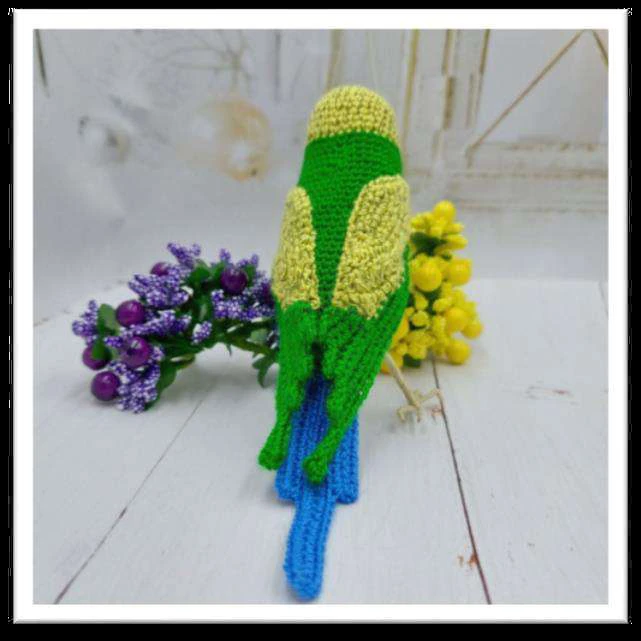
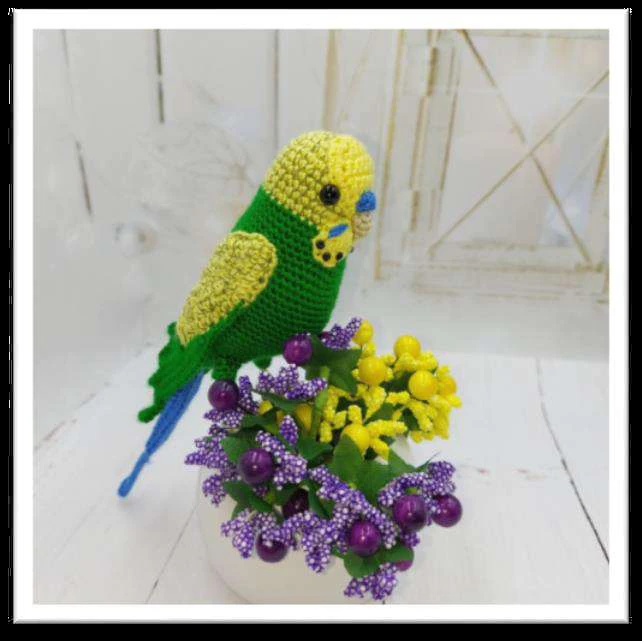
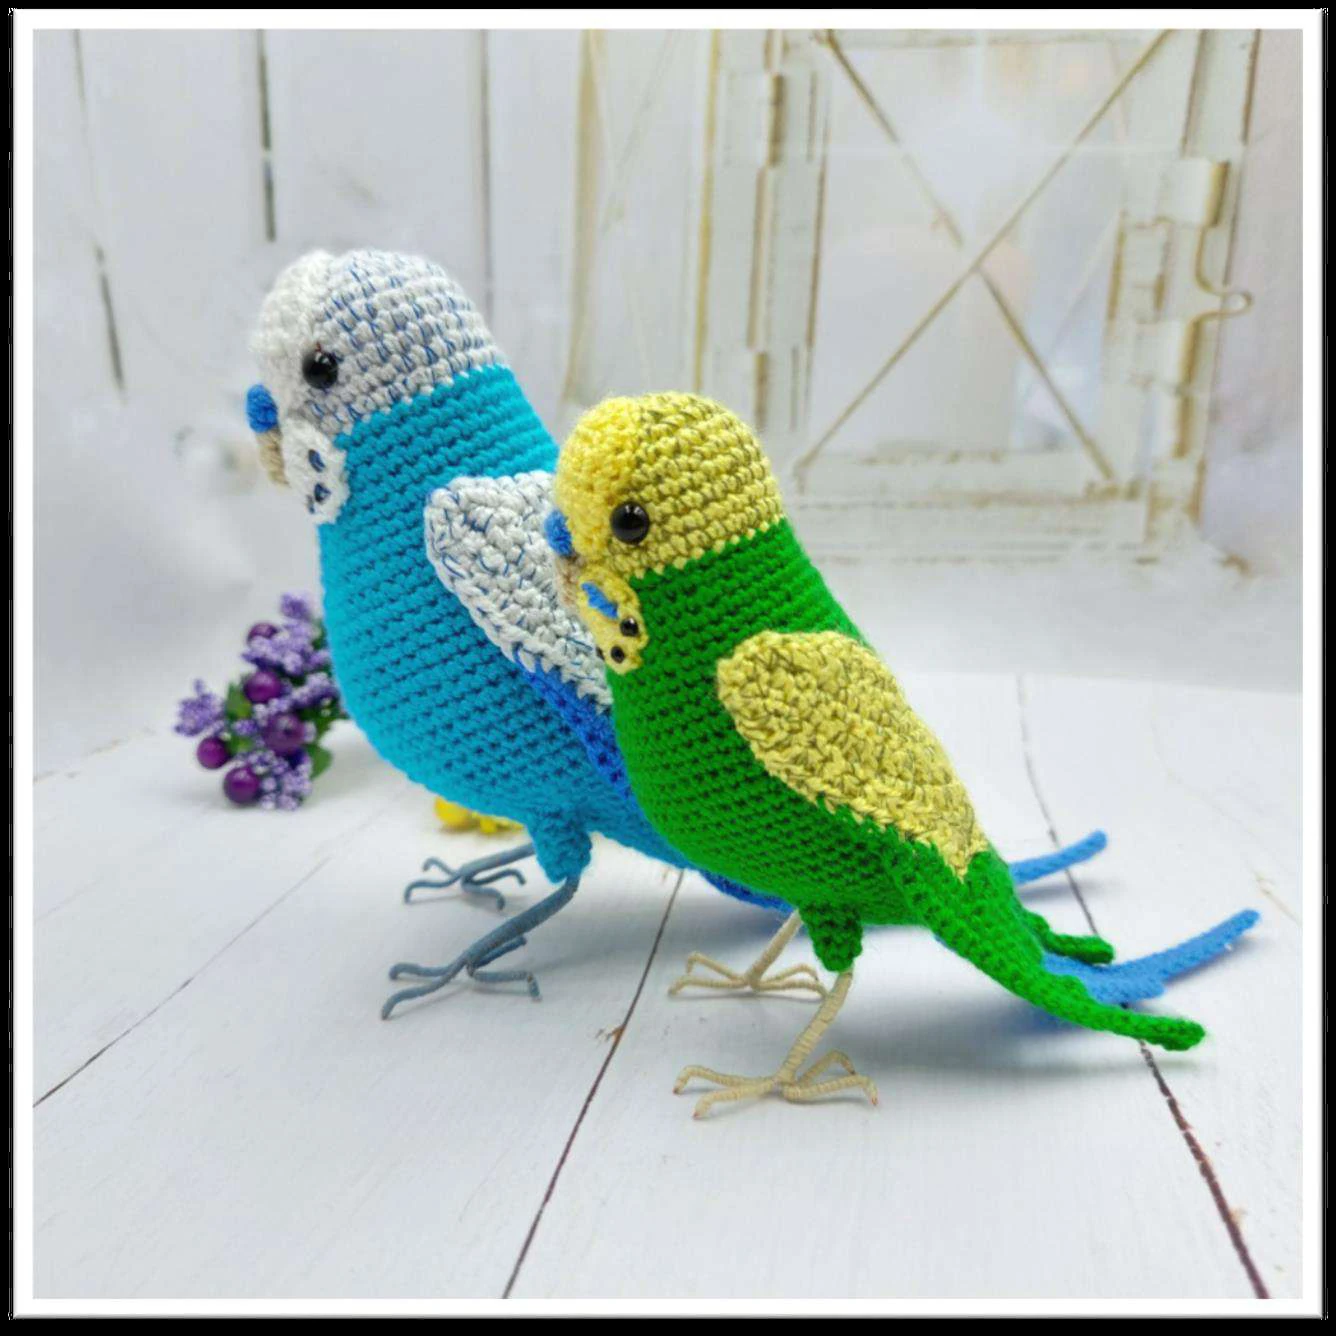
Budgies come in different colors. You can choose the yarn colors based on the photos.
There is a nuance – boys have a blue or light blue cere, girls have from beige to light brown
cere.
For example, I will crochet a blue parrot with a white muzzle and a green one with a yellow
muzzle.
Leg – make two
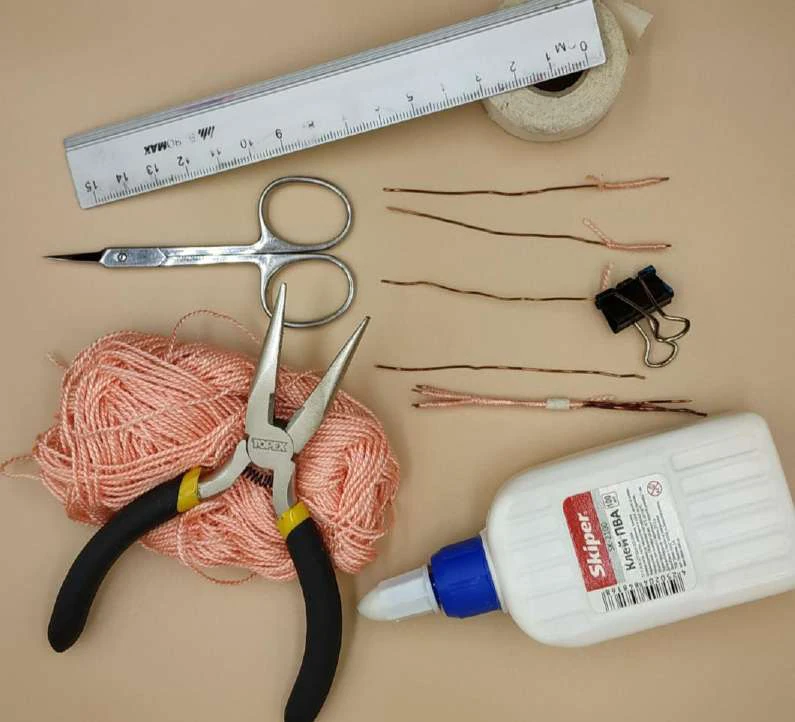
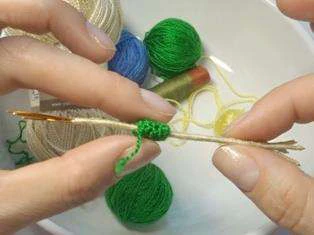
We make leg with toes on a wire frame.
Page 6 of 20
1.
Cut 4 pieces of wire 8 cm (3 inch) long.
2. On the tip of the wire, we wind the yarn in a single layer 16 mm (0,6 inch) long,
moisten it with PVA glue and fix the tip with a clip. Let it dry.
3. We don't cut the thread from the fourth toe. Put your toes together and continue
to wrap, forming a leg. The winding length is 3 cm (1,2 inch). It can also be
impregnated with PVA glue.
4. We make the limiter with a pair of turns with a textile band-aid at a height of 2 cm
(0,8 inch) from the toes. The leg is ready.
5. Repeat for the second leg.
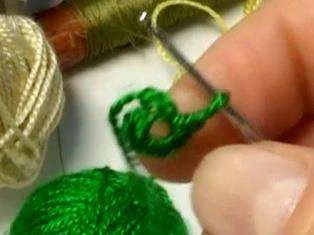
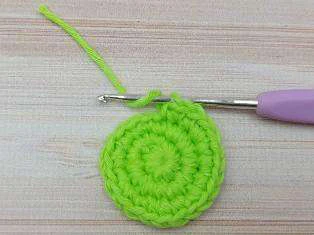
We crochet in a spiral.
Row 1: 6 sc in MC, we close the ring, but do not
tighten it! We direct the tail from the ring
inward, but do not crochet or shorten.
Row 2-3: 6 sc
Row 4: (inc, 2 sc) * 2 = 8, to close the work
invisibly without skipping the loop = 9 (cheat
sheet)
Page 7 of 20
We insert the wire foot into the amigurumi circle, but do not tighten it. Put the foot aside.
Crochet the second same foot.
Head-body
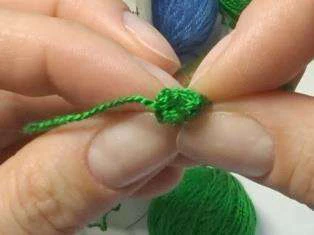
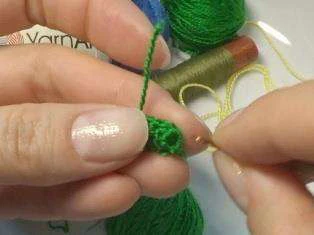
We start crocheting with white yarn with the addition of dark blue thin bobbin thread or
yellow yarn with the addition of dark olive bobbin thread.
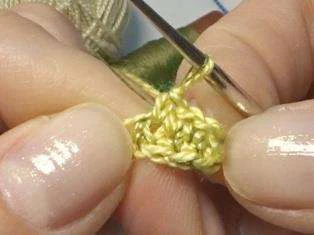
Row 1: ch 5, 3 sc, inc, 3 sc on the other side of the chain = 8
Row 2: (inc, 2 sc, inc) * 2 = 12

Page 8 of 20
Row 3: (sc, inc) * 6 = 18
Row 4: (2 sc, inc) * 6 = 24
Row 5: (3 sc, inc) *6 = 30
Check that the marking thread runs exactly in the center of the front. It is convenient to
fold the figure in half along the initial chain – then the displacement is clearly visible. If it
necessary, we crochet loops offset.
Row 6-8: 30 sc
Row 9: (inc, 14 sc) * 2 = 32 + LO
Row 10: 32 sc
Change the thread to green / blue.
Row 11: inc, 31 sc = 33
Row 12: inc, 32 sc = 34
Row 13: (inc, 16 sc) * 2 = 36 + LO
Row 14: (inc, 17 sc) * 2 = 38
Row 15: inc, 18 sc, inc, 17 sc, inc = 41
Row 16: (inc, 19 sc) * 2, inc = 44
Row 17: 44 sc
Row 18: inc, 42 sc, inc = 46 + LO
Row 19-21: 46 sc
Page 9 of 20
Row 22: inc, 44 sc, inc = 48
Row 23-27: 48 sc + LO
Row 28: dec, 46 sc = 47
Row 29: dec, 45 sc = 46
Row 30: dec, 44 sc = 45
Row 31: dec, 41 sc, dec = 43
Row 32: 3 sc, dec, 33 sc, dec, 3 sc = 41
Row 33: 7 sc, dec, 23 sc, dec, 7 sc = 39
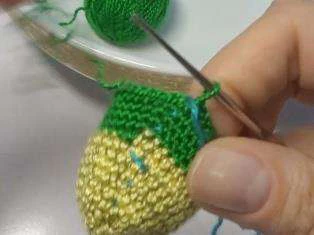
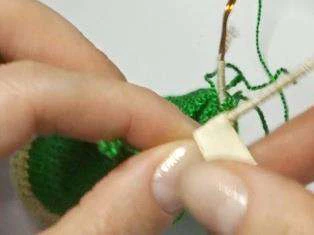
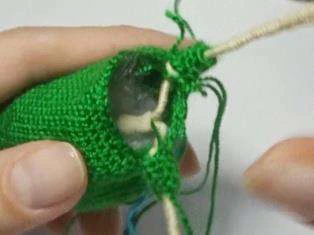
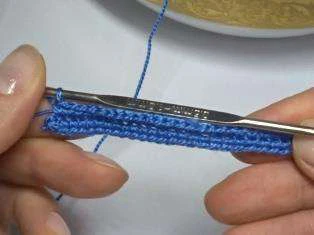
Partially fill the toy with fiberfill (photo 1).
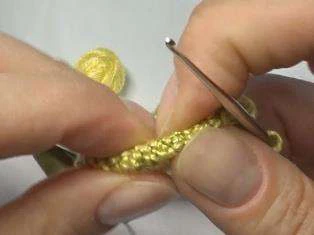
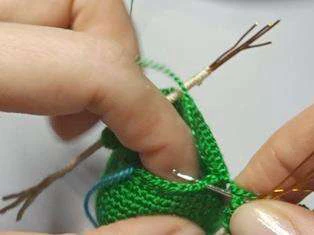
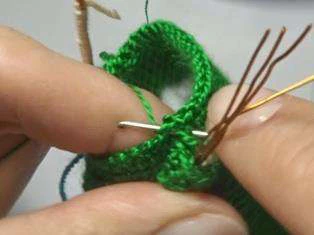
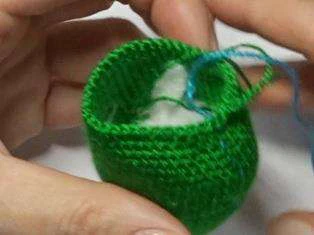
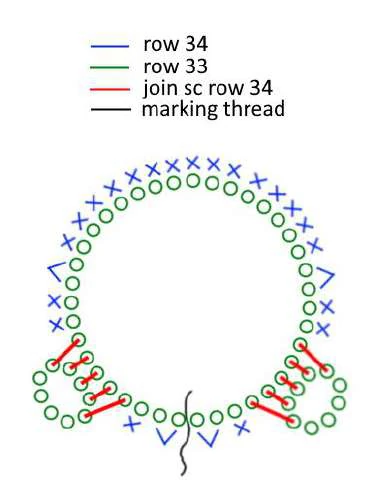
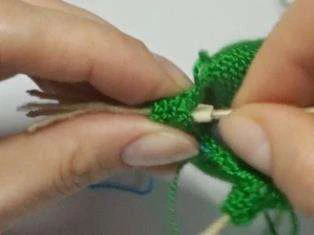
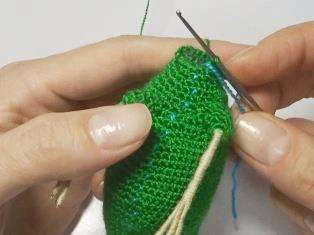
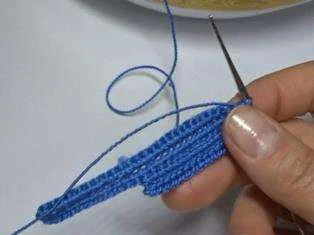
Row 34: dec, sc, 5 join sc with thigh, 2 sc, dec, 15 sc, dec, 2 sc, 5 join sc with thigh, sc, dec
= 32 (photo 2-3, scheme). Attention! The number of loops in a row does not match the
arithmetic operations, since we crocheted 5 loops per thigh, and left 4 loops each.
Since the bird's body is partially stuffed and almost
finished, we can determine the length of the legs in
accordance with the proportions of the resulting
figure (it depends heavily on the chosen yarn and
knitting density).
Measure the desired length of the leg and above this
point, wrap a textile band-aid limiter in several
layers. The thickness of the stopper should allow you
to push it deep into the leg. Now you can pull the end
of the thread and pull the amigurumi circle
completely.


Page 10 of 20
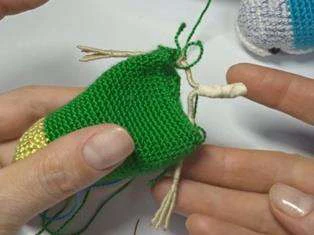
Twist the frame wires together, isolate the ends with a textile band-aid.
Insert the frame into the bird's body. Carefully place the fiberfill so that the frame is
not palpable. Press the legs to the chest so that they do not interfere with continuing
crocheting.
Row 35: dec, 4 sc on the leg, 20 sc on the body, 4 sc on the leg, dec = 30
Row 36: 7 sc, dec, 12 sc, dec, 7 sc = 28
Row 37: 2 sc, dec, 20 sc, dec, 2 sc = 26
Row 38: 5 sc, dec, 12 sc, dec, 5 sc = 24
Row 39: 3 sc, dec, 14 sc, dec, 3 sc = 22
Row 40: sc, dec, 16 sc, dec, sc = 20
Row 41: sc, dec, sc, dec, 8 sc, dec, sc, dec, sc =
Fill the body with fiberfill.
Page 11 of 20
Row 42: thru.dec, dec, 8 sc, dec, thru.dec = 12
Row 43: thru.dec, dec, 4 sc, dec, thru.dec = 8, fasten off, leaving a long thread for sewing
the tail.
Fill the body with fiberfill finally.
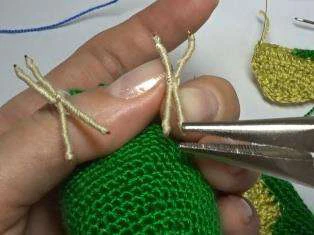
Bend the legs to a natural position. Bend toes – 2
forward and 2 back. Give the toes a curved shape
with round pliers (photo 1). Trim and file nails to
prevent scratching.
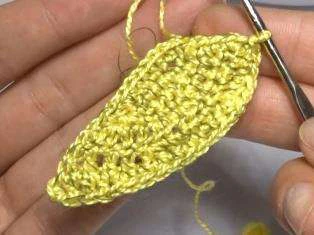
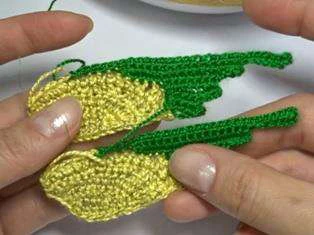
Wings
Crochet yellow/white yarn with the addition of
olive/dark blue fine bobbin thread.
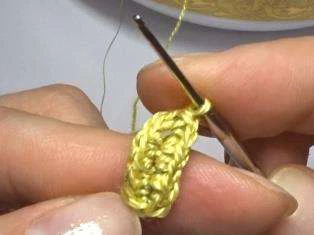
Row 1: ch 6, inc, 3 sc, 3 sc in 1, 4 sc, sl st, ch, turn = 12 (photo 2)
Row 2: inc, 5 sc, inc, ch, turn = 9
Row 3: inc, 7 sc, inc, ch, turn = 11
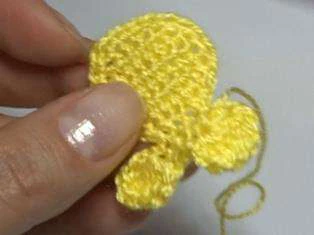
Row 4: inc, 4 sc, 2 hdc, inc hdc, 2 dc, inc dc, turn = 14 (photo 3)
Row 5: inc dc, 2 dc, inc hdc, 2 hdc, 7 sc, 3 sc in 1,
11 sc, 2 sc, 2 sc, continue crocheting in the same
direction.
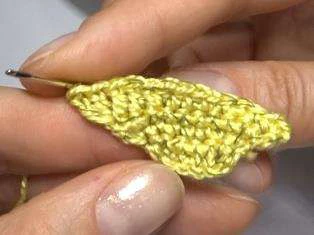
Row 6: inc dc, 2 dc, inc hdc, 7 hdc, inc hdc, 3 hdc,
sc, sl st, fasten off (photo 4).
Cut the thread, leaving a tail for sewing. Crochet
the second same wing.
Page 12 of 20
Feathers
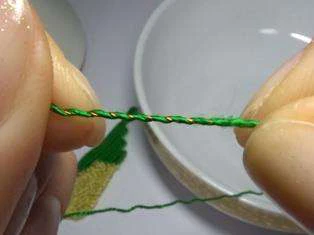
Wing feathers should be carefully starched or crocheted with carcass wire. I prefer to
use 0.5 mm thick copper wire in the yarn winding.
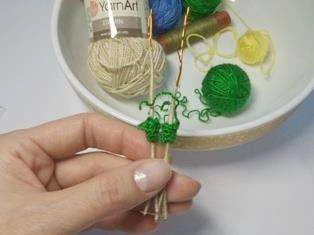
Don't be scared! It is easy to wind thin wire. Rolling the tip of the wire between the
thumb and forefinger. In order for the winding to be of high quality, the wire must be
pulled tighter than the yarn for winding. If the yarn is pulled tighter than the wire, then
the effect is obtained, as in photo 1.
We start winding a centimeter from the edge of the wire and wind it to the edge. We
bend the end of the wire to fix the yarn. Now we wind, scrolling the wire with the winding
between the fingers. If the coils are not very tight, they can be moved. Avoid sagging –
the coils should cover the wire in one layer only!
It took me 18 cm of wire in green / gold winding for the wings, 32 cm for the tail in blue
winding. Try to make with a spare so that you do not have to build up the frame.
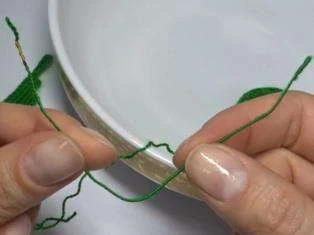
Attach the green/blue yarn to the sharp corner of the wing along the long side. We
crochet across the crocheting, at the end of the feather attaching it to the wing – we
consider the wing to be the basis of crocheting.
Page 13 of 20
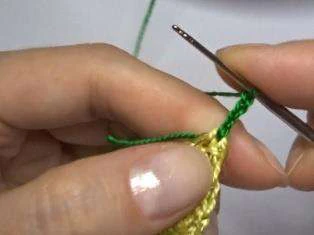
Feather 1: ch 3, (photo 1) add wrapped wire, sc in the bend of the wire (photo 2), 3 sc, sc
in the same loop where the chain began, 2 sc on the base, turn.
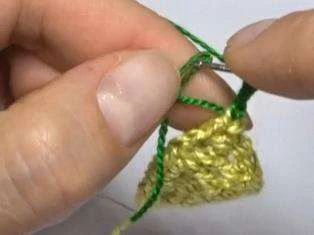
Feather 2: (photo 3), skip 2, 3 sc, ch 3 (photo 4), sc in the band of the wire, 6 sc, sc in the
same loop where the feather began, sc on the base (photo 5), turn.
Feather 3: skip 1, 7 sc, ch 3, sc in the band of the wire, 10 sc, sc in the same loop where
the feather began, 5 sc on the base (photo 6), turn.
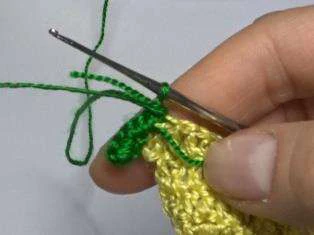
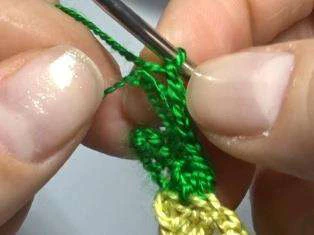
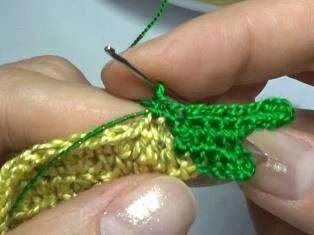
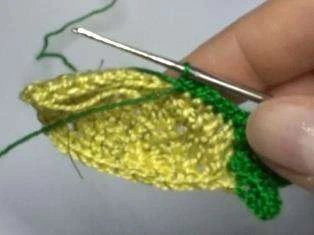
Page 14 of 20
Feather 4: skip 1, 15 sc, 6 ch (photo 1), sc in the band of the wire, 21 sc, sc in the same
loop where the feather began, 3 sc on the base, sl st (photo 2), to close the work invisibly
without skipping the loop (photo 3).
Repeat for the second wing in the same way, without mirroring anything (photo 4). The
difference in the turning rows will not be noticeable. And the edges of the base will be
sewn to the body.
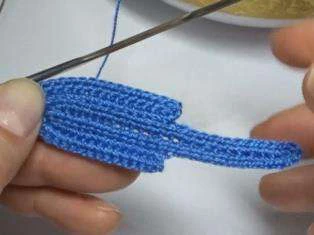
Tail
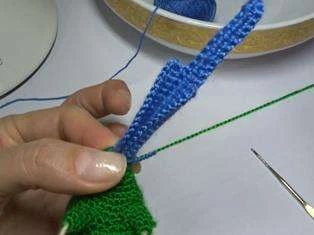
I also lay a frame wire with a winding in the tail so that I do not have to starch.
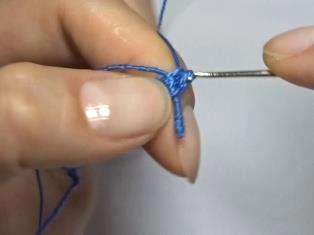
Feather 1: ch 25, 23 sc (photo 1-2), 3 sc in 1, 23 sc.
Page 15 of 20
Feather 2: 2 sc in the band of the wire,
then we crochet FLO: 15 sc, sc in the wire,
turn, 15 sc, for both edges of the loop: inc.
Feather 3: inc, then we crochet FLO: 15 sc, sc in
the wire, turn, 15 sc, sc, sl st. Fasten the thread,
hide the end of the thread inside the single crochets.
Bend the base of the tail with a corner, insert the tail into the remaining hole on the body.
Sew on the tail with the end of the yarn left on the body.
Forehead & cheeks
Crochet yellow/white yarn in one thread.
Row 1: ch 6, 5 sc, ch, turn = 5
Row 2: inc, 3 sc, inc, ch, turn = 7
Row 3: inc, 5 sc, inc, ch, turn = 9
Row 4-5: 9 sc, ch, turn
Row 6: dec, 5 sc, dec, ch, turn = 7
Page 16 of 20
Row 7: dec, 3 sc, dec, ch, turn = 5
Row 8: dec, sc, dec = 3
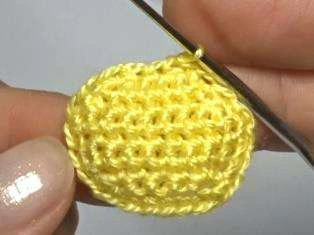
Crochet in a circle with sc, make increase so that
the muzzle will be smooth, sl st, ch (photo 1).
Row 9: 3 sc, ch, turn = 3
Row 10: inc, sc, inc, ch, turn = 5
Row 11: (dc, 5 htr, dc) in 1, 3 sc, (dc, 5 htr, dc), sl
st. Fasten off, leaving a long tail for sewing (photo 2).
Cere
Crochet in one thread in blue or brown.
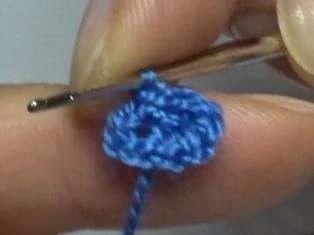
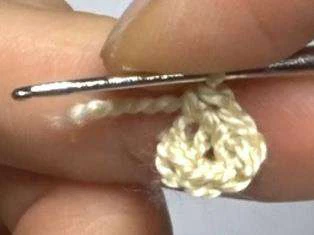
Ch 3, 4 sc in 1, 4 sc in 1, sl st (photo 3). Cut the thread, leaving the tip for sewing.
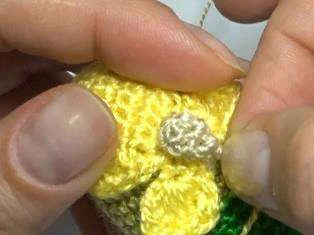
Beak
We crochet in a spiral around the chain by beige
yarn.
Row 1: ch 4, 2 sc, inc, 2 sc = 6 (photo 4)
Row 2: dec, 4 sc = 5
Row 3: dec, 3 sc = 4, fill with leftover yarn. Pull
the hole by the front loops, leaving a long tail for
sewing.
cere
forehead
cheeks
Page 17 of 20
Assembly and design of the toy
1)
We sew the forehead behind both edges of
the loops. The cheeks must cover the color
change step, and the edge of the forehead is
located in the middle of the initial chain of
the parrot's head.
2) We sew the beak with invisible stitches.
3) We sew the cere on both edges of the loops,
bending the upper edge so that the holes of
the initial chain form the nostrils.
4)
Glue the eyes under the forehead.
Please note: the eyes of the birds are
located almost on the sides of the head. In
animals, the eyes are located in front of
the head.
5)
We embroider black spots on the
cheeks with threads, beads or sequins, we
embroider a blue stroke, as on photo.
6)
Give the toes a slightly curved
shape. Bend the tips of the claws with round pliers at an angle of 90 degrees. File the
claws so that they do not scratch.
7) Take a picture of toy and don't forget to share the photo on social networks with the
author's name: «made by Svetlana Kononenko's MK / HOBBY-MK» .

Page 18 of 20
I wish you every success!
I hope I see you soon!
Page 19 of 20
Crochet budgerigar © 2021 Svetlana Kononenko HOBBY-MK
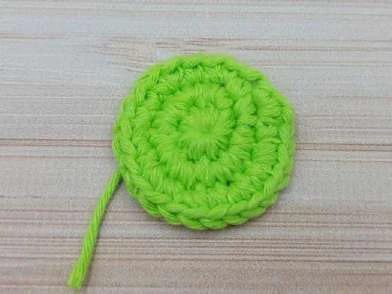
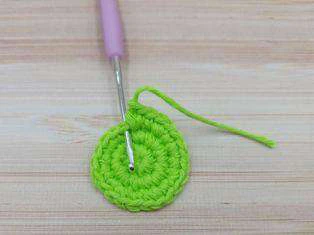
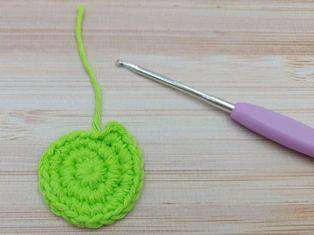
Cheat sheet: How to close the work invisibly, round or spiral, without skipping
the loop
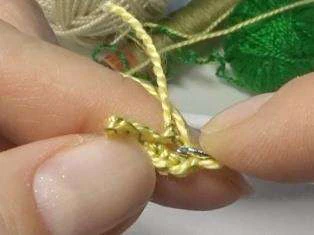
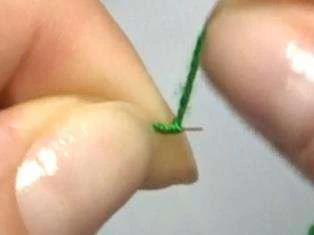
Pull the end of the yarn completely through the last stitch. Pass the hook through
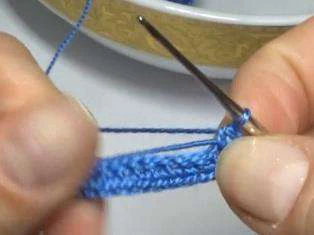
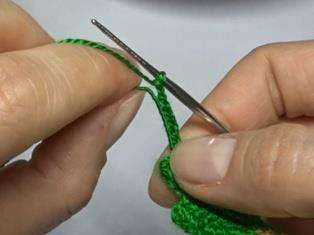
the first stitch, from the outside to the inside of the work (photo 1-2).
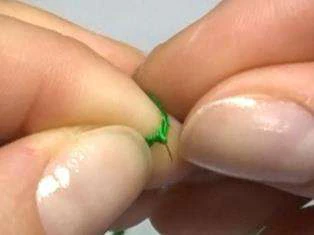
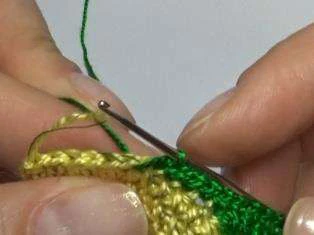
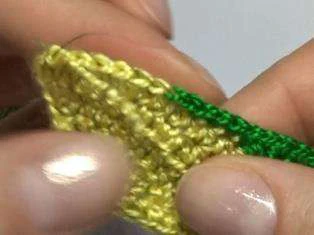
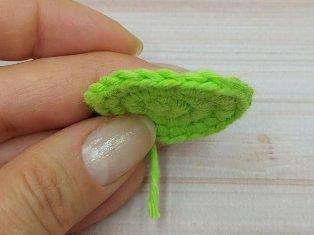
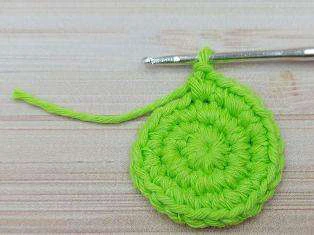
We pick up the tail and pull it out of the loop (photo 3). Insert the hook from the
outside into the middle of the last tied loop (photo 4).
We pick up the tail and pull it out – a smoothing loop has formed. We pull up the tail
so that the loop gets the desired size. Back



Page 20 of 20
Recommended Digital Products

The Ultimate Beginner’s Crochet Guide: Master 45+ Essential Techniques & Practical Projects
$5.99

From Loop to Perfection: The Ultimate Step-by-Step Crochet Master Guide
$9.99
The Ultimate Crochet Handbook: Essential Techniques, Color Theory & 80+ Step-by-Step Patterns
$19.99
Master the Art of Crochet from Scratch – Ultimate Digital Guide with 8 Step-by-Step Projects!
$19.99
Get this Crochet Pattern as a Free PDF
Enter your email to receive the PDF associated with this article.
Leave a Reply