
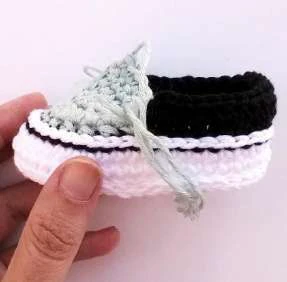
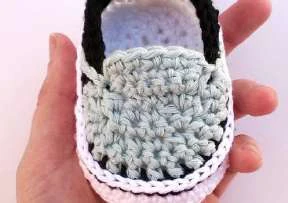
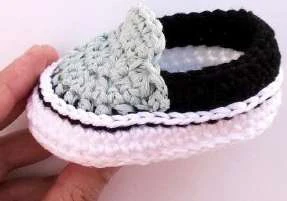
Baby Van Shoes
Modern
sneakers
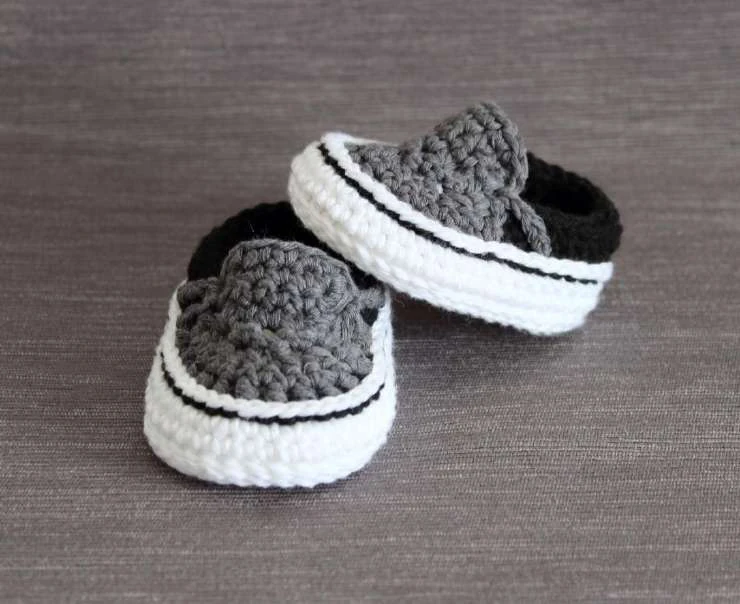
S K I L L L E V E L : Intermediate
F I N I S H E D S I Z E :
0-3 months(8.5cm/3.37in)
3-6 months(9.5 cm/3.75in)
6-9 months(11cm/4.33in)
M A T E R I A L S :
Crochet 3.5 mm
Soles: Black and White 8 ply DK/worsted yarn or
cotton yarn
Upper: 8 ply DK/worsted yarn or cotton yarn (choose
your favourite color)
Scissors
Yarn needle
Sugested yarn: Drops Merino Extra Fine
G A U G E :
18 sc x 19 rows=10x10cm (4” x 4”)
S T I T C H E S :
ch= chain
sc= single crochet
hdc= half double crochet
dc= double crochet
slst= slip stitch
sc2tog= * insert hook in next stitch, yo and pull up a
loop* x 2, yo, pull through all 3 loops on hook.
NOTE: sc2tog at the beginning of the row, pattern
instructions are (Ch1, sc2tog) = * Ch1, insert hook
in same stitch, yo and pull up a loop* x 2, yo, pull
through all 3 loops on hook.
H O W T O R E A D T H E
P A T T E R N :
The instructions are given in this way:
E.g:
hdc in next 5-6-7 sts
It means you have to follow only the number that
belongs to your size
0-3 months
size
3-6 months
size
6-9 months
size
P A T T E R N N O T E S :
st/ sts= stitch/stitches
yo= yarn over
Check that you have the correct total stitch
number after each row, it helps to prevent
some mistakes.
Weave in ends when you finish each step,
it helps you to maintain a tidy work.
The most common way is weaving through
the stitches using a yarn needle, weave on
the wrong side of the work and do your best to
hide the ends as much as possible.
If you are an experienced crocheter you can
weave as you crochet. Double up your yarn
and take the loose end with you as your
crochet. After some stitches you can cut the
loose end.
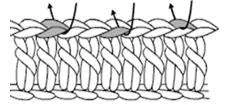
Working
in top 2
loops
Working in
front loop
only
Working in
back loop
only
Sc back loop only
Sc front loop only



S T E P 1 : S O L E S
Row 3
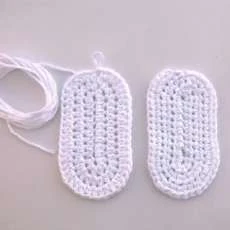
Make 2 white soles for each sneaker, 4 total soles.
•
Make 2 sole #1’s. At the end fasten off and cut.
•
Make 2 sole #2’s. At the end pull last loop a little longer so you don´t lose your stitch.
Measure and cut a 60in/1.5mts tail to be used in next slipstitch 2 soles together for one
sneaker directions.
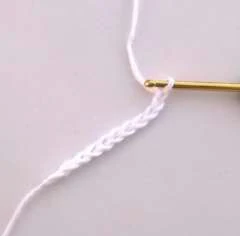
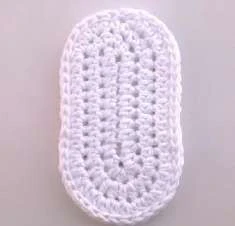
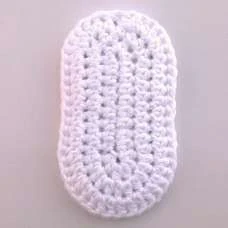
Ch 10-11-13.
Row 1 : 2hdc in second ch from hook, hdc in each of next 7-8-10 sts, 6hdc into last ch, rotate to
work on the other side of the foundation ch, 7-8-10 hdc, 2hdc into next ch, do not join.( 24-26-30
sts)
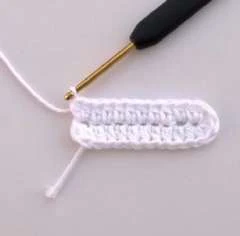
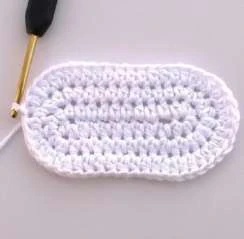
Row 2: 2hdc into each of next 2sts, 7-8-10 hdc, 2hdc in each of next 6 sts, 7-8-10 hdc, 2hdc in
each of last 2 sts, do not join.(34-36-40 sts)
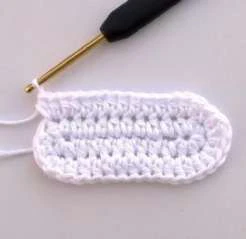
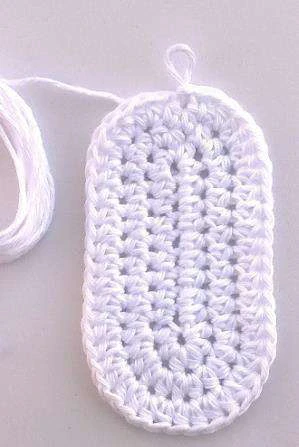
Row 3: Hdc in each of first 2 sts, 2hdc in each of next 3 sts, 7-8-10 hdc, (2hdc in next st, hdc in
next st) x 6 times, 7-8-10 hdc, 2hdc in each of next 3 sts, do not join. (46-48-52 sts)
Dc in next st, slst in next st to bring you to the center back of the heel.
Row 1
Row 1
Row 2
1. Ch 10-11-13
2. 2hdc in second ch from
hook, hdc in each of next 7-
8-10 sts,6hdc into last ch
3. What Row 2 looks like
finished
4. What Row 3 looks like
finished
2. Insert the hook in stich
located in the center back
of the heel
3. Now insert hook into sole #2’s loop, pull that loop
through the stitch.
4a. Insert hook in next stitch
going through both soles
4b. Yarn over and pull
through both sole layers,
then..
8. What a finished 2-layer
sole looks like.
9. Continue working next
steps on this side of the
sole.
1. Place sole #1 over sole
4c. ..continue to pull that
“yarn over” loop through
the first loop on your hook
to complete your first slip
stitch.
5.
Repeat
steps
4a-4c
along the soles working slip
stitches (46-48-52 sts total)
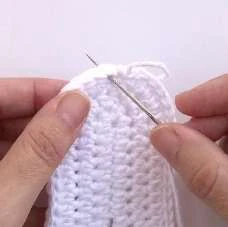
6. Cut the yarn and pull
back
7. Thread a yarn needle
with yarn tail and sew to
fasten off the last slip stitch.
Weave in ends.
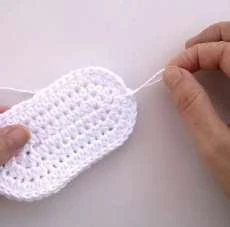
As in my photos below: place sole #1 (right side up, heel on top) over the top of sole #2 (
upside down, heel on top) .Using the 60in/1.5mts tail (from sole #2) to slst in each st through both
soles (46-48-52 sts total) Fasten off and weave in ends.
Repeat same steps with other 2 sneaker soles.
Start in the stitch located in the center back of the heel.
4a throught 4c shows how to start and finish a slip stitch
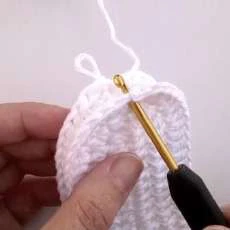
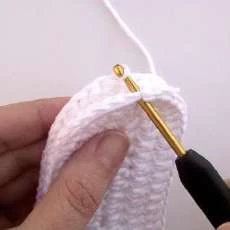
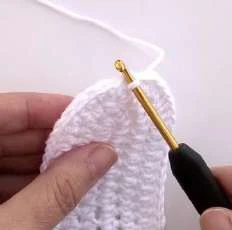
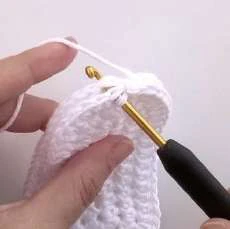
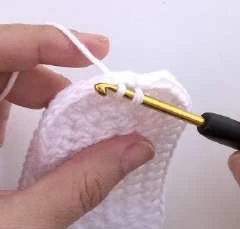
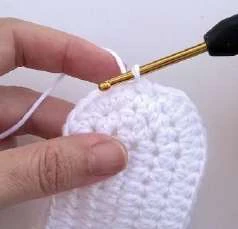
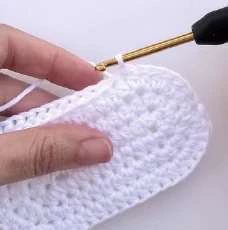
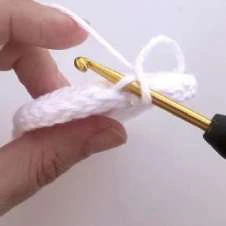
1. Start with a slip knot
already on your hook
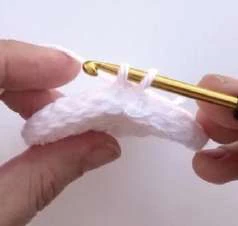
2. Insert your hook into
the indicated stitch
3. Yarn over and pull up a
loop
4. Yarn over again..
5. ..and pull through both
loops on your hook. You
just completed a standing
single crochet.
6. Continue working single
crochet in each of next 45-
47-57 sts
Be careful ! Sc2tog at the beginning of the row= insert
hook in same stitch, yo and pull up a loop, insert hook in
next stitch yo a pull up a loop, yo and pull through all 3
loops on hook.
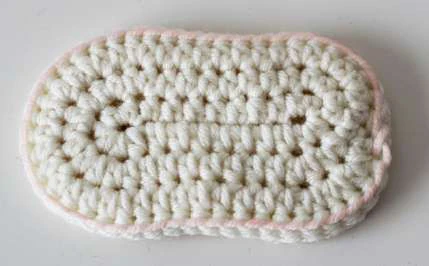
Row 1: Join white yarn in the indicated st with
a standing single crochet , sc in each of next
45-47-51 sts, slst to first st (46-48-52 sts)
Row 2: Ch 1, sc2tog, sc in each of next 42-44-
48 sts, sc2tog, slst to first st (44-46-50 sts).
Fasten off and cut. Weave in ends.
Continue working on the indicated side of
the sole .First row of stitches are to be
started in the stitch located in the center
back of the heel.
Work Row 1 over the indicated stitches
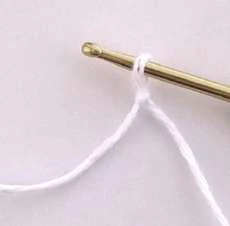
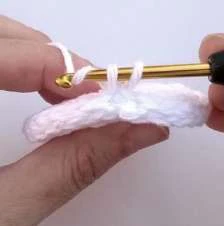
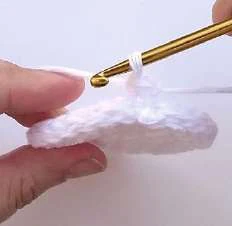
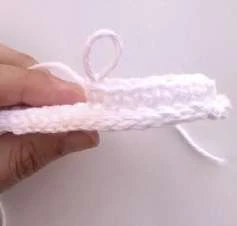
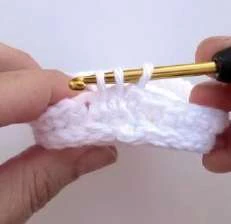
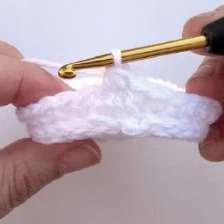

1.
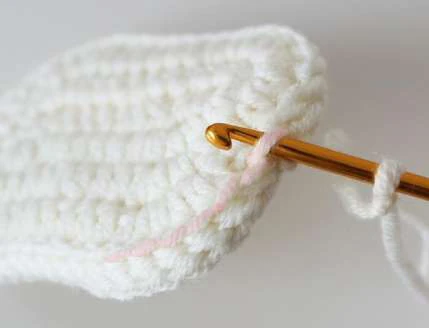
Insert hook from the
inside part ..
2. Hold the brown yarn and
pull through the stitch
3. Insert the hook into the
next st
4.
Yarn over and pull
through the stitch.
5. Pull through the loop on
the
hook,
you
have
completed
the
first
slip
stitch.
6. Repeat from step 3 to 5
working
44-46-50
slip
stitches along the sole.
(45-47-51 sts)
Cut the yarn and pull back.
Fasten off using a yarn
needle.
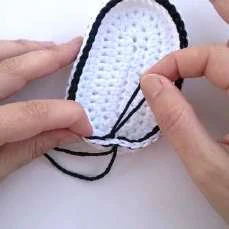
As a result you have a
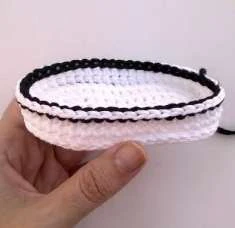
super characteristic Vans
sole
A C C E N T C O L O R R O W
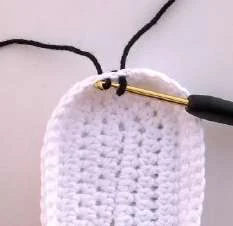
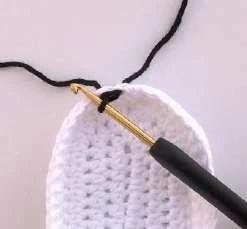
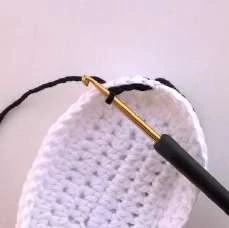
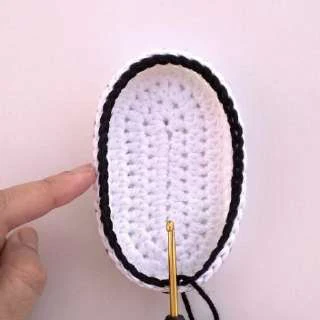
For this row: Using black, work a row of slst´s over the previous row 2 from the inside part. Join black in
any stich in the center of the back of the heel, then slst in each of the next 45-47-51 sts along the sole. Do
not make tight stitches for this row, it helps to make the next step easier.
At the end , put down crochet needle and pull end of yarn out , thread into a large eyed needle to fasten off
with. Weave in ends.
S T E P 2 : U P P E R
12 sts
Find in the stitch located in the centre back of the heel,
then find the 12th st from this point, start in this 12th sts.
Work with the color you have choosen for the upper.
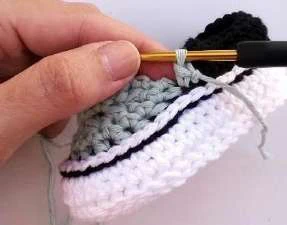
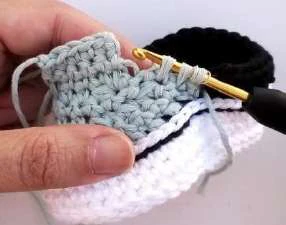
Work Row 1 front loop only over the black slip stitches from
the previous step, this part could be a little tricky but if you use
the hook of your crochet needle it will be easier.
Row 1: (Front loop only) Join the yarn with a standing single
crochet in the 12th sts from the stitch located in the center back
of the heel, (sc2tog) 10-11-13 times, sc in last stitch, turn (12-
13-15 sts)
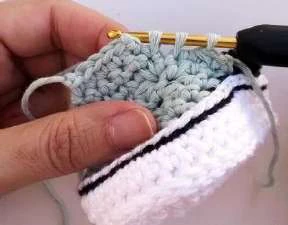
Row 2: Ch 1, sc in same st, sc in each of next 11-12-14 sts ,
turn (12-13-15 sts)
From this point follow the given instructions for each size.
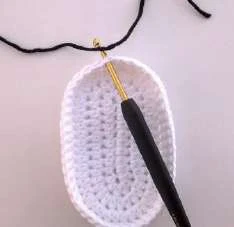



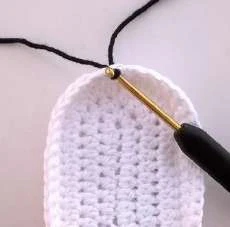
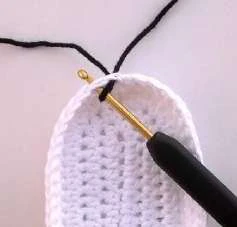
1. Start with a slip knot
already on your hook.
2. Insert your hook into the
indicated stitch
3. Yarn over a pull up a
loop
4. Yarn over again and
pull through both loops on
your hook.
5. You have completed the
standing single crochet.
6. Use the hook of your
crochet needle to work
over the front loop only.
Row 1
7. Continue with the given instructions
Row 3
Row 4
Row 2
Row 5
Example for 3-6 month size
0-3 month size
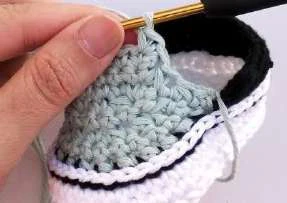
Row 3: Ch 1, (sc2tog) 6
times, turn (6 sts)
Row 4: Ch 1, (sc2tog) 3
times (3 sts). Fasten off and
cut.
3-6 month size
Row 3: Ch 1, (sc2tog) 3
times , sc in next st, (sc2tog)
3 times , turn (7 sts)
Row 4: Ch 1, sc2tog , sc in
each of next 3 sts , sc2tog (5
sts).
Row 5: Ch 1, sc2tog , sc in
next st , sc2tog (3 sts).
Fasten off and cut.
6-9 month size
Row 3: Ch 1, sc in same st ,
sc in each of next 2 sts ,
(sc2tog) 2 times, sc in next
st , (sc2tog) 2 times , sc in
each of next 3 sts , turn (11
sts)
Row 4: Ch 1, sc in same st ,
(sc2tog) 2 times, sc in next
st , (sc2tog) 2 times, sc in
last st, turn (7 sts)
Row 5: Ch 1, (sc2tog) 3
times, sc in last st (4 sts).
Fasten off and cut.
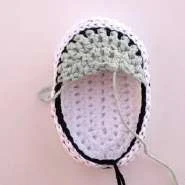
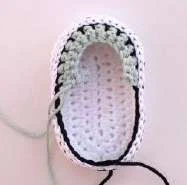
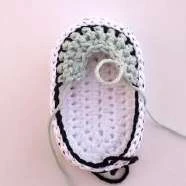
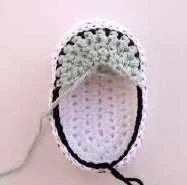
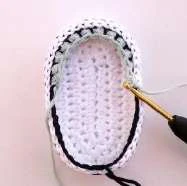
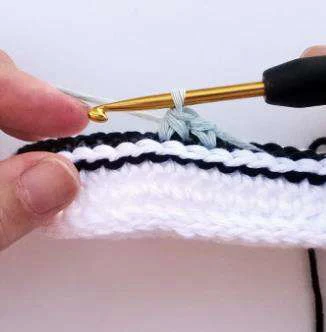
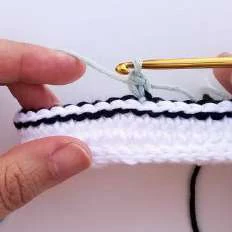
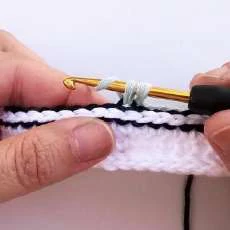
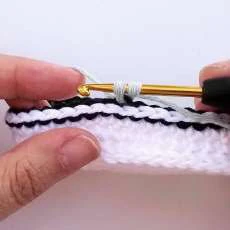
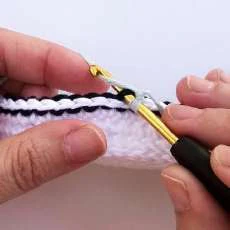
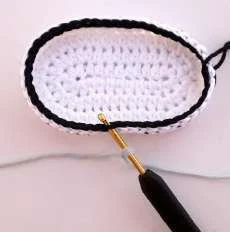
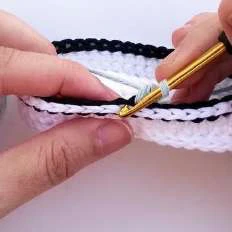
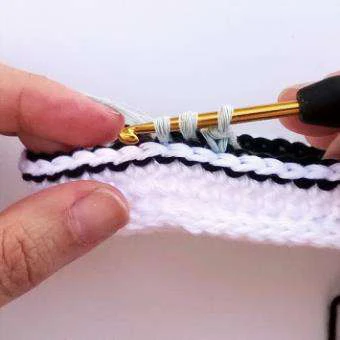
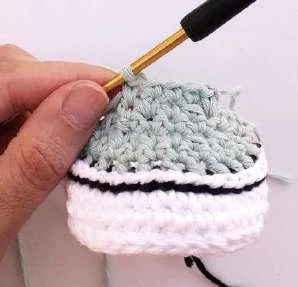
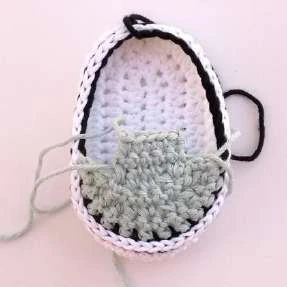
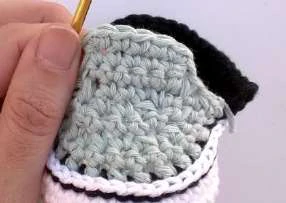
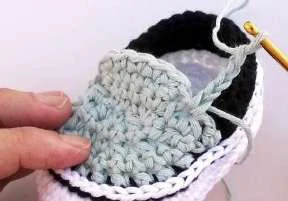
Row 1: Rejoin yarn with a standing single crochet in the indicated stitch (Photo 1) , work 4-4-5
single crochet , turn (5-5-6 sts).
The flap should be placed aligned with the center (Photo 3)
Row 2 : Ch 1, sc in same st, sc in each of the next 4-4-5 sts, turn (5-5-6 sts)
(Work Row 3 only for 0-3 and 3-6 months)
Row 3 : Ch 1, sc in same st, sc in each of the next 4 sts (5 sts). Fasten off and cut.
STEP 4: BACK
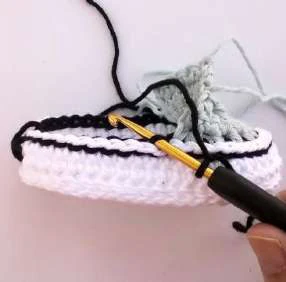
Work Row 1 front loop only over the black slip stitches.
Row 1: (Front loop only) Rejoin black yarn with a standing single crochet in the first stitch located
in the side (Photo 1) , work sc in each of the next 22-22-22 sts, turn (23-23-23 sts).
Row 2: Ch 1, sc in same st, sc in the next 7 sts, hdc in the next 2 sts, dc in the next 3 sts, hdc in
the next 2 sts, sc in the next 8 sts, turn (23-23-23 sts )
Row 3. Ch 1, slst in each of the next 23-23-23 sts. Fasten off and cut. Weave in ends.
S T E P 3 : F L A P
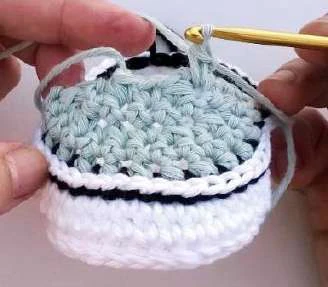
STEP 5: FLAP EDGE
Rejoin yarn with a standing single crochet in the first stitch of the front part (Photo 1) , work (sc2tog)
2 times along the first side, 2sc in the first st of the flap, sc in each of the next 3-3-4 sts, 2sc in the
last st of the flap, work again (sc2tog) 2 times along the other side, sc in last st. Fasten off and cut.
Weave in ends.
Rejoin yarn with a standing single
crochet in the fist st.
(sc2tog) x 2 times along the first side
2sc in the first st of the flap
sc in each of the next 3-3-4 sts, 2sc
in the last st of the flap
Work again (sc2tog) 2 times along
the other side, sc in last st.
STEP 6: FINISH TOUCH
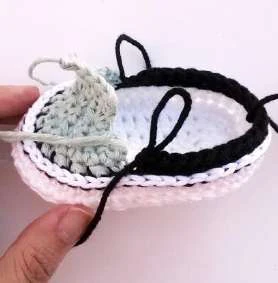
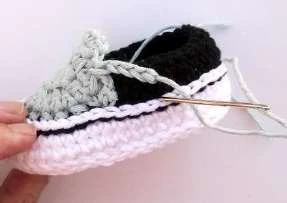
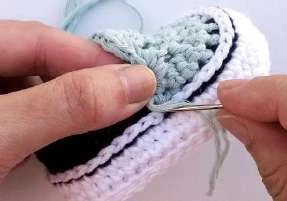
Place front part slightly over back part and sew both parts with a yarn needle making some
stitches in each side.
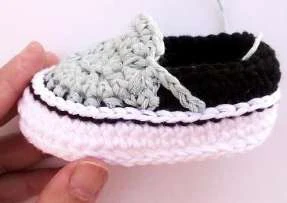
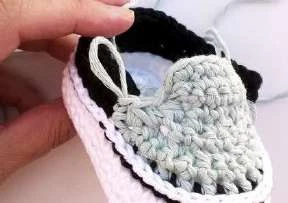
Rejoin yarn in the indicated st (photo 3) with a slst, ch5, fasten off and cut. Sew the ch-5 stripe next
to the sole .leaving a 3-sts space from this point. Fasten off and weave in ends.
Finally, repeat the same steps in the other side.
Sew front to back part with a yarn needle
Rejoin yarn in this stitch, ch 5.
Sew the ch-5 stripe next to the sole leaving a 3-sts space from this point
Repeat the same steps in the
other side
Enjoy


Recommended Digital Products
Baby Superhero Amigurumi Crochet Pattern PDF | Easy Little Green Monster Plush Toy Pattern | DIY Chibi Superhero Plushie
$4.99
Simple Playdays Baby Cardigan Crochet Pattern PDF | Easy Unisex Newborn to 4 Years Sweater with Rainbow & Bunny Appliques
$4.99
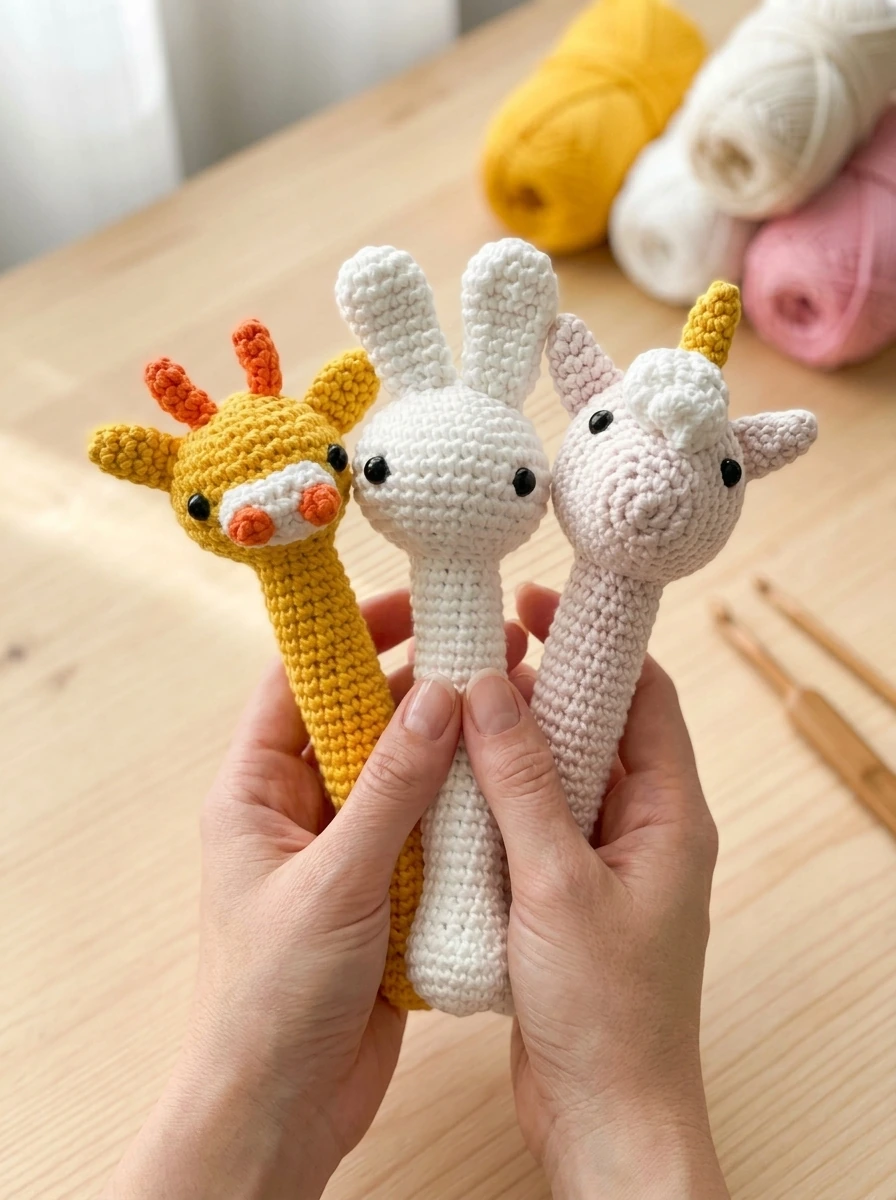
Crochet Baby Rattle PDF Pattern – Amigurumi Stick Toy Set (Bunny, Giraffe, Unicorn)
$4.99
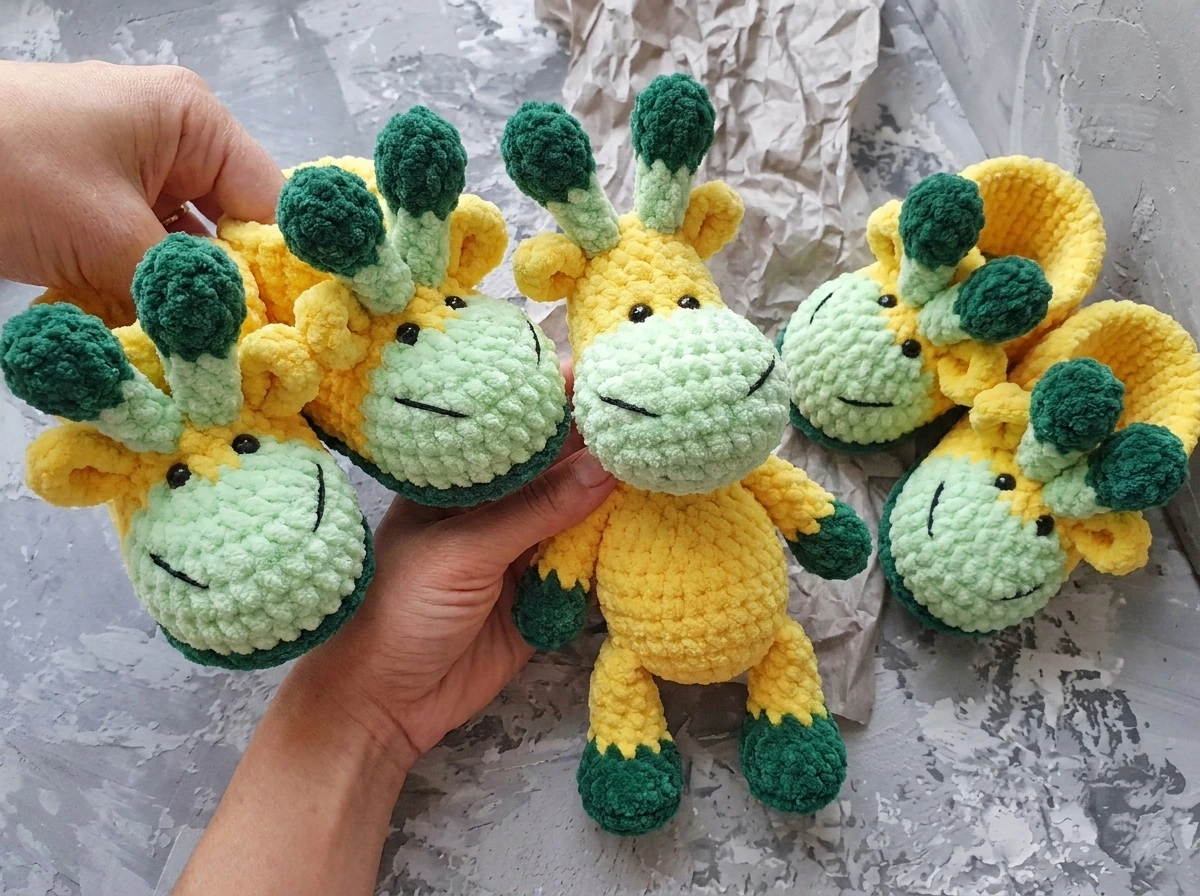
Crochet Baby Animal Booties PDF Pattern – Plush Amigurumi Shoes (Unicorn, Giraffe, Deer, Penguin)
$4.99
Get this Crochet Pattern as a Free PDF
Enter your email to receive the PDF associated with this article.
Leave a Reply