
Baby Beanie Vintage Vibes
Page | 1
Pattern Details
• Detailed instructions for a baby beanie that is ~37 cm/ ~14.5” relaxed circumference
at brim and ~13 cm/ ~5” length from brim to peak (approximately compatible with
0-3 months sizing). This is a great size to gift paired with a crochet blanket.
• Skill level: Advanced beginner to intermediate.
• Stitch terminology: US – refer to Abbreviations and Special Stitch Instructions
• Yarn: 8 ply/ Cat. 3/ DK weight, less than 50 grams/ 1.8 ounces in total.
• Hook: 4 mm/ size G.
• Gauge: First three rounds should result in circle with ~7 cm/ ~2.75“diameter and
~3.5cm/ ~1.4” depth.
with your finished projects.
1 This is an original pattern by Farrah Jane Tate. You are welcome to sell products you’ve made
using my patterns; however I ask that you refer to the exact name of my pattern somewhere in
the text of your listing. You may not copy, re-publish, sell, distribute, translate without
permission, or claim my photos or patterns as your own in any way.
Please note: If you have downloaded this pattern from a site other than Ravelry, Love Crochet,
or my personal blog, you may not have the most current version. Please visit one of the
aforementioned sites to download an official, version controlled copy.
Vintage Vibes Baby Beanie
The Crochet Fix Pattern 0121
Page | 2
Pattern Synopsis
•
The following instructions are included for a 0-3 month size beanie:
▪
Sweet and Simple pattern (one three round motif repeat);
▪
Twice as Nice pattern (two three round motif repeats); and,
▪
Matchy Mummy pattern (additional filet work with matching adult
pattern1).
•
Worked right side always, in rounds, from top downwards.
•
Composed mostly of beginner worthy DC and Ch stitches.
•
0-3 month pattern is 12 rounds in total, with an optional finishing round.
Rounds 1-5 are increase rounds. Rounds 6 onwards maintain the stitch
count (with the exception of the diamond flower motifs).
•
Basic resizing tips are included.
•
Shhhhh… There is also a sneaky Itty Bitty and Titchy pattern lurking in this
document!!!
Tips
•
For best results, use a yarn that is composed of a fibre that yields good
stitch definition (not overly fluffy).
•
Use the recommended hook size as a guide only. My tension is reasonably
loose and I have a ‘Rider’ Golden Loop style. Check if your gauge is close to
the gauge documented in the Pattern Details. If your circumference gauge
differs considerably, adjust either your tension or hook size, to meet the
gauge. You can also substitute DCs for HDCs in the pattern HDC rounds, to
add length to the beanie.
•
When making the diamond flower motif, for best results, stitch into the Ch
stitches rather than over them.
Changing Colours
Beanies can be made using yarn of one solid colour, variegated yarn, or with
blocks of different colours. Work it your way. Change colours as frequently as
preferred. Preferably join colours using a StndSt.
1 Refer to The Crochet Fix Vintage Vibes Beanie pattern (adult size).
Abbreviations
Ch = Chain
Sp = Space
SlSt = Slip Stitch
SC = Single Crochet
HDC = Half Double Crochet
DC = Double Crochet
StndSt = DC height Standing Stitch (this is the default standing stitch)
HDCStndSt = HDC height Standing Stitch (used only for HDC rounds)
2DCTogCl = 2 DCs worked together in a single stitch from the previous round.
Only one stitch results for subsequent rounds (i.e. stitch count maintained).
2DCTog = 2 DCs worked together over two consecutive stitches from the
previous round. This is a reduction stitch – two stitches replaced with one.
2HDCTog = 2 HDCs worked together over two consecutive stitches from the
previous round. Only one stitch results for subsequent rounds (i.e. stitch count
maintained). This is a reduction stitch – two stitches replaced with one.
3DCTog = 3 DCs worked together over three consecutive stitches from the
previous round. This is a reduction stitch – three stitches replaced with one.
3HDCTog = 3 HDCs worked together over three consecutive stitches from the
previous round. This is a reduction stitch – three stitches replaced with one.
Special Stitch Instructions – StndSt
StndSt2:
Ch 1 and then SC in same stitch that the SltSt was made to finish the previous
round. Ch 1 and then SC in the front loop only of the first SC made. Two SCs will
have now been made on top of one another. Your stitch should be
approximately the same height as a DC.
2 This stitch is worked at the start of a new round so that the seam is less obvious. Please note:
there are a number of ways to work this stitch and I personally vary my method depending on
the item I am making. If you already have a method that works for you, please substitute your
preferred method where this stitch is referenced in the pattern instructions.
Page | 3
HDCStndSt:
As per StndSt, except when working the second SC, use both loops of the first
SC made (instead of only a single loop). Your stitch should be approximately the
same height as a HDC.
2DCTogCl:
Yarn over hook (YOH), insert hook (IH) through stitch and draw yarn through (DYT) to
make a third loop on hook. YOH and DYT two loops on hook (so that two loops remain
on hook).YOH, IH again through same stitch as previous and DYT to make another two
loops on hook (four loops on hook in total). YOH, DYT two loops on hook (so that three
loops remain on hook). YOH, DYT all three loops on hook.
2DCTog:
Yarn over hook (YOH), insert hook (IH) through stitch and draw yarn through (DYT) to
make a third loop on hook. YOH and DYT two loops on hook (so that two loops remain
on hook).YOH, IH through next stitch and DYT (four loops on hook in total). YOH, DYT
two loops on hook (so that three loops remain on hook). YOH, DYT all three loops on
hook.
2HDCTog:
Yarn over hook (YOH), insert hook (IH) through stitch and draw yarn through (DYT) to
make a third loop on hook. YOH, IH through next stitch and DYT (five loops on hook in
total). YOH, DYT all loops on hook.
3DCTog:
Same principle as 2DCTog, except an additional stitch is worked over.
2HDCTog:
Same principle as 2HDCTog, except an additional stitch is worked over.
Pattern Instructions
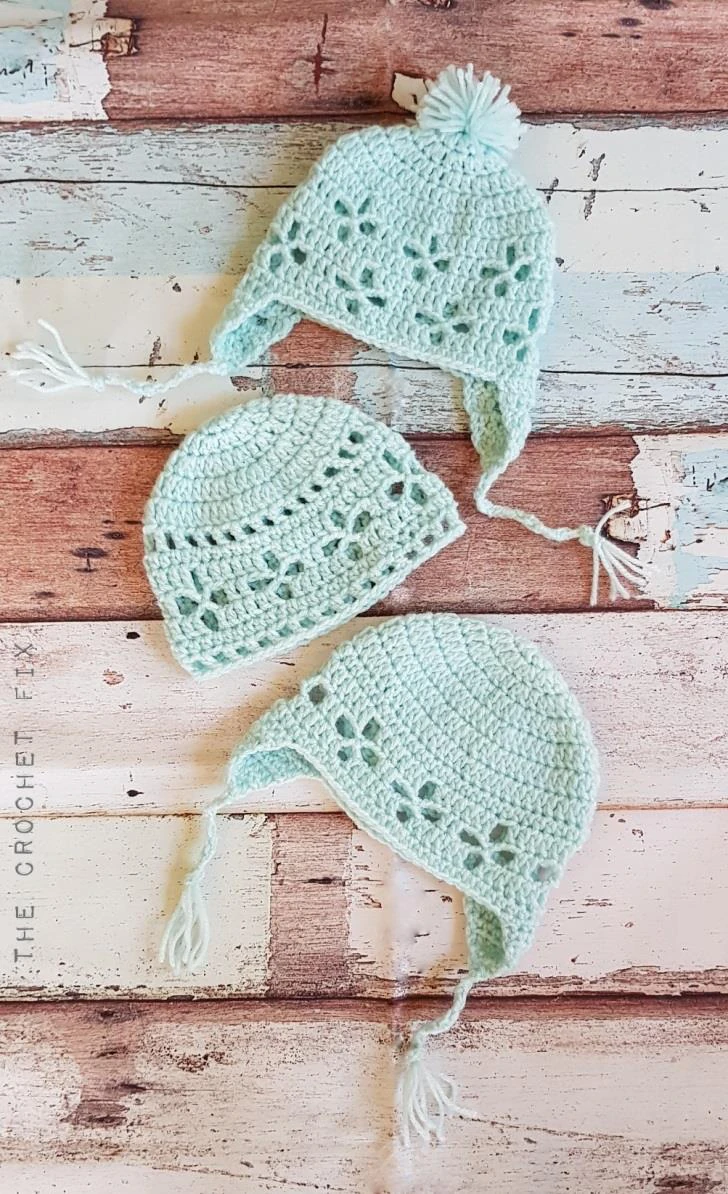
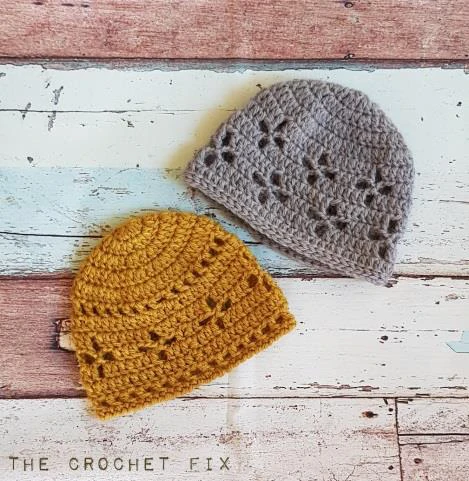
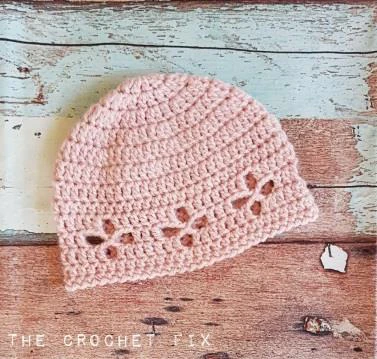
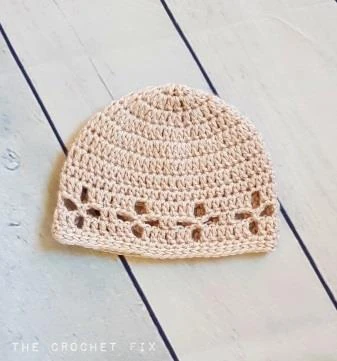
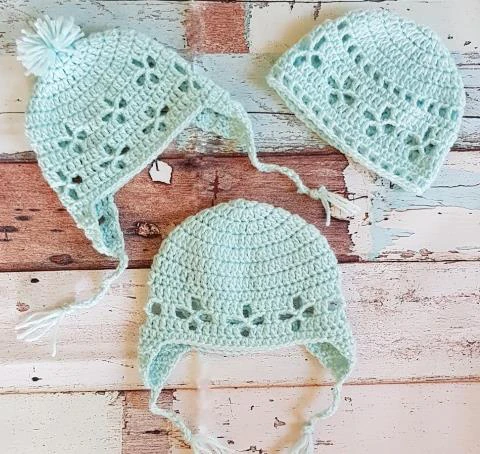
Vintage Vibes Sweet & Simple Baby Beanie (Images 1 & 2)
The Diamond Flower Motifs can be spaced either 3 DCs apart (refer to Image 1) or 2
DCs apart (refer to Image 2) in the middle round. Rounds 9-12 marked with an ‘A’ will
result in the 3 DC spacing; whereas rounds 9-12 marked with a ‘B’ will result in 2 DC
spacing. Please consistently follow either the A or B instructions.
Note: the SlSt that finishes each round does not count as a stitch, for stitch count
purposes, and as such, this stitch should not be worked into, in the subsequent round.
ROUND 1 – Make a circle. Note: Beginning Ch 2 does not count as a stitch.
1. With first colour yarn make a closed circle using either: Magic circle; or 3-4 Ch and
then SlSt into first Ch.
2. Ch 2, then DC 11 times into circle. (If using magic circle, now pull taut.)
3. SlSt into first DC (skip 2 Ch) to close circle.
(Stitch Count: 11 DC (excluding beginning 2 Ch))
ROUND 2 – Double the stitch count
1. To commence the round, StndSt3 in first DC from previous round.
2. DC in the same stitch that the StndSt was made.
3. 2 DC in each of the remaining stitches around.
4. SlSt into the StndSt from Step 1.
(Stitch Count: 22 DC (2 DCs made in each stitch from Round 1))
ROUND 3 – Increase in every second stitch
1. To commence the round, StndSt in StndSt from previous round.
2. 2 DC in the next stitch.
3. DC in the next stitch.
4. 2 DC in the next stitch.
5. Repeat Steps 3 and 4 nine times.
6. SlSt into the StndSt from Step 1.
(Stitch Count: 33 DC)
ROUND 4– Increase in every third stitch
1. To commence the round, StndSt in StndSt from previous round.
2. DC in the next stitch.
3 Or substitute with 3 Ch for StndSt and 2 Ch for HDCStndSt, if you prefer (then use this option
consistently throughout).
Page | 4
3. 2 DC in the next stitch.
4. DC in each of the next two stitches.
5. 2 DC in the next stitch.
6. Repeat Steps 4 and 5 nine times.
7. SlSt into the StndSt from Step 1.
(Stitch Count: 44 DC)
ROUND 5– Increase in every fourth stitch and the second to last stitch
1. To commence the round, StndSt in StndSt from previous round.
2. DC in each of the next two stitches.
3. 2 DC in the next stitch.
4. DC in each of the next three stitches.
5. 2 DC in the next stitch.
6. Repeat Steps 4 and 5 eight times.
7. DC in each of the next two stitches.
8. 2 DC in each of the next two stitches.
9. SlSt into the StndSt from Step 1.
(Stitch Count: 56 DC)
ROUND 6–DC in all stitches around
1. To commence the round, StndSt in StndSt from previous round.
2. DC in next and each of the remaining stitches around.
3. SlSt into the StndSt from Step 1.
(Stitch Count: 56 DC)
ROUND 7–DC in all stitches around
Repeat Round 6.
(Stitch Count: 56 DC)
ROUND 8- HDC in all stitches around
1. To commence the round, HDCStndSt in StndSt from previous round.
2. HDC in next and each of the remaining stitches around.
3. SlSt into the HDCStndSt from Step 1.
(Stitch Count: 56 HDC)
ROUND 9A– First Round Diamond Flower – 3 DC spacing
1. To commence the round, StndSt in HDCStndSt from previous round.
2. DC in each of the next three stitches.
3. Ch 3 and skip the next stitch.
4. DC in each of the next seven stitches.
5. Ch 3 and skip next stitch.
6. Repeat steps 4 and 5 five times.
7. DC in each of the next three stitches.
8. SlSt into the StndSt from Step 1.
(Stitch Count: 49 DC and 7 Ch 3 Sp)
ROUND 9B– First Round Diamond Flower – 2 DC spacing
1. To commence the round, StndSt in HDCStndSt from previous round.
2. DC in each of the next three stitches.
3. Ch 3 and skip the next stitch.
4. DC in each of the next six stitches.
5. Ch 3 and skip next stitch.
6. Repeat steps 4 and 5 six times.
7. DC in each of the next two stitches.
8. SlSt into the StndSt from Step 1.
(Stitch Count: 48 DC and 8 Ch 3 Sp)
ROUND 10A– Second Round Diamond Flower – 3 DC spacing
1. To commence the round, StndSt in StndSt from previous round.
2. DC in next stitch.
3. Ch 3 and skip the next 2 DC stitches and the first Ch (of the next previous round 3
Ch).
4. SlSt in the second (middle) Ch of the previous round 3 Ch.
5. Ch 3 and skip the third Ch of the previous round 3 Ch and the next 2 DC stitches.
6. DC in each of the next three stitches.
7. Ch 3 and skip the next 2 DC stitches and the first Ch (of the next previous round 3
Ch).
8. SlSt in the second (middle) Ch of the next previous round 3 Ch.
9. Ch 3 and skip the third Ch of the previous round 3 Ch and the next 2 DC stitches.
10. Repeat steps 6 to 9 five times.
11. DC in next (last) stitch.
12. SlSt into the StndSt from Step 1.
(Stitch Count: 21 DC and 7 [Ch 3 Sp, SlSt, Ch 3 Sp])
ROUND 10B– Second Round Diamond Flower – 2 DC spacing
1. To commence the round, StndSt in StndSt from previous round.
2. DC in next stitch.
3. Ch 3 and skip the next 2 DC stitches and the first Ch (of the next previous round 3
Ch).
4. SlSt in the second (middle) Ch of the previous round 3 Ch.
5. Ch 3 and skip the third Ch of the previous round 3 Ch and the next 2 DC stitches.
Page | 5
6. DC in each of the next two stitches.
7. Ch 3 and skip the next 2 DC stitches and the first Ch (of the next previous round 3
Ch).
8. SlSt in the second (middle) Ch of the next previous round 3 Ch.
9. Ch 3 and skip the third Ch of the previous round 3 Ch and the next 2 DC stitches.
10. Repeat steps 6 to 9 six times.
11. SlSt into the StndSt from Step 1.
(Stitch Count: 16 DC and 8 [Ch 3 Sp, SlSt, Ch 3 Sp])
ROUND 11A– Third Round Diamond Flower – 3 DC spacing
1. To commence the round, StndSt in StndSt from previous round.
2. DC in next DC.
3. DC in each of next two Ch stitches.
4. Ch 1 and skip all of: Ch, SlSt and Ch.
5. DC in each of next two Ch stitches.
6. DC in each of the next three DC stitches.
7. DC in each of next two Ch stitches.
8. Ch 1 and skip all of: Ch, SlSt and Ch.
9. DC in each of next two Ch stitches.
10. Repeat steps 6 to 9 five times.
11. DC in next (last) stitch.
12. SlSt into the StndSt from Step 1.
(Stitch Count: 49 DC and 7 Ch 1 Sp)
ROUND 11B– Third Round Diamond Flower – 2 DC spacing
1. To commence the round, StndSt in StndSt from previous round.
2. DC in next DC.
3. DC in each of next two Ch stitches.
4. Ch 1 and skip all of: Ch, SlSt and Ch.
5. DC in each of next two Ch stitches.
6. DC in each of the next two DC stitches.
7. DC in each of next two Ch stitches.
8. Ch 1 and skip all of: Ch, SlSt and Ch.
9. DC in each of next two Ch stitches.
10. Repeat steps 6 to 9 six times.
11. SlSt into the StndSt from Step 1.
(Stitch Count: 48 DC and 8 Ch 1 Sp)
ROUND 12A– HDC in all stitches around – 3 DC spacing
1. To commence the round, HDCStndSt in StndSt from previous round.
2. HDC in each of the next 3 DCs.
3. HDC over Ch Sp.
4. HDC in each of next 7 DCs.
5. HDC over Ch Sp.
6. Repeat Steps 4 and 5 five times.
7. HDC in each of the last 3 DCs.
8. SlSt into the HDCStndSt from Step 1.
(Stitch Count: 56 HDC)
ROUND 12B– HDC in all stitches around – 2 DC spacing
1. To commence the round, HDCStndSt in StndSt from previous round.
2. HDC in each of the next 3 DCs.
3. HDC over Ch Sp.
4. HDC in each of next 6 DCs.
5. HDC over Ch Sp.
6. Repeat Steps 4 and 5 six times.
7. HDC in each of the last 2 DCs.
8. SlSt into the HDCStndSt from Step 1.
(Stitch Count: 56 HDC)
SLST FINISHING ROUND (Optional)
SlSt in every stitch around. (Careful to maintain same tension as previous HDC round.)
Or, if you prefer, work a round of Crab Stitch or Spin Stitch4.
difficult to work, this is an alternative option that results in the same finish.
Page | 6
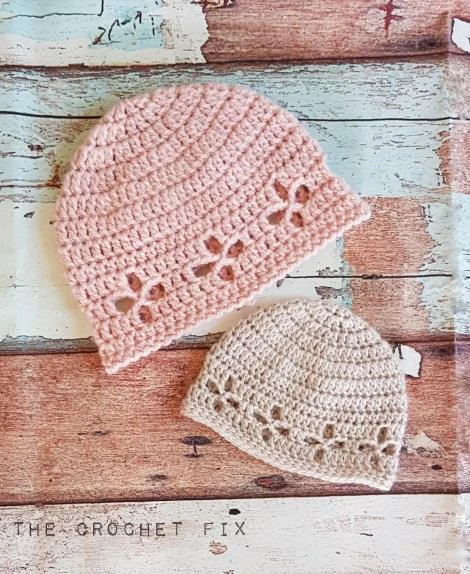
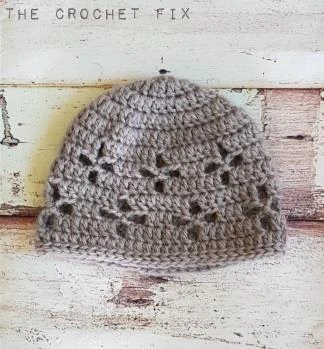
Vintage Vibes Twice as Nice Baby Beanie (Image 3)
Work the first four rounds as per Simple and Sweet pattern. Substitute the Simple and
Sweet pattern rounds 5 onwards, with the rounds detailed below.
Note: the SlSt that finishes each round does not count as a stitch, for stitch count
purposes, and as such, this stitch should not be worked into, in the subsequent round.
ROUND 5– Increase in every fourth stitch and the second to last stitch
1. To commence the round, HDCStndSt5 in StndSt from previous round.
2. HDC in each of the next two stitches.
3. 2 HDC in the next stitch.
4. HDC in each of the next three stitches.
5. 2 HDC in the next stitch.
6. Repeat Steps 4 and 5 eight times.
7. HDC in each of the next two stitches.
8. 2 HDC in each of the next two stitches.
9. SlSt into the HDCStndSt from Step 1.
(Stitch Count: 56 HDC)
ROUND 6– First Round Diamond Flower
1. To commence the round, StndSt in HDCStndSt from previous round.
2. DC in each of the next three stitches.
3. Ch 3 and skip the next stitch.
4. DC in each of the next seven stitches.
5. Ch 3 and skip next stitch.
6. Repeat steps 4 and 5 five times.
7. DC in each of the next three stitches.
8. SlSt into the StndSt from Step 1.
(Stitch Count: 49 DC and 7 Ch 3 Sp)
ROUND 7– Second Round Diamond Flower
1. To commence the round, StndSt in StndSt from previous round.
2. DC in next stitch.
3. Ch 3 and skip the next 2 DC stitches and the first Ch (of the next previous round 3
Ch).
4. SlSt in the second (middle) Ch of the previous round 3 Ch.
5. Ch 3 and skip the third Ch of the previous round 3 Ch and the next 2 DC stitches.
5 Or substitute with 3 Ch for StndSt and 2 Ch for HDCStndSt, if you prefer (then use this option
consistently throughout).
6. DC in each of the next three stitches.
7. Ch 3 and skip the next 2 DC stitches and the first Ch (of the next previous round 3
Ch).
8. SlSt in the second (middle) Ch of the next previous round 3 Ch.
9. Ch 3 and skip the third Ch of the previous round 3 Ch and the next 2 DC stitches.
10. Repeat steps 6 to 9 five times.
11. DC in next (last) stitch.
12. SlSt into the StndSt from Step 1.
(Stitch Count: 21 DC and 7 [Ch 3 Sp, SlSt, Ch 3 Sp])
ROUND 8– Third Round Diamond Flower
1. To commence the round, StndSt in StndSt from previous round.
2. DC in next DC.
3. DC in each of next two Ch stitches.
4. Ch 1 and skip all of: Ch, SlSt and Ch.
5. DC in each of next two Ch stitches.
6. DC in each of the next three DC stitches.
7. DC in each of next two Ch stitches.
8. Ch 1 and skip all of: Ch, SlSt and Ch.
9. DC in each of next two Ch stitches.
10. Repeat steps 6 to 9 five times.
11. DC in next (last) stitch.
12. SlSt into the StndSt from Step 1.
(Stitch Count: 49 DC and 7 Ch 1 Sp)
ROUND 9– First Round Diamond Flower Offset
1. To commence the round, SlSt in next stitch and then StndSt in the same stitch the
SlSt was worked.
2. DC in each of the next six stitches.
3. Ch 3 and skip the next stitch.
4. DC in each of the next seven stitches.
5. Ch 3 and skip next stitch.
6. Repeat steps 4 and 5 five times.
7. SlSt into the StndSt from Step 1.
(Stitch Count: 49 DC and 7 Ch 3 Sp)
ROUND 10– Second Round Diamond Flower Offset
1. To commence the round, SlSt in the next two stitches and then StndSt in the same
stitch the second SlSt was worked.
2. DC in the next two stitches.
Page | 7
3. Ch 3 and skip the next 2 DC stitches and the first Ch (of the next previous round 3
Ch).
4. SlSt in the second (middle) Ch of the previous round 3 Ch.
5. Ch 3 and skip the third Ch of the previous round 3 Ch and the next 2 DC stitches.
6. DC in each of the next three stitches.
7. Ch 3 and skip the next 2 DC stitches and the first Ch (of the next previous round 3
Ch).
8. SlSt in the second (middle) Ch of the next previous round 3 Ch.
9. Ch 3 and skip the third Ch of the previous round 3 Ch and the next 2 DC stitches.
10. Repeat steps 6 to 9 five times.
11. SlSt into the StndSt from Step 1.
(Stitch Count: 21 DC and 7 [Ch 3 Sp, SlSt, Ch 3 Sp])
ROUND 11– Third Round Diamond Flower Offset
1. To commence the round, StndSt in StndSt from previous round.
2. DC in the next two DCs.
3. DC in each of next two Ch stitches.
4. Ch 1 and skip all of: Ch, SlSt and Ch.
5. DC in each of next two Ch stitches.
6. DC in each of the next three DC stitches.
7. DC in each of next two Ch stitches.
8. Ch 1 and skip all of: Ch, SlSt and Ch.
9. DC in each of next two Ch stitches.
10. Repeat steps 6 to 9 five times.
11. SlSt into the StndSt from Step 1.
(Stitch Count: 49 DC and 7 Ch 1 Sp)
ROUND 12– HDC in all stitches around
1. To commence the round, HDCStndSt in StndSt from previous round.
2. HDC in each of the next 4 DCs.
3. HDC over Ch Sp.
4. HDC in each of next 7 DCs.
5. HDC over Ch Sp.
6. Repeat Steps 4 and 5 five times.
7. HDC in each of the last 2 DCs.
8. SlSt into the HDCStndSt from Step 1.
(Stitch Count: 56 HDC)
SLST FINISHING ROUND (Optional)
SlSt in every stitch around. (Careful to maintain same tension as previous HDC round.)
Or, if you prefer, work a round of Crab Stitch or Spin Stitch6.
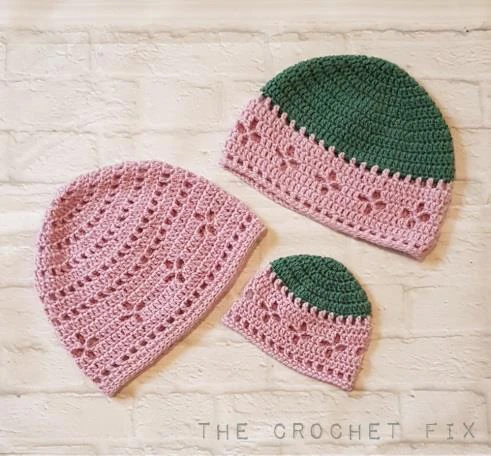
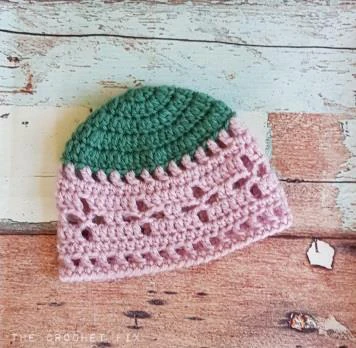
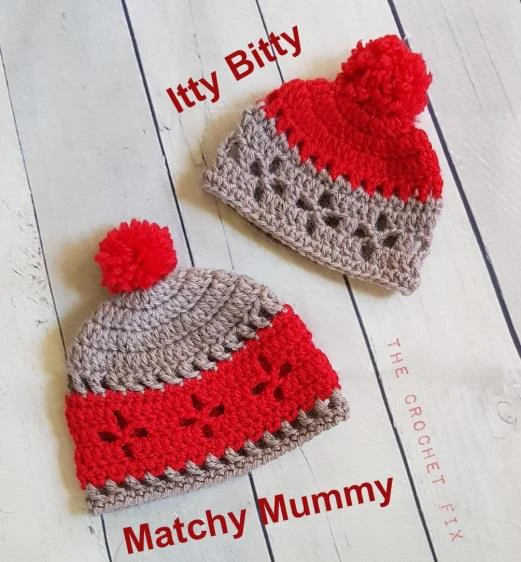
Vintage Vibes Matchy Mummy Baby Beanie (Image 4)
This beanie matches in design with the adult Vintage Vibes Beanie (‘Basic Beanie
Pattern’ variant). The instructions below provide spacing for 3 DCs apart; if preferred,
the motifs can be spaced 2 DCs apart (as per Sweet & Simple pattern).
Note: the SlSt that finishes each round does not count as a stitch, for stitch count
purposes, and as such, this stitch should not be worked into, in the subsequent round.
ROUND 1 – Make a circle. Note: Beginning Ch 2 does not count as a stitch.
1. With first colour yarn make a closed circle using either: Magic circle; or 3-4 Ch and
then SlSt into first Ch.
2. Ch 2, then DC 11 times into circle. (If using magic circle, now pull taut.)
3. SlSt into first DC (skip 2 Ch) to close circle.
(Stitch Count: 11 DC (excluding beginning 2 Ch))
ROUND 2 – Double the stitch count
1. To commence the round, StndSt7 in first DC from previous round.
2. DC in the same stitch that the StndSt was made.
3. 2 DC in each of the remaining stitches around.
4. SlSt into the StndSt from Step 1.
(Stitch Count: 22 DC (2 DCs made in each stitch from Round 1))
ROUND 3 – Increase in every second stitch
1. To commence the round, StndSt in StndSt from previous round.
2. 2 DC in the next stitch.
3. DC in the next stitch.
4. 2 DC in the next stitch.
5. Repeat Steps 3 and 4 nine times.
6. SlSt into the StndSt from Step 1.
(Stitch Count: 33 DC)
difficult to work, this is an alternative option that results in the same finish.
7 Or substitute with 3 Ch for StndSt and 2 Ch for HDCStndSt, if you prefer (then use this option
consistently throughout).
Page | 8
ROUND 4– Increase in every third stitch
1. To commence the round, StndSt in StndSt from previous round.
2. DC in the next stitch.
3. 2 DC in the next stitch.
4. DC in each of the next two stitches.
5. 2 DC in the next stitch.
6. Repeat Steps 4 and 5 nine times.
7. SlSt into the StndSt from Step 1.
(Stitch Count: 44 DC)
ROUND 5– Increase in every fourth stitch and the second to last stitch
1. To commence the round, StndSt in StndSt from previous round.
2. DC in each of the next two stitches.
3. 2 DC in the next stitch.
4. DC in each of the next three stitches.
5. 2 DC in the next stitch.
6. Repeat Steps 4 and 5 eight times.
7. DC in each of the next two stitches.
8. 2 DC in each of the next two stitches.
9. SlSt into the StndSt from Step 1.
(Stitch Count: 56 DC)
ROUND 6- Ch 1 Sp for every other stitch
1. To commence the round, StndSt in StndSt from previous round.
2. Ch 1 and skip the next stitch.
3. DC in the next stitch.
4. Ch 1 and skip the next stitch.
5. Repeat Steps 3 and 4, 26 times.
6. SlSt into the StndSt from Step 1.
(Stitch Count: 28 DC and 28 Ch 1 Sp)
ROUND 7–HDC in all stitches around
1. To commence the round, HDCStndSt in StndSt from previous round.
2. HDC over next Ch Sp.
3. HDC in next DC.
4. HDC over next Ch Sp.
5. Repeat Steps 3 and 4, 26 times.
6. SlSt into the HDCStndSt from Step 1.
(Stitch Count: 56 HDC)
ROUND 8– First Round Diamond Flower
1. To commence the round, StndSt in HDCStndSt from previous round.
2. DC in each of the next three stitches.
3. Ch 3 and skip the next stitch.
4. DC in each of the next seven stitches.
5. Ch 3 and skip next stitch.
6. Repeat steps 4 and 5 five times.
7. DC in each of the next three stitches.
8. SlSt into the StndSt from Step 1.
(Stitch Count: 49 DC and 7 Ch 3 Sp)
ROUND 9– Second Round Diamond Flower
1. To commence the round, StndSt in StndSt from previous round.
2. DC in next stitch.
3. Ch 3 and skip the next 2 DC stitches and the first Ch (of the next previous round 3
Ch).
4. SlSt in the second (middle) Ch of the previous round 3 Ch.
5. Ch 3 and skip the third Ch of the previous round 3 Ch and the next 2 DC stitches.
6. DC in each of the next three stitches.
7. Ch 3 and skip the next 2 DC stitches and the first Ch (of the next previous round 3
Ch).
8. SlSt in the second (middle) Ch of the next previous round 3 Ch.
9. Ch 3 and skip the third Ch of the previous round 3 Ch and the next 2 DC stitches.
10. Repeat steps 6 to 9 five times.
11. DC in next (last) stitch.
12. SlSt into the StndSt from Step 1.
(Stitch Count: 21 DC and 7 [Ch 3 Sp, SlSt, Ch 3 Sp])
ROUND 10– Third Round Diamond Flower
1. To commence the round, StndSt in StndSt from previous round.
2. DC in next DC.
3. DC in each of next two Ch stitches.
4. Ch 1 and skip all of: Ch, SlSt and Ch.
5. DC in each of next two Ch stitches.
6. DC in each of the next three DC stitches.
7. DC in each of next two Ch stitches.
8. Ch 1 and skip all of: Ch, SlSt and Ch.
9. DC in each of next two Ch stitches.
10. Repeat steps 6 to 9 five times.
11. DC in next (last) stitch.
Page | 9
12. SlSt into the StndSt from Step 1.
(Stitch Count: 49 DC and 7 Ch 1 Sp)
ROUND 11 – HDC in all stitches around
1. To commence the round, HDCStndSt in StndSt from previous round.
2. HDC in each of the next 3 DCs.
3. HDC over Ch Sp.
4. HDC in each of next 7 DCs.
5. HDC over Ch Sp.
6. Repeat Steps 4 and 5 five times.
7. HDC in each of the last 3 DCs.
8. SlSt into the HDCStndSt from Step 1.
(Stitch Count: 56 HDC)
ROUND 12- Ch 1 Sp for every other stitch
1. To commence the round, StndSt in HDCStndSt from previous round.
2. Ch 1 and skip the next stitch.
3. DC in the next stitch.
4. Ch 1 and skip the next stitch.
5. Repeat Steps 3 and 4, 26 times.
6. SlSt into the StndSt from Step 1.
(Stitch Count: 28 DC and 28 Ch 1 Sp)
SLST FINISHING ROUND (Optional)
SlSt in every stitch around. (Careful to maintain same tension as previous DC round.)
Or, if you prefer, work a round of Crab Stitch or Spin Stitch8.
difficult to work, this is an alternative option that results in the same finish.
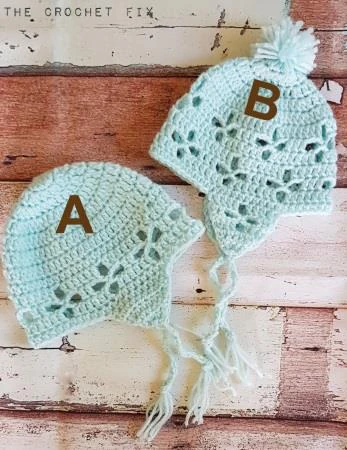
Adding Earflaps – brief instructions (Images 5 & 6)
Smaller solid earflap (Image 5A):
Place stitch markers 11 stitches apart in a position as per earflaps shown in Image 6.
Make two earflaps as follows:
Row 1: Commence earflap with an HDCStndSt in the first stitch, and then work a HDC in
each of the following 10 stitches. (11 stitches)
Row 2: Ch 1, turn work, 2HDCTog over the first two HDCs (reduction stitch), HDC in
each subsequent stitch until reaching the last two stitches, and then 2HDCTog over the
last two HDCs (reduction stitch). (9 stitches, excluding the Ch 1 and including the two
reduction stitches at the beginning and end of row)
Rows 3 – 5: Repeat Step 2, three times. A triangle should be forming, with each row
reducing by two stitches. (3 stitches should remain at the end of Row 5, excluding 1 Ch)
Row 6: Ch 1, turn work, and then 3HDCTog over the 3 DCs from the previous row.
Row 7: Ch1, turn work, and then SC in 3HDCTog from the previous row.
Earflap Chain: Turn work, and then work multiple HDCStndSt, to make a chunky chain
that is the length of your preference. Chunky knot the chain, or if you prefer, first make
a tassel before knotting the chain.
Larger motif earflap (Image 5B):
Place stitch markers 11 stitches apart in a position as per earflaps shown in Image 6.
Make two earflaps as follows:
Row 1: Commence earflap with a StndSt in the first stitch, work a DC in each of the
following 4 stitches, Ch 3 and skip a stitch, and then work a DC in each of the following
5 stitches. (10 DC and a Ch 3 Sp)
Row 2: Ch 2, turn work, 2DCTog over the first two DCs (reduction stitch), DC in next
stitch, Ch 3 and SlSt into middle Ch stitch of the previous round Ch 3, Ch 3 and then DC
into third to last stitch, 2DCTog over the last two stitches (reduction stitch). (4 DC and a
Ch 3 Sp – SlSt – Ch 3 Sp sequence)
Row 3: Ch 2, turn work, 2DCTog over the first two DCs (reduction stitch), DC in each of
the first two Ch stitches, Ch 1 and (skipping Ch, SlSt, Ch) DC in the last two Ch stitches,
and then 2DCTog over the last two DCs (reduction stitch). (6 DC and a Ch 1 Sp)
Row 4: Ch 2, turn work, 2DCTog over the first two DCs (reduction stitch), DC in each
subsequent stitch until reaching the two last stitches, and then 2DCTog over the last
two stitches (reduction stitch). (5 DC)
Row 5: Ch 1, turn work, 2HDCTog over the first two stitches (reduction stitch), HDC in
next stitch, and then 2HDCTog over the last two stitches (reduction stitch). (3 HDC)
Row 6: Ch 1, turn work, and then 3HDCTog over the 3 DCs from the previous row.
Row 7: Ch1, turn work, and then SC in 3HDCTog from the previous row.
Page | 10
Earflap Chain: as per Smaller Solid Earflap.
Basic Resizing Tips
For an easy and minor resize, adjust one of yarn ply/ hook size/ tension, and then work
a 3 round swatch. For example, reducing a one or more hook sizes, or tightening your
tension, should be sufficient to achieve a NB size beanie.
You can approximately estimate the finished circumference by using the following
formula: (Pattern Gauge Circumference/ Pattern Gauge 3rd Round Diameter) * Your 3rd
Round Diameter (n). E.g. (37cm/7cm) * n cm – if n is 6.5 cm then finished circumference
will be approximately 32 cm.
Changing to 4-5ply (Fingering to Sport Weight/ Cat. 1 to 2) baby yarn and using a
smaller hook size will result in a preemie to small NB beanie.
Changing to 10ply (Worsted Weight/ Cat. 4) or even thicker yarn and using a larger
hook size will result in a larger beanie (3+ months or 6+ months, depending on the
hook size used). For larger beanies you may wish to substitute HDC stitches for DC
stitches (if additional length is preferred).
Approximate required beanie circumference for resizing (baby):
Age
NB
3-6 months
6-9 months
Circumference
Centimetres (cm)
33-35.5
40-43
43-44
Inches (“)
13-14
15.5-17
17.5-18
If making a beanie for your own baby, I recommend you measure your baby’s head
circumference to achieve the perfect fit.
To adjust this pattern for larger baby and toddler/ child size:
1. Chain a circle that fits your child’s head circumference in its relaxed state, or ask
for the measurement of the child’s head circumference and then determine the
relaxed number of chains for this measurement. Record the chain number.
2. Determine the closest total chain stitch count that is divisible by either 7 or 8.
Record the chain number.
3. Determine the most appropriate starting stitch count (in a magic ring) of 11 or 12
for a baby/toddler, or 10 or 11 for an older child, which will most closely allow you
to reach this maximum circumference stitch count.
For example:
1. Head circumference measure is 66 chains around relaxed.
2. Use 64 chains as the finished circumference. 64 divided by 8 results in motifs
around with 3 DC spacing between motifs.
3. Commence with 11 stitches in a magic circle and work 5 standard beanie increase
rounds in total. In the fifth increase round (where you are increasing in every fifth
stitch) omit two of the increase stitches (i.e so that you achieve 66-2 = 64 stitches).
Ensure the omitted increase stitches are evenly spaced around the beanie. You will
also likely need to add another 1-2 rounds to the baby pattern to achieve the
appropriate length. Add these before you commence the diamond flower motif
rounds.
If you make a toddler or child sized beanie, please create a project on Ravelry, with
notes, so others can see the initial magic circle count and increases that you have used.
Pattern support is available via the following social media platforms:
•
•
•
Ravelry: thecrochetfix
•
UChF_xzxo5jju4KdzBFHntBA
Please help keep my patterns free by following me on the various social media
platforms above and subscribing to my feeds.
Pattern Versioning
Version
Date
Comments
0.1
14/05/2019
Draft Version
0.2
16/05/2019
Corrections/ enhancements
0.3
20/05/2019
Enhancements from testing/ inclusion of earflap instructions.
0.4
21/05/2019
Further corrections and inclusion of additional preemie sizes.
0.5
17/10/2019
Correction to stitch counts (Matchy Mummy R11 and Twice as
Nice R12)
0.6
05/02/2020
Added ‘SC’ to Abbreviations.
Page | 11
Acknowledgements
Thanks to the fabulous testers for their effort,
commitment to the testing process, attention to
detail, and helpful feedback provided. A big
shout out to: Alysha B; Dragonfly Creations; and,
all the adult sized Vintage Vibes Beanie testers
(on which this pattern was based).
.
Beanie Images
Image 1
Image 2
Image 3
Image 4
Image 5
Image 6
Image 7
Image 8
Page | 12
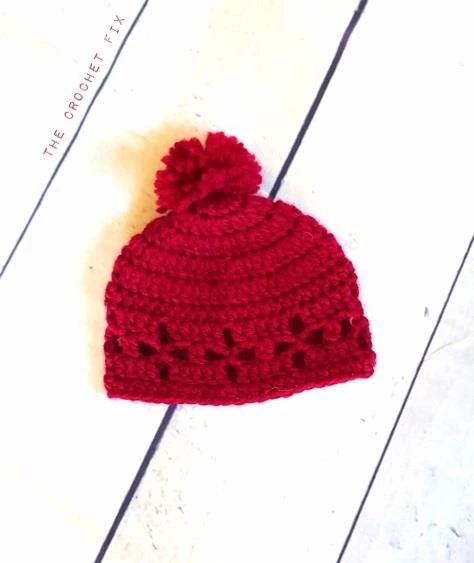
BONUS: Vintage Vibes Itty Bitty Baby Beanie (Image 7)
Applying a gauge with 8ply/ DK weight yarn, as per Pattern Details, will result in a
beanie that is ~28.5cm/ ~11.2” in circumference and ~9.5cm/ ~3.7” in height. This is a
mid-term preemie size. Go up a hook size and loosen tension, or use 10 ply/ Worsted
weight yarn to make this beanie as late-term preemie size. Go down a hook size and
tighten tension to make this beanie a little smaller. Use a thinner yarn, or try the Titchy
pattern for a much smaller preemie size.
Note: the SlSt that finishes each round does not count as a stitch, for stitch count
purposes, and as such, this stitch should not be worked into, in the subsequent round.
ROUND 1 – Make a circle. Note: Beginning Ch 2 does not count as a stitch.
1. With first colour yarn make a closed circle using either: Magic circle; or 3-4 Ch and
then SlSt into first Ch.
2. Ch 2, then DC 12 times into circle. (If using magic circle, now pull taut.)
3. SlSt into first DC (skip 2 Ch) to close circle.
(Stitch Count: 12 DC (excluding beginning 2 Ch))
ROUND 2 – Double the stitch count
1. To commence the round, StndSt9 in first DC from previous round.
2. DC in the same stitch that the StndSt was made.
3. 2 DC in each of the remaining stitches around.
4. SlSt into the StndSt from Step 1.
(Stitch Count: 24 DC (2 DCs made in each stitch from Round 1))
ROUND 3 – Increase in every second stitch
1. To commence the round, StndSt in previous round StndSt.
2. 2 DC in the next stitch.
3. DC in the next stitch.
4. 2 DC in the next stitch.
5. Repeat Steps 3 and 4 ten times.
6. SlSt into the StndSt from Step 1.
(Stitch Count: 36 DC)
ROUND 4– Increase in every third stitch
1. To commence the round, StndSt in previous round StndSt.
2. DC in the next stitch.
9 Or substitute with 3 Ch for StndSt and 2 Ch for HDCStndSt if you prefer (then use this option consistently
throughout).
3. 2 DC in the next stitch.
4. DC in each of the next two stitches.
5. 2 DC in the next stitch.
6. Repeat Steps 4 and 5 ten times.
7. SlSt into the StndSt from Step 1.
(Stitch Count: 48 DC)
ROUND 5- Ch 1 Sp for every other stitch
1. To commence the round, StndSt in previous round StndSt.
2. Ch 1 and skip the next stitch.
3. DC in the next stitch.
4. Ch 1 and skip the next stitch.
5. Repeat Steps 3 and 4, 22 times.
6. SlSt into the StndSt from Step 1.
(Stitch Count: 24 DC and 24 Ch 1 Sp)
ROUND 6–HDC in all stitches around
1. To commence the round, HDCStndSt in previous round StndSt.
2. HDC over next Ch Sp.
3. HDC in next DC.
4. HDC over next Ch Sp.
5. Repeat Steps 3 and 4, 22 times.
6. SlSt into the HDCStndSt from Step 1.
(Stitch Count: 48 HDC)
ROUND 7– First Round Diamond Flower
1. To commence the round, StndSt in previous round HDCStndSt.
2. DC in each of the next two stitches.
3. Ch 3 and skip the next stitch.
4. DC in each of the next five stitches.
5. Ch 3 and skip next stitch.
6. Repeat steps 4 and 5 six times.
7. DC in each of the next two stitches.
8. SlSt into the StndSt from Step 1.
(Stitch Count: 40 DC and 8 Ch 3 Sp)
ROUND 8– Second Round Diamond Flower
1. To commence the round, HDCStndSt and DC in previous round StndSt (counts as
first 2DCTogCl).
2. Ch 3 and skip the next 2 DC stitches and the first Ch (of the next previous round 3
Ch).
Page | 13
3. SlSt in the second (middle) Ch of the previous round 3 Ch.
4. Ch 3 and skip the third Ch of the previous round 3 Ch and the next 2 DC stitches.
5. 2DCTogCl in the next stitch.
6. Ch 3 and skip the next 2 DC stitches and the first Ch (of the next previous round 3
Ch).
7. SlSt in the second (middle) Ch of the next previous round 3 Ch.
8. Ch 3 and skip the third Ch of the previous round 3 Ch and the next 2 DC stitches.
9. Repeat steps 5 to 8 six times.
10. SlSt into the DC from Step 1 (i.e. skip HDCStndSt).
(Stitch Count: 8 2DCTogCl and 8 [Ch 3 Sp, SlSt, Ch 3 Sp])
ROUND 9– Third Round Diamond Flower
1. To commence the round, StndSt in first DC from previous round.
2. DC in each of next two Ch stitches.
3. Ch 1 and skip all of: Ch, SlSt and Ch.
4. DC in each of next two Ch stitches.
5. DC in the next 2DCTogCl stitch.
6. DC in each of next two Ch stitches.
7. Ch 1 and skip all of: Ch, SlSt and Ch.
8. DC in each of next two Ch stitches.
9. Repeat steps 5 to 8 six times.
10. SlSt into the StndSt from Step 1.
(Stitch Count: 40 DC and 8 Ch 1 Sp)
ROUND 10 – HDC in all stitches around
1. To commence the round, HDCStndSt in previous round StndSt
2. HDC in each of the next 2 DCs.
3. HDC over Ch Sp.
4. HDC in each of next 5 DCs.
5. HDC over Ch Sp.
6. Repeat Steps 4 and 5 six times.
7. HDC in each of the last 2 DCs.
8. SlSt into the HDCStndSt from Step 1.
(Stitch Count: 48 HDC)
SLST FINISHING ROUND (Optional)
SlSt in every stitch around. (Careful to maintain same tension as previous DC round.)
Or, if you prefer, work a round of Crab Stitch or Spin Stitch10.
Solid except for motif option (Image 8)
Work Round 5, after initial StndSt, as DCs in every stitch around.
Work Round 6, after initial HDCStndSt, as HDCs in every stitch around.
BONUS: Vintage Vibes Titchy Baby Beanie
You asked… so please find brief instructions for working smaller preemie beanies in
8py/ DK weight yarn specifically. These could also be worked in soft 10 ply for mid to
late term preemie beanies. Gauge as previous. If you need more detailed instructions
for these, please let me know and I will incorporate these.
~25 cm/ ~9.8” circumference
Rounds 1-3: As per Itty Bitty pattern. (36 DC after Round 3)
Round 4: StndSt, then DC in each of the next 4 stitches, then 2 DC in next stitch, *then
DC in each of the next five stitches, then 2 DC in next stitch*. Repeat *sequence* 4
times, and then SlSt into StndSt. (42 DC)
Round 5: HDCStndSt, then HDC all around, and then SlSt into HDCStndSt. (42 DC)
Rounds 6-8: As per Itty Bitty pattern Round 7-9, except repeat 5 times instead of 6.
Round 9: HDCStndSt, then HDC all around (including over Ch 1 spaces), and then SlSt
into HDCStndSt. (42 DC)
Note: If a shorter length beanie is required, substitute Single Crochet (SC) stitches for
HDC stitches in rounds 5 and 9.
~23cm/ ~9” circumference
Rounds 1-3: As per Itty Bitty pattern. (36 DC after Round 3)
Round 4: HDCStndSt, then HDC all around, and then SlSt into HDCStndSt. (36 HDC)
Rounds 5-7: As per Itty Bitty pattern Round 7-9, except repeat 4 times instead of 6.
Round 8: HDCStndSt, then HDC all around (including over Ch 1 spaces), and then SlSt
into HDCStndSt. (35 HDC)
Note: If a shorter length beanie is required, substitute Single Crochet (SC) stitches for
HDC stitches in rounds 4 and 8.
difficult to work, this is an alternative option that results in the same finish.
Recommended Digital Products
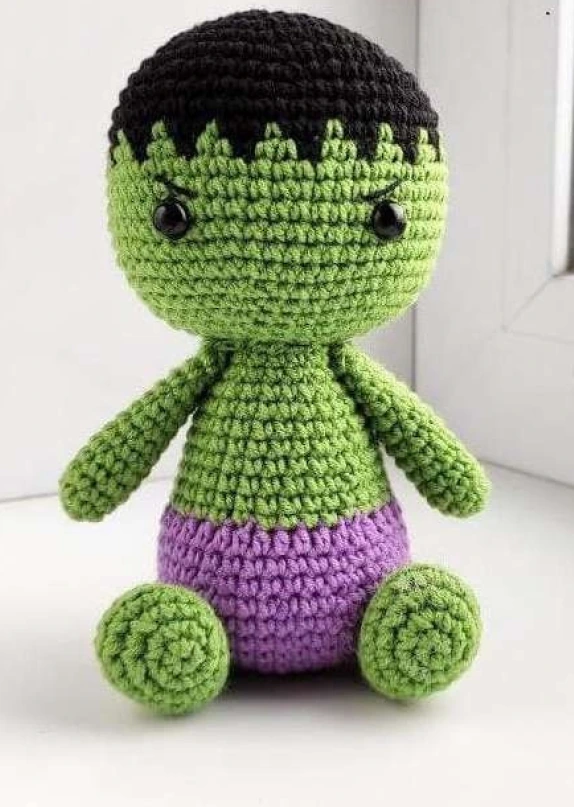
Baby Superhero Amigurumi Crochet Pattern PDF | Easy Little Green Monster Plush Toy Pattern | DIY Chibi Superhero Plushie
$4.99
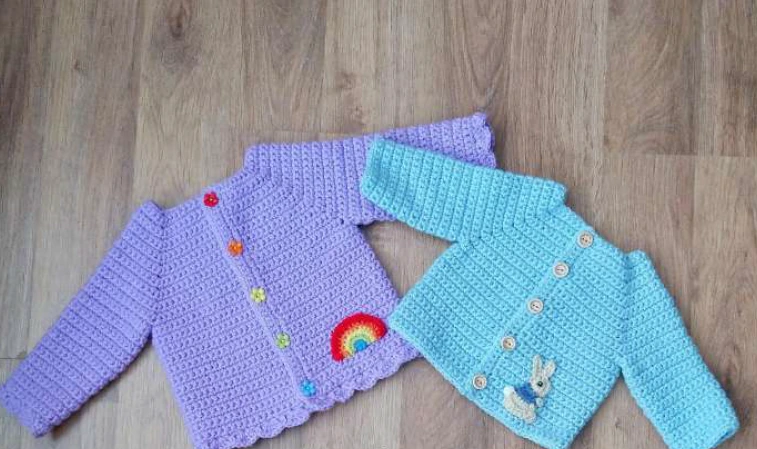
Simple Playdays Baby Cardigan Crochet Pattern PDF | Easy Unisex Newborn to 4 Years Sweater with Rainbow & Bunny Appliques
$4.99
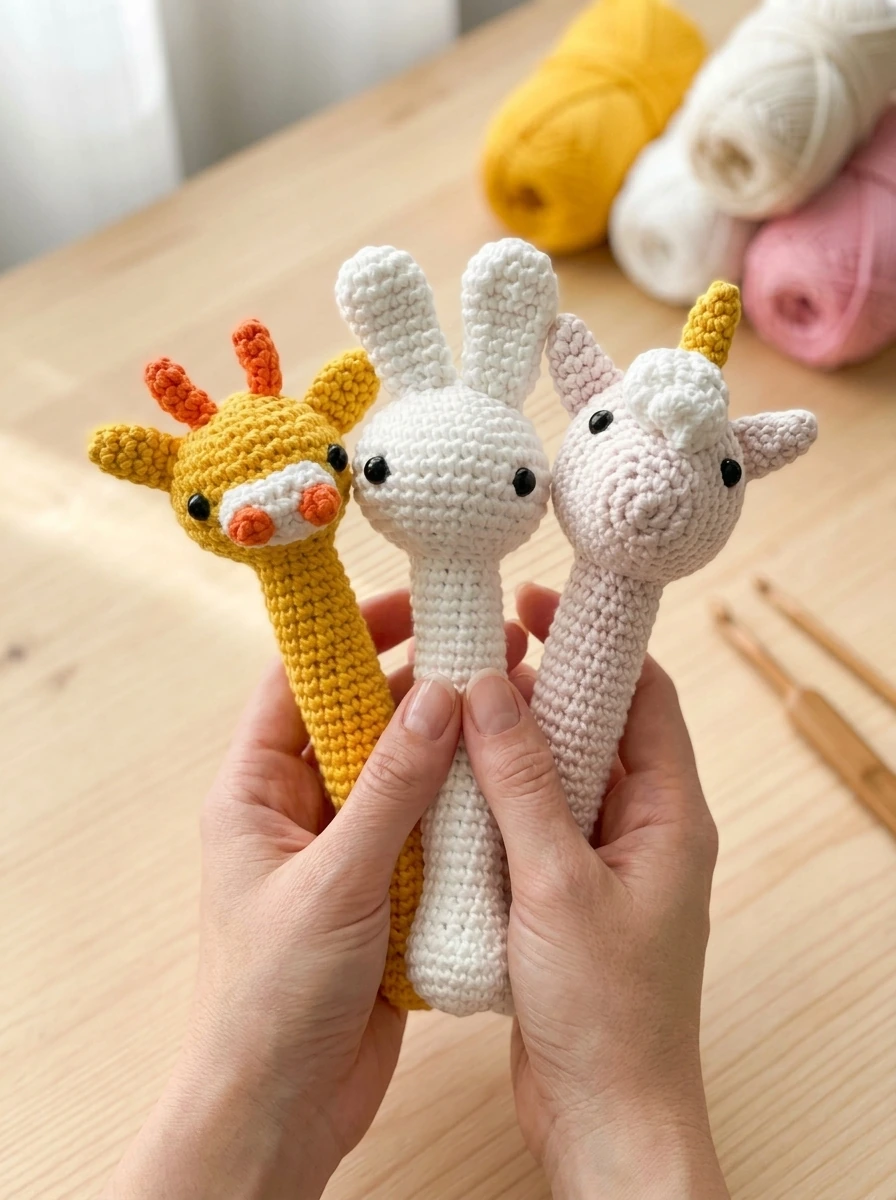
Crochet Baby Rattle PDF Pattern – Amigurumi Stick Toy Set (Bunny, Giraffe, Unicorn)
$4.99
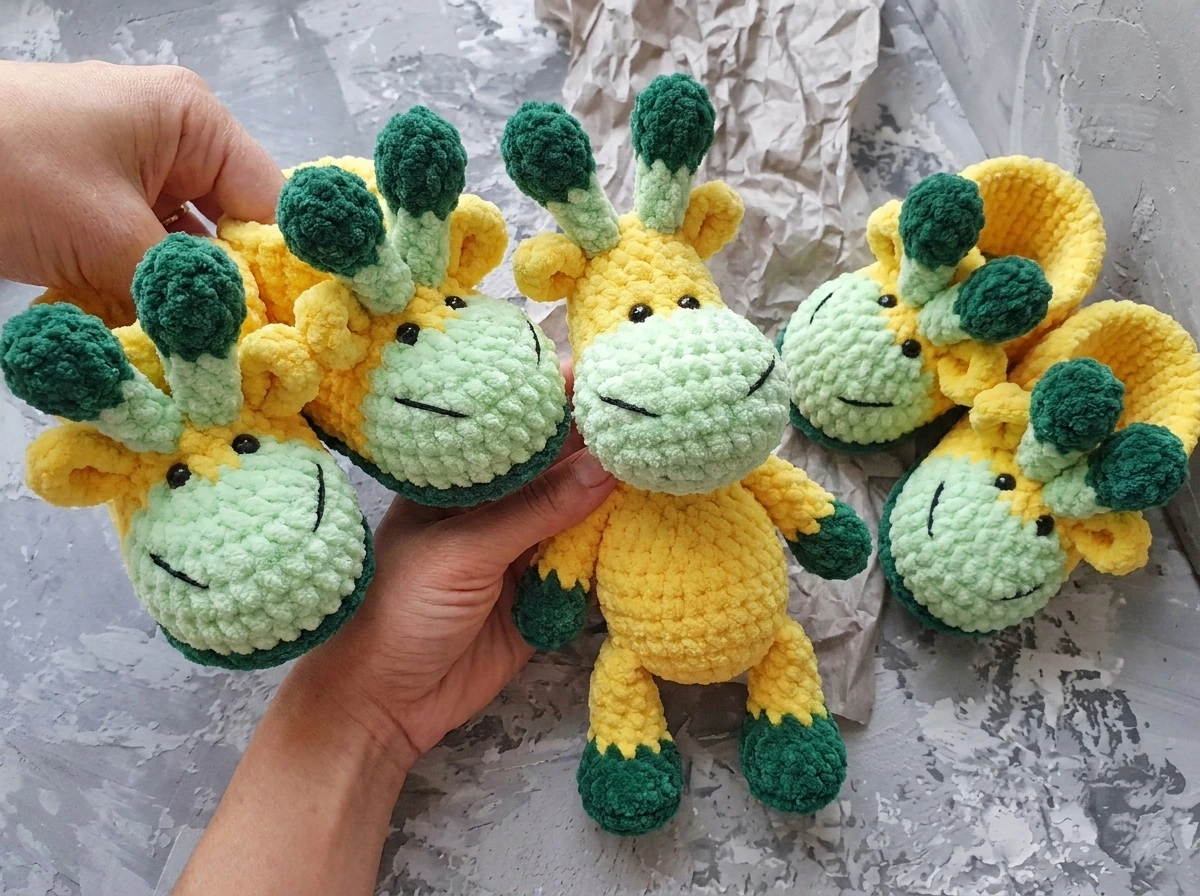
Crochet Baby Animal Booties PDF Pattern – Plush Amigurumi Shoes (Unicorn, Giraffe, Deer, Penguin)
$4.99
Get this Crochet Pattern as a Free PDF
Enter your email to receive the PDF associated with this article.
Leave a Reply