
Sloth giant
GIANT SLOTH
sylvia
sylvester
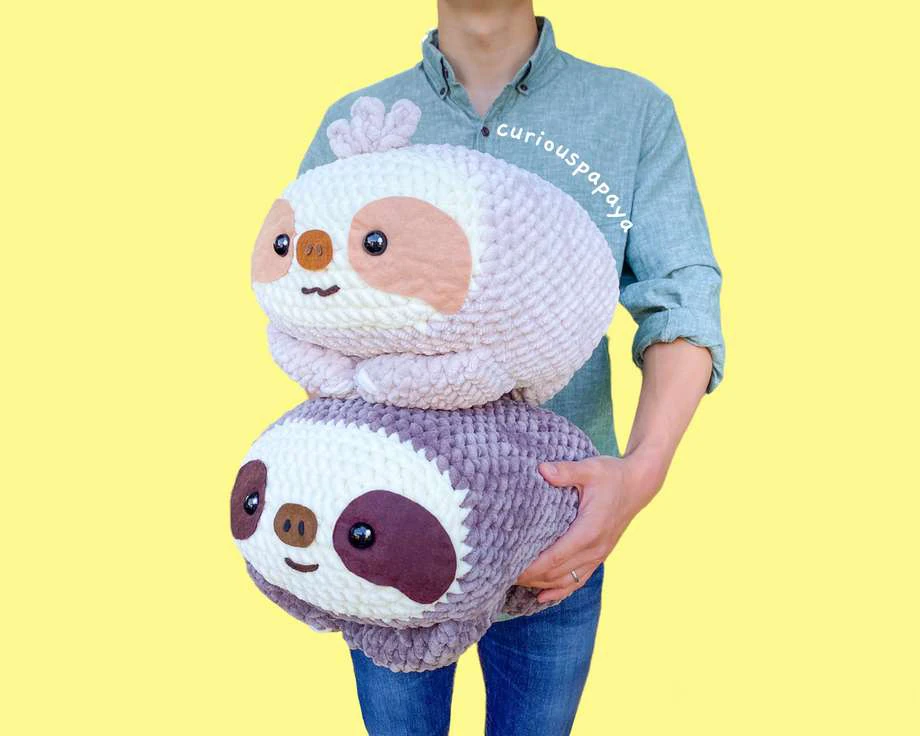
*We will be working in a spiral.
*Measurements: 14 in. x 13 in.
MATERIALS:
-Jumbo size 7 chenille yarn in cream for the face (23 g) and
taupe or marshmallow for the body (386 g). (Here, I’m using
Sweet Snuggles/Chenille Home yarn by Loops & Threads). Note
that you will need a little over 1 skein for the main body color if
using this brand.
-10 mm hook
-Jumbo yarn needle, scissors, stitch markers, hot glue
-Fiber fill stuffing (680 g)
-20 mm safety eyes
-Brown/tan/black felt + a long strand of dark brown medium
worsted yarn for the facial features
-Long strand of white blanket yarn for the claws
TERMS:
-blo: back loops only
-ch: chain
-dec: (invisible) decrease
-inc: increase
-sc: single crochet
[35.56 cm x 33.02 cm] if using the
prescribed materials.
*This is a beginner-intermediate level
pattern due to working in an oval
spiral with this specific type of yarn.
*Please email me at
questions you might have about this
pattern.
-slst: slip stitch
-st(s): stitch(es)
-rnd(s): round(s)
-[#]: stitch count
-(…) x #: repeat instructions
INTRODUCTION:
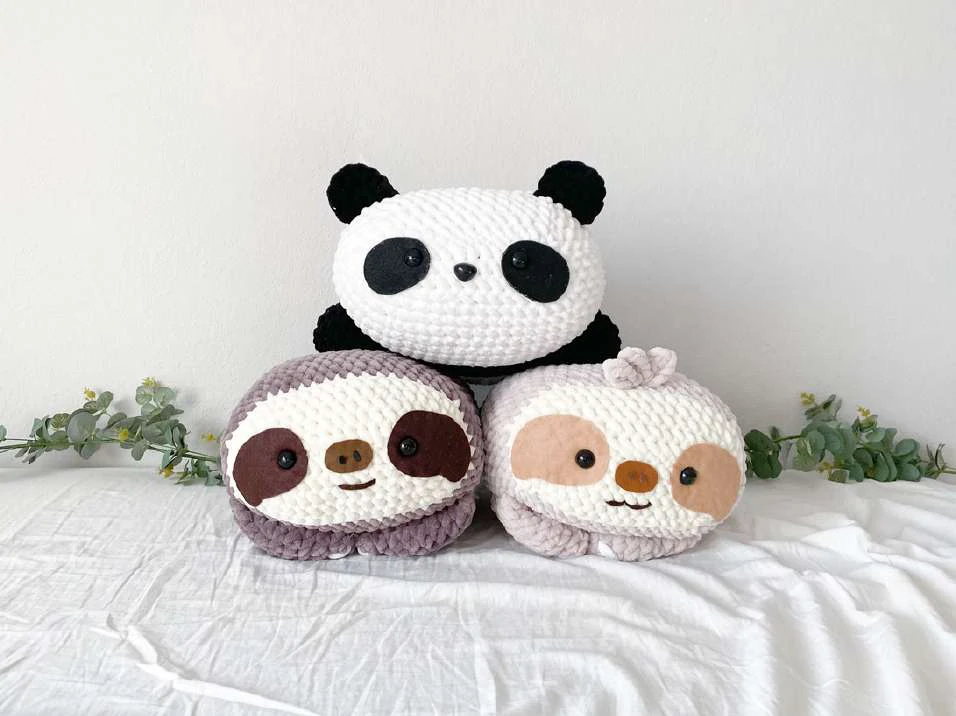
Meet Sylvia and Sylvester the Giant Sloths! This sweet sibling
duo does everything together – from basking in the sun to
snacking on their favorite veggies… and even the occasional
argument about who gets the last celery stick. They're the
coolest Three-Toed Sloths you'll ever come across.
TIPS:
-Use stitch markers to keep track of the beginning of each round (especially important since this fuzzy chenille
yarn can make it difficult to see!)
-Use sewing pins to position parts on evenly.
-Fluff up your stuffing by pulling it apart and inserting it little by little to make your amigurumi more even. Stuff it
some more right before closing using the tips of your scissors (for small spaces) for a firmer shape.
-Note that my jumbo patterns do not transfer to thinner yarn weights well. The dimensions will be off!
-Please note that when you cut this specific type of chenille yarn, experiencing some loose fibers is normal.
-When using hot glue, apply in a zigzag motion and not in globs. Avoid the edges. Less is more!
*When working in a spiral, it’s normal for each rnd to stagger (and for your start of the rnd to slightly rotate). To
avoid having your oval begin to turn (resulting in a lopsided butt), add or undo a few sc to align the start of rnd 24
(where the decreases begin) with where rnd 6 begins (where you start the main color of the body).
-Ex. of how to read the pattern – "Rnd 3: (10 sc, [sc into the next st, inc] x 3) x 2 [38]" = 10 sc, sc, inc, sc, inc, sc, inc, 10
sc, sc, inc, sc, inc, sc, inc.
Rnd 1: Ch 13. Sc into the second st from the
hook. Sc into the next 10 sts. Make 3 sc into the
next st. Continue onto the underside of the
chain. Sc into the next 10 sts. Inc into the next st
and slst into the first st of the rnd. [26]
*The new rnd starts after the slst.
Rnd 2: (10 sc, inc into the next 3 sts) x2. [32]
Rnd 3: (10 sc, [sc into the next st, inc] x3) x2 [38]
Rnd 4: (10 sc, [2 sc, inc) x3]) x2 [44]
Rnd 5: (10 sc, [3 sc, inc) x3]) x2 [50]
Change to your main color yarn.
Rnd 6: blo – (10 sc, [4 sc, inc) x3]) x2 [56]
Rnd 7-23: (17 rnds total): sc all around [56]
Insert a stitch marker and remove your hook. We
will now create the facial features before closing up
the body.
HEAD/BODY
(start in cream yarn)
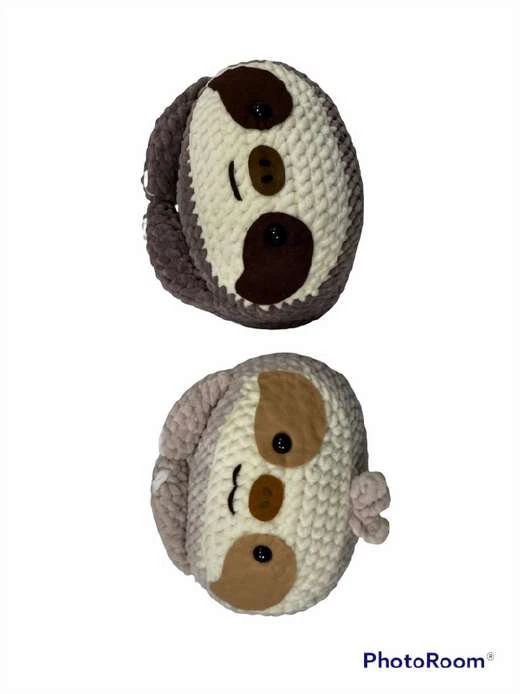
FACIAL FEATURES
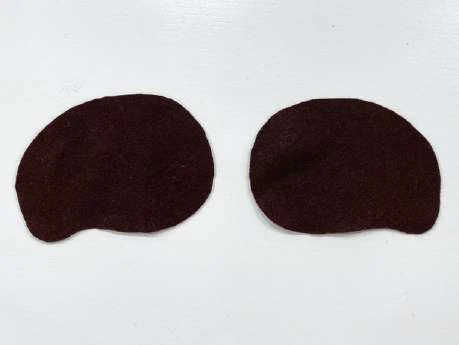
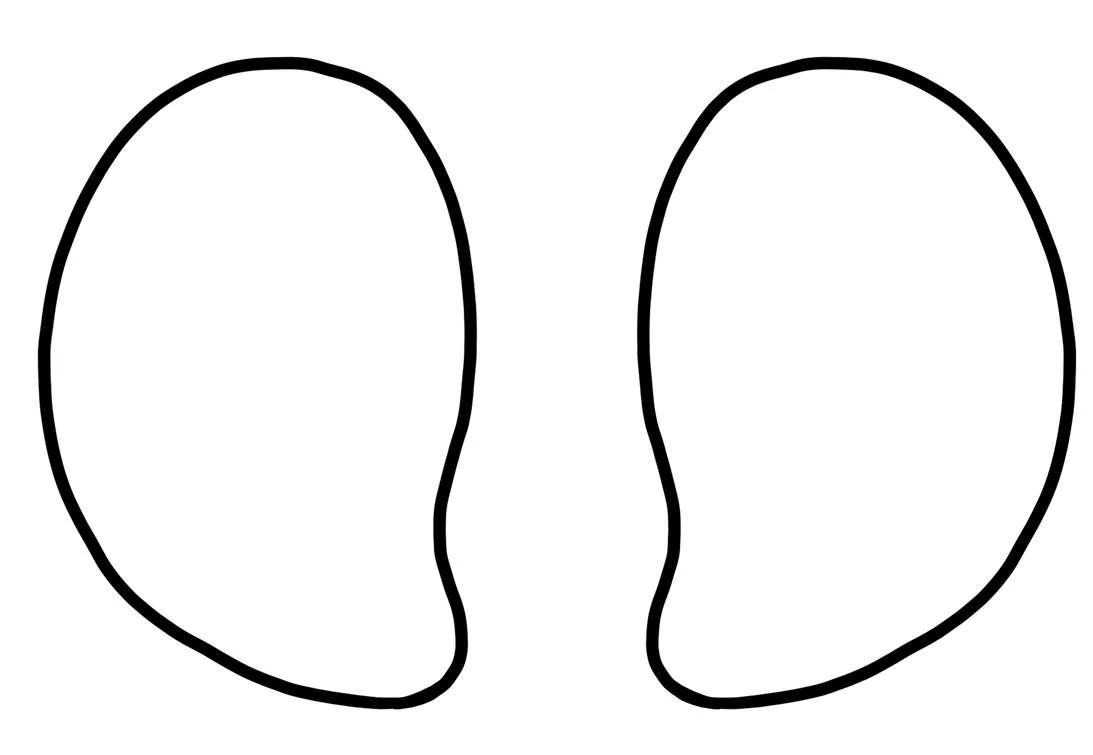
Eyes: Cut out two pieces of brown or tan felt for
the dark part of the eyes using the template on
pg 5.
Then, cut a small slit in both to insert the safety
eyes into. Glue (sewing is optional) the felt part
onto the face and secure the eyes in place.
Nose: Cut an oval out of brown felt ~2 in. x 1 in.
and create the nostrils out of a darker felt.
Glue (or sew) the nose in the middle of the
starting ch, keeping it aligned with the eyes for a
cuter look.
Mouth: Use your yarn needle and create a
mouth right below the nose. Secure the yarn
tails in a knot on the wrong side of the body. [img
2]
Hair tuft (for Sylvia): (ch 6, slst into the first st)
x3. Fasten off and sew onto the head where the
body color starts. Secure the yarn tails in a knot
on the inside of the body. [img 2]
Here, we will begin decreasing. Lay the body flat
against a table to see where the start of the rnd
should align with where rnd 6 started. Undo or
add a few sts to achieve this.
Rnd 24: (10 sc, [4 sc, dec) x3]) x2 [50]
Rnd 25: (10 sc, [3 sc, dec) x3]) x2 [44]
Rnd 26: (10 sc, [2 sc, dec) x3]) x2 [38]
Rnd 27: (10 sc, [sc into the next st, dec] x3) x2
[32]
Rnd 28: (10 sc, dec into the next 3 sts) x2. [26]
Fasten off and leave a long tail for sewing. Stuff
well.
Pinching the two longer edges together, whip stitch
the hole closed. Bury the excess yarn tail.
ARMS/LEGS
(make four in body color)
Rnd 4-5 (2 rnds total): sc all around [16]
Rnd 6: (6 sc, dec) x2 [14]
Rnd 7-9 (3 rnds total): sc all around [14]
Fasten off and leave a long tail for sewing.
HEAD/BODY
(cont.)
ASSEMBLY
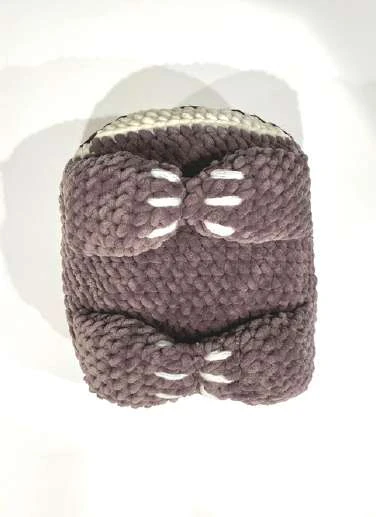
Limbs: Cut a long strand of white blanket yarn.
Using your yarn needle, weave through each limb
to create three long claws. Secure the yarn tails in
a knot. Lightly stuff.
Flatten each arm and then use pins to mark
where to sew so that the tips meet in the middle.
Sew the arms 2 rnds below the cream part of the
face. Sew the legs 4 rnds below the arms.
Weave one of the arm's remaining tail through to
the hand and sew the two hands together. [img
3]
Rnd 1: Ch 5. Sc into the second ch from the
hook. Sc into the next 2 sts. Make 3 sc into the
next st. Continue onto the underside of the
chain. Sc into the next 2 sts. Inc into the next st
and slst into the first st of the rnd. [10]
Rnd 2: sc all around [10]
Rnd 3: (2 sc, inc into the next 3 sts) x2 [16]
print this page and cut these shapes out to use as a template.
x marks where to insert the eyes. if using a thinner yarn weight,
you can shrink down this page in your printer settings accordingly.
x
x
THANK YOU FOR MAKING MY GIANT SLOTHS!
Recommended Digital Products

The Ultimate Beginner’s Crochet Guide: Master 45+ Essential Techniques & Practical Projects
$5.99

From Loop to Perfection: The Ultimate Step-by-Step Crochet Master Guide
$9.99
The Ultimate Crochet Handbook: Essential Techniques, Color Theory & 80+ Step-by-Step Patterns
$19.99
Master the Art of Crochet from Scratch – Ultimate Digital Guide with 8 Step-by-Step Projects!
$19.99
Get this Crochet Pattern as a Free PDF
Enter your email to receive the PDF associated with this article.
Leave a Reply