
Oceana Bikini
©entirelyemma
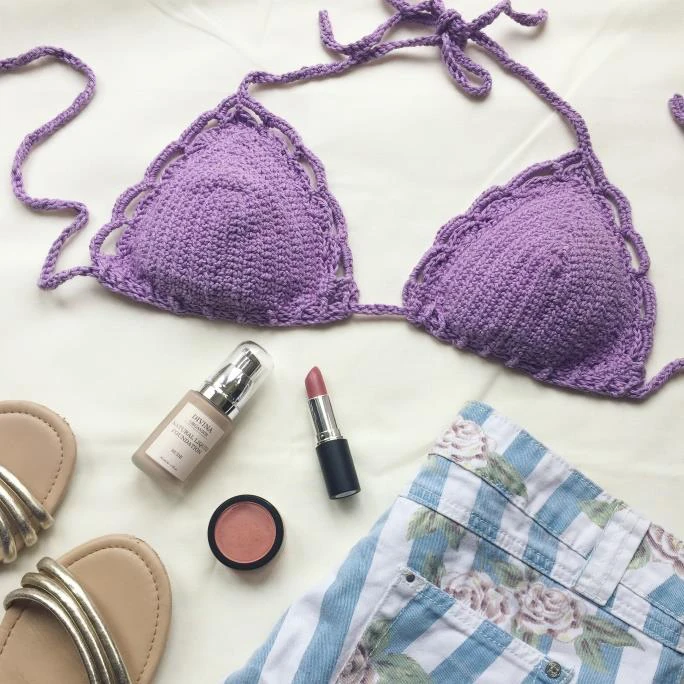
Oceana Bikini Top
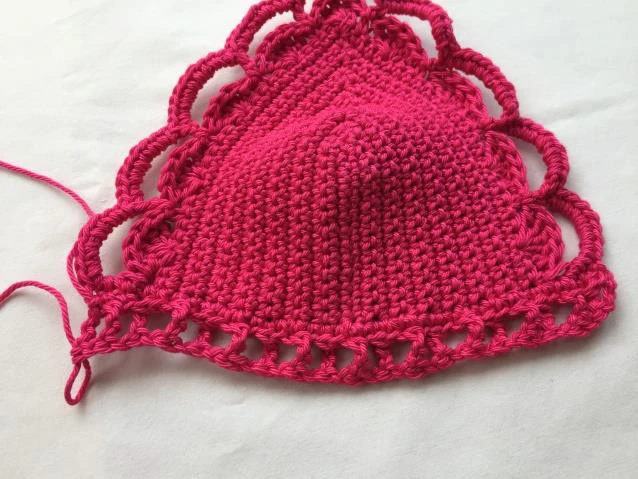
This bikini top puts a twist on the traditional string bikini, making it perfect for
relaxing by the pool or chilling at the beach. Like a traditional string bikini this top
has cups that move, meaning you can get the fit and coverage you desire. A
combination of shell stitches and chaining creates the scalloped edging. This pattern
is written for cup sizes: Small, Medium and Large with a totally customisable back tie.
However information is given on how to adjust the cups sizes for the perfect fit.
Materials used:
1 skein of Wendy Supreme Cotton DK (DK,100% cotton, 201m per 100g ) or
substitute cotton yarn
3mm hook
Yarn needle
Stitch markers (optional)
Knitting-in elastic (optional)
Swimwear Fabric (optional)
Cup Sizes:
Small – base of the cup should measure 6.5” (16.5cm)
Medium – base of the cup should measure 7.5” (19cm)
Large – Base of the cup should measure 8.5” (21.6cm)
©entirelyemma
Back Tie:
Can be made as long as required.
Gauge:
Small: 21sc x 24 rows = 4”x 4” (10cm x 10cm)
Medium/Large: 22 hdc x 17.5 rows= 4”x 4” (10cm x 10cm)
Abbreviations:
ch(s)- chain(s)
sc- single crochet
hdc- half double crochet
sl st- slip stitch
st(s)- stitch(es)
rep- repeat
prev- previous
skp- skip
ch sp – chain space
tr- treble crochet
FPtr- front post treble crochet
BPtr- back post treble crochet
Notes:
Pattern uses US terms
Cups are worked by working along one side of the ch and back down the
other (working in a horse shoes shape), this is classed as 1 row
The ch 1 does not count as a stitch throughout
Stitch count will be provided in brackets at the end of a row or repeat
Instructions included in [ ] are to be done in the same st
This pattern is split into 3 sections, Main Cup, Edging and Back Tie
Choose your desired cup size and then follow the corresponding instructions
in the Main Cup and Edging sections
Small instructions will be in black, Medium in blue and Large in purple.
Information on how to adapt each cup size for a perfect fit is included in each
Main Cup section
If you plan to wear this bikini in water you may wish to work knitting-in elastic
with the yarn to help the bikini hold its shape. Just work the elastic like you
were crocheting with 2 strands of yarn. This can either be worked throughout
or can be added on the last row of the main cup section. To do these simply
©entirelyemma
fasten off and reattach the yarn with the knitting-in elastic and work the
remaining pattern as normal.
You can also use the back tie of an old bikini instead of crocheting one if you
prefer
I recommend lining the bikini with swimwear fabric (again you can use an old
bikini) if you plan to wear this top in water.
Main Cup Section:
Small Cup:
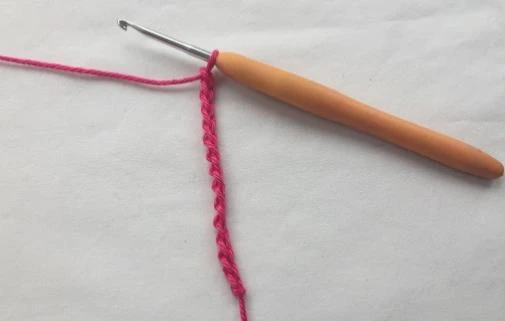
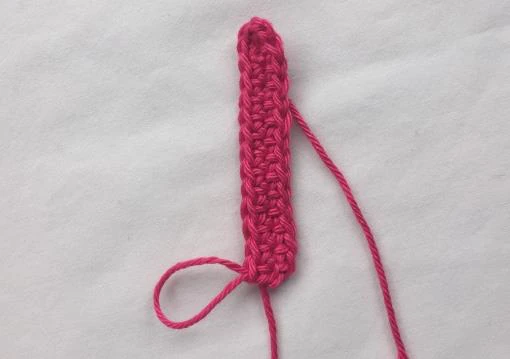
Row 1:
(sc in back loops of ch)
ch14
sc in 2nd ch from hook
sc along 11sts
In last st [2sc,ch1,2sc]
Sc along 12 sts
(12sc, 2sc, ch1, 2sc, 12sc)
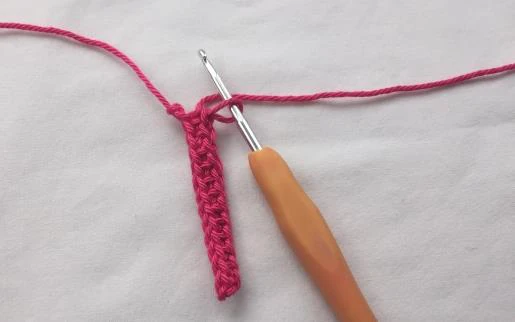
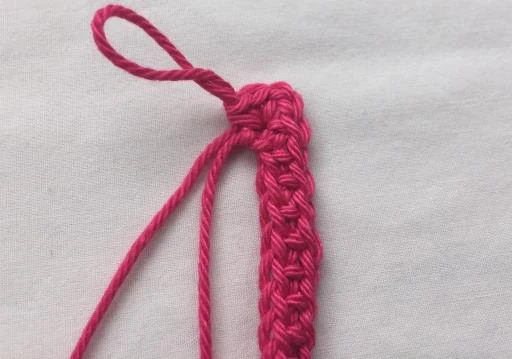
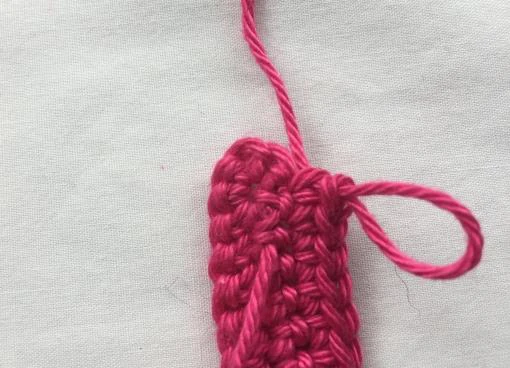
Row 2:
ch1, turn
sc along to 1st st of the [2sc,ch1,2sc] group of prev row
skp sc before ch1 sp
[2sc,ch1,2sc] in ch1 sp
Skp next sc
Sc along
(13sc, 2sc, ch1, 2sc,13sc)
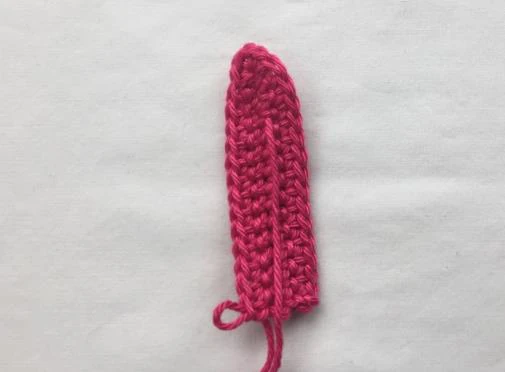
To make the cups bigger or smaller to
fit you as desired, simply add or reduce
the number of repeats instructed below
respectively.
ch 1 sp
skp this st
skp this st
©entirelyemma
Row 3-14:
Rep row 2
(25sc, 2sc, ch1, 2sc, 25sc)
*Fasten off after row
13 and reattach yarn and
knitting-in elastic
for row 14 if you are using
it for the edging* (OPTIONAL)
Now go to Edging Section.
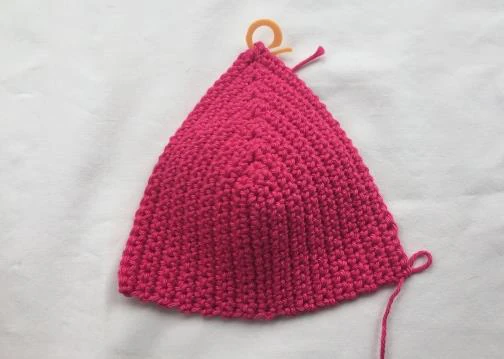
Medium(Large) Cup:
If no adaptions are given in purple for the large cup follow the medium instructions
(Large cup stitch count will be given at the end of row or repeat in purple) .
Row 1:
ch 15 (ch16)
hdc in 2nd ch from hook
hdc along 12 sts (13sts)
In last st [2hdc,ch1,2hdc]
hdc along 13sts (14sts)
(13sts,2hdc,ch1,2hdc,13sts)
(14hdc, 2hdc, ch2, 2hdc,14hdc)
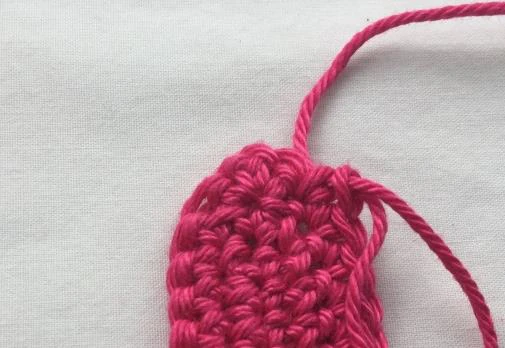
Row 2:
ch1,turn
hdc to 1st hdc of the [2hdc,ch1,2hdc] group
skp hdc before ch1 sp
[2hdc,ch1,2hdc] in ch sp
skp next hdc st
hdc along
(14hdc,2hdc,ch2,2hdc,14hdc)
(15hdc,2hdc,ch1,2hdc,15hdc)
To make the cups bigger or smaller to
fit you as desired, simply add or reduce
the number of repeats instructed below
respectively.
skp this st
skp this st
ch 1 sp
ch 1 sp
skp this st
skp this st
©entirelyemma
For medium cup:
Row 3-12:
Rep row 2
(24hdc, 2hdc, ch1, 2hdc, 24hdc)
*Fasten off after row
11 and reattach yarn and
knitting-in elastic
for row 12 if you are using
it for the edging* (OPTIONAL)
For Large Cup:
Row 3-15:
Rep row 2
(28hdc, 2hdc, ch1, 2hdc, 28hdc)
*Fasten off after row
14 and reattach yarn and
knitting-in elastic
for row 15 if you are using
it for the edging* (OPTIONAL)
Now go to Edging Section
Edging Section:
For Small and Medium Cup:
If no adaption for medium cup is given in blue, follow the instructions in black.
Row1:
ch1, turn
sc in 1st st
*skp 2 sts
5 tr in next st (shell st)
skp 2 sts
sc in next st*
*-* rep 3 times
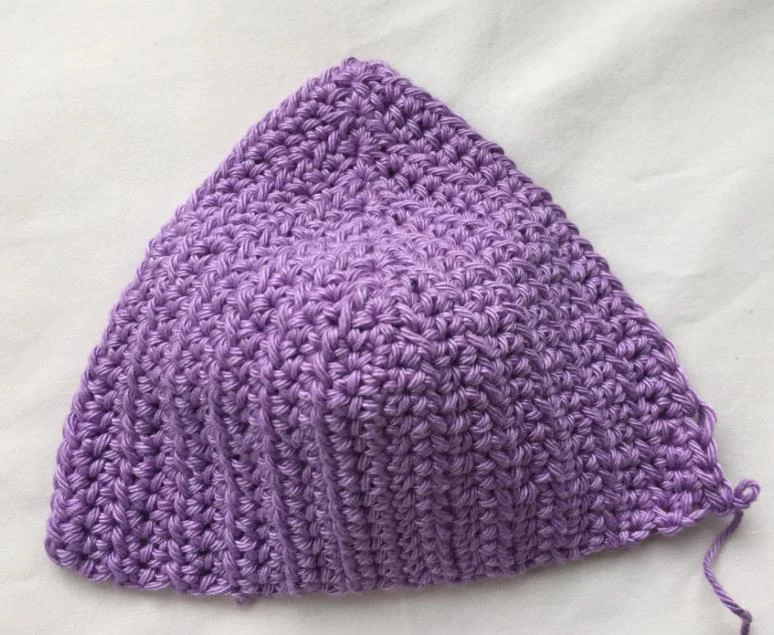
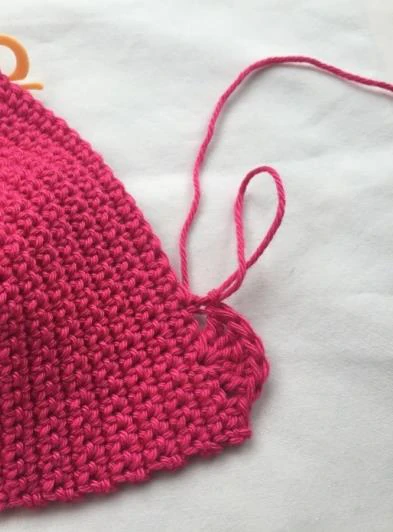
©entirelyemma
skp 2 sts (skp 1 st)
5 tr in ch 1 sp of prev row
skp 2 sts (skp 1 st)
*sc in next st
skp 2 sts
5tr in next st (shell)
skp 2 sts *
*-* rep 3 times
sc in last st
(9 shells,10 sc)
(45tr, 10 sc)
Row 2:
ch1,turn
hdc in 1st st
*ch7
skp 5 sts
hdc in sc between shells*
*-*rep 3 times
ch5
skp 2 sts
hdc in top of shell
ch5
skp 2 sts
*hdc in sc between shells
ch7
skp 5sts*
*-*rep 3 times
hdc last st
(66chs, 11hdc)
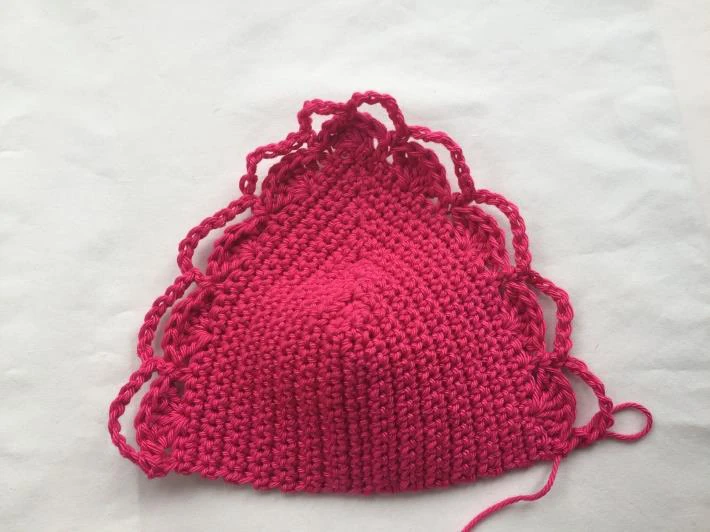
Row 3:
ch1, turn
sc in 1st st
*9sc in ch 7 sp
sc in hdc between chs*
*-* rep 3 times
5 sc in ch 5 sp
sc in hdc at top of shell (47 sc)
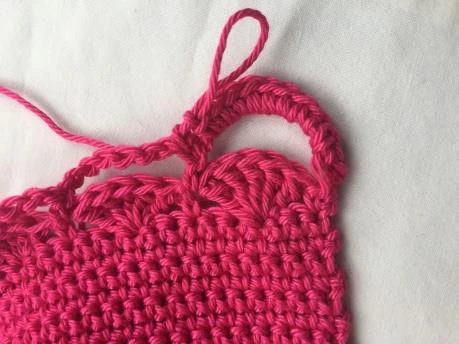
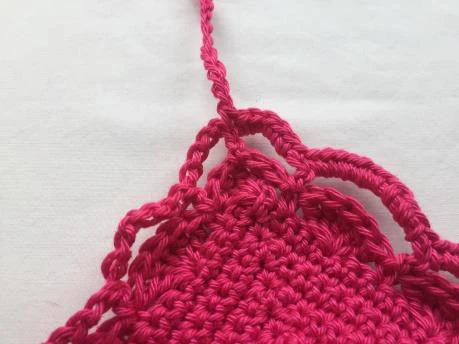
ch 90+1 (This is the neck strap
ch more or less to get desired
length)
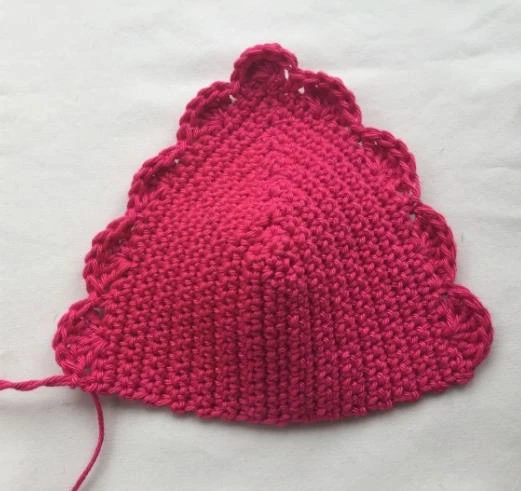
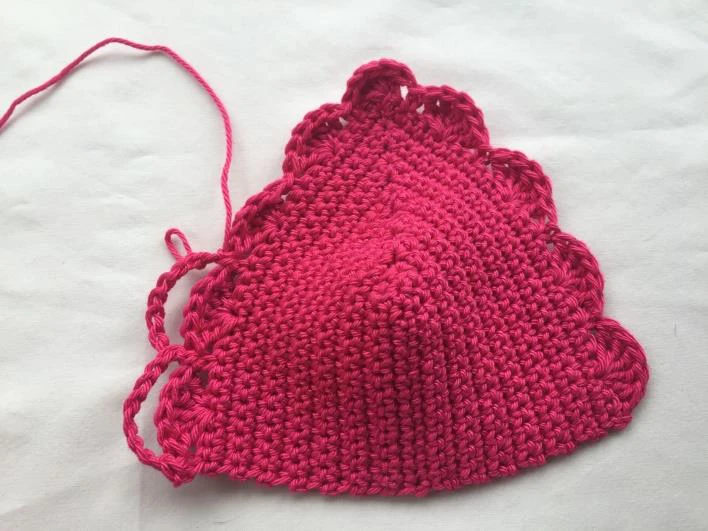
©entirelyemma
sc in 2nd ch from hook
sc along chs (90scs)
sl st into sc at base of ch
5sc in ch 5 sp
*sc in hdc between chs
9sc in ch 7 sp*
*-* rep 3 times
sc in last st (46 sc, 1 sl st)
(93 sc, 1 sl st and 90 sc for strap)
Fasten off and weave in ends.
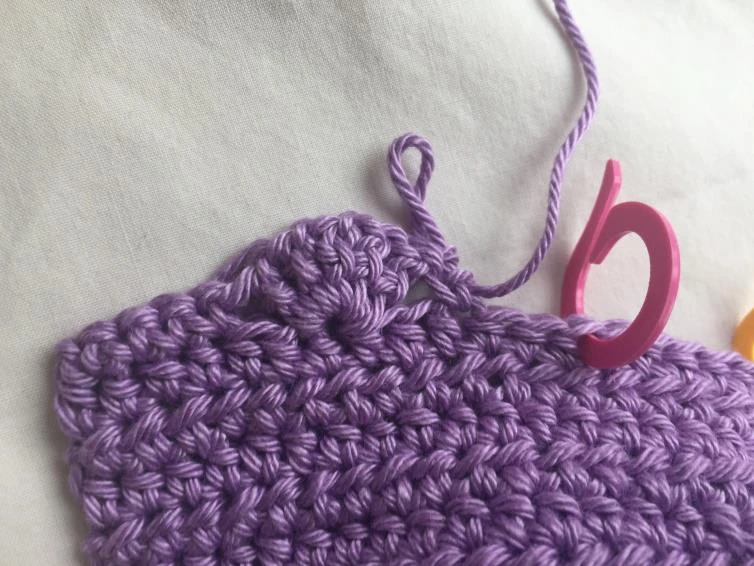
Base of cup:
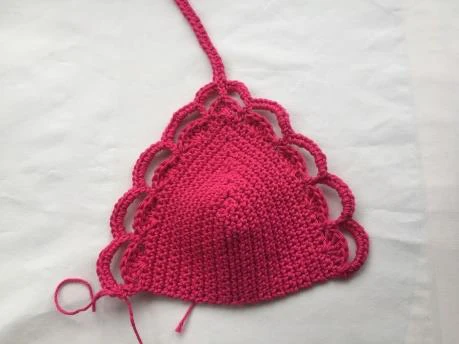
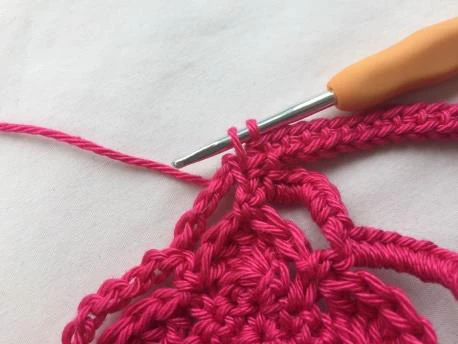
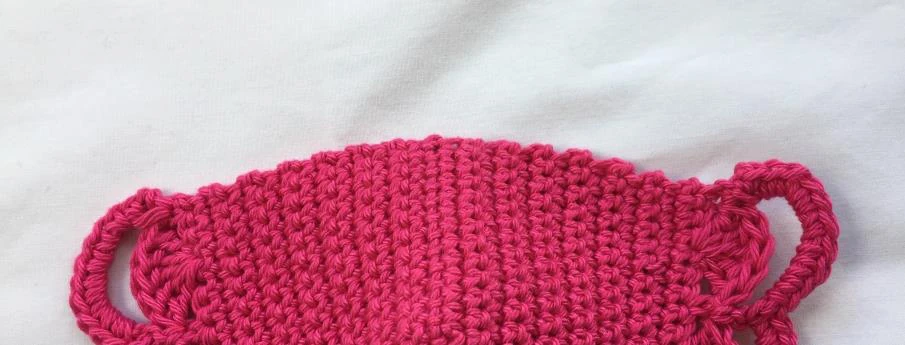
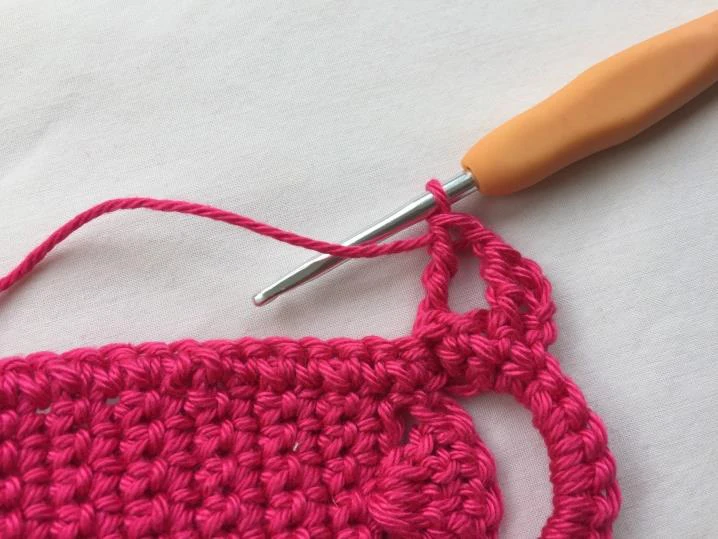
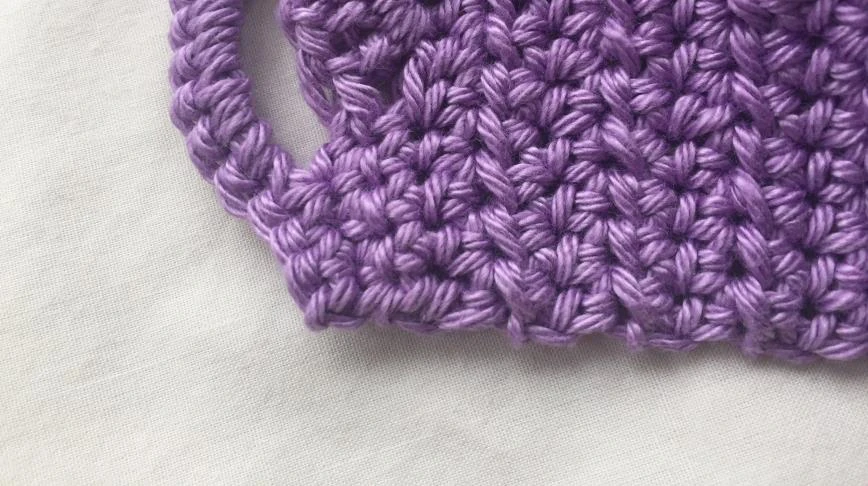
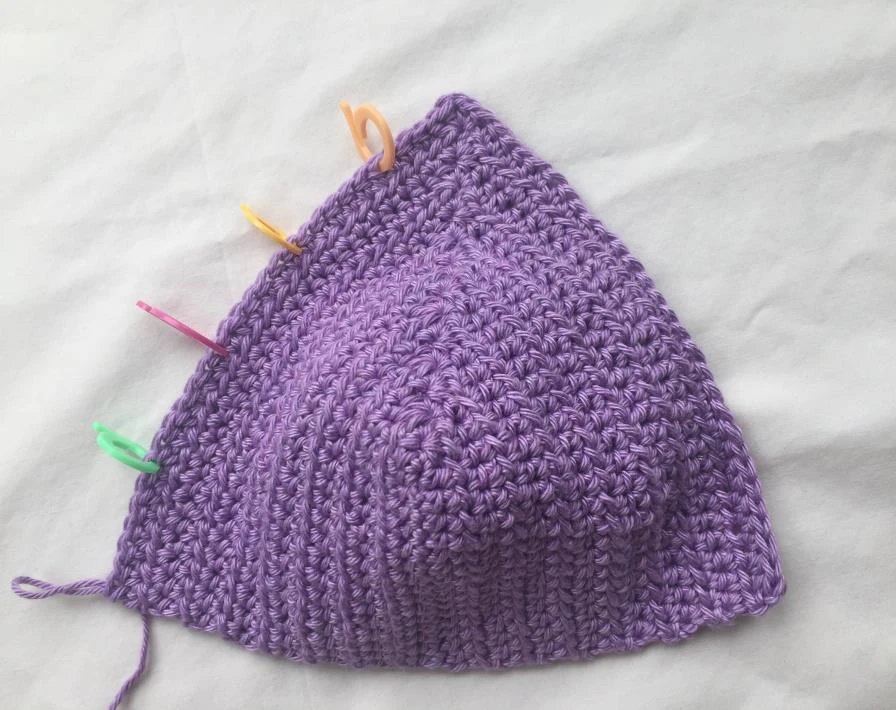
Attach yarn in the 3rd sc of the last row (see picture).
Row 1:
sc along base (including 3 sts either side from last row of the cup), spread sts evenly
(37sc)(40sc)
See picture above.
Row 2:
ch 3, turn (counts as a st)
*FPtr around next st after ch
ch 1, skp 1 st
BPtr around next st
ch1 , skp 1*
*-*rep 8 times
For small cup FPtr in last st
For Medium cup FPtr
ch1, skp 1
BPtr in last st
Attach
yarn here
Finish here
©entirelyemma
(10 FPtr, 9 BPtr)
(10 FPtr, 10 BPtr)
Fasten off weave in ends.
Now go to back tie section.
For Large Cup:
Row 1:
ch1,turn
sc in next 4 sts
*skp 2 sts
5 tr in next st
skp 2 sts
sc in next st*
*-* rep 3 times
skp 2 sts
5tr in the ch 1 sp of prev row
skp 2 sts
*sc in next st
skp 2 sts
5tr in next st
skp 2 sts*
*-* rep 3 times
sc in last 4 sts
(9 shells, 16 sc)
(45tr, 16 sc)
©entirelyemma
Row 2:
ch1,turn
sc in first 3 sts
hdc in 4th st (the last sc before shell st)
*ch7
skp 5 sts
hdc in sc between shells*
*-*rep 3 times
ch5
skp 2 sts
hdc in top of shell
ch5
skp 2 sts
*hdc in sc between shells
ch7
skp 5sts*
*-*rep 3 times
hdc in the next st
sc in last 3 sts
(66chs, 11hdc, 6 sc)
Row 3:
ch1, turn
sc in next 4 sts
*9sc in ch 7 sp
sc in hdc between chs*
*-* rep 3 times
5 sc in ch 5 sp
sc in hdc at top of shell (50 sc)
ch 90+1 (This is the neck strap
ch more or less to get desired length)
sc along chs (90scs)
sl st into sc at base of ch
5sc in ch 5 sp
*sc in hdc between chs
9sc in ch 7 sp*
*-* rep 3 times
sc in last 4 sts (49 sc, 1 sl st)
(99 sc, 1 sl st and 90 sc for strap)
Fasten off and weave in ends.
©entirelyemma
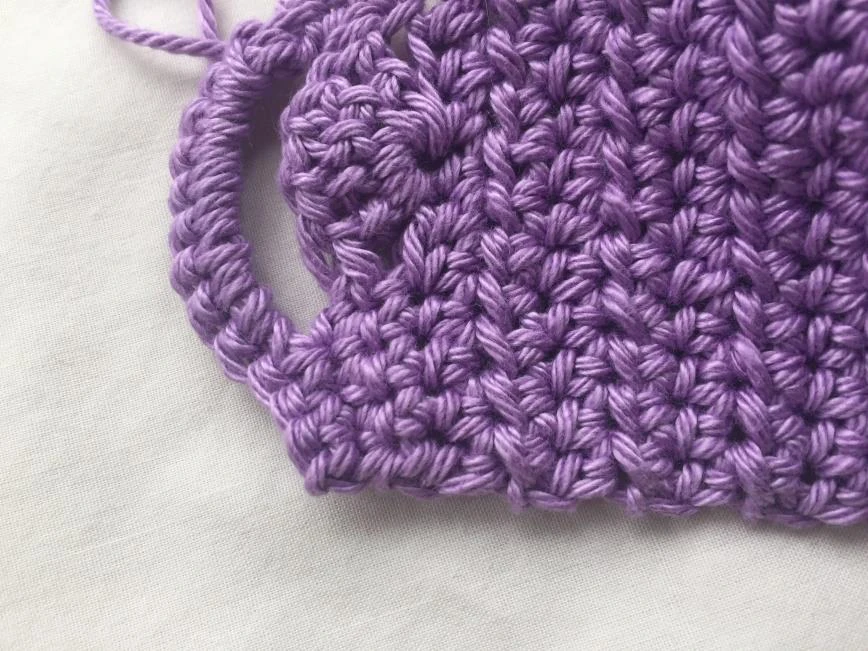
Base of cup:
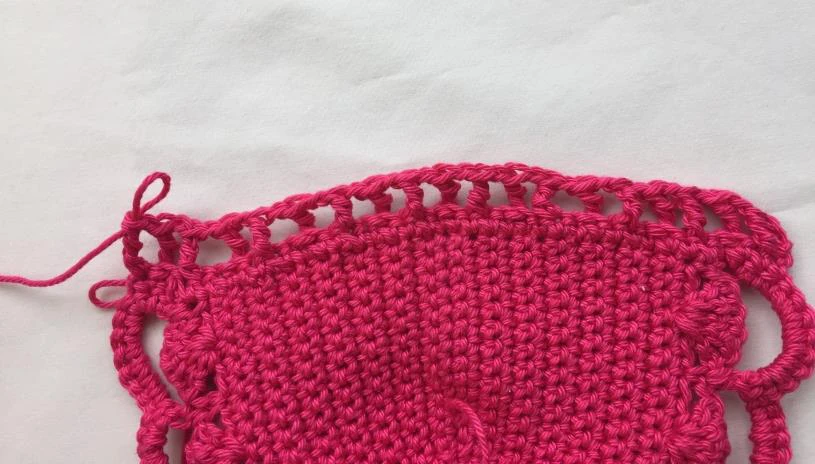
Attach yarn in the 6th sc of the
last row (see picture).
Row 1:
sc along base ( including 6 sts either side from last row of the cup), spread sts evenly
(43 sc) See picture above.
Row 2:
ch 3, turn (doesn’t count as a st)
*FPtr around next st after ch
ch 1, skp 1 st
BPtr around next st
ch1 , skp 1*
*-*rep 9 times
FPtr in last st
(11 FPtr, 10 BPtr)
Fasten off weave in ends.
Go to back tie section.
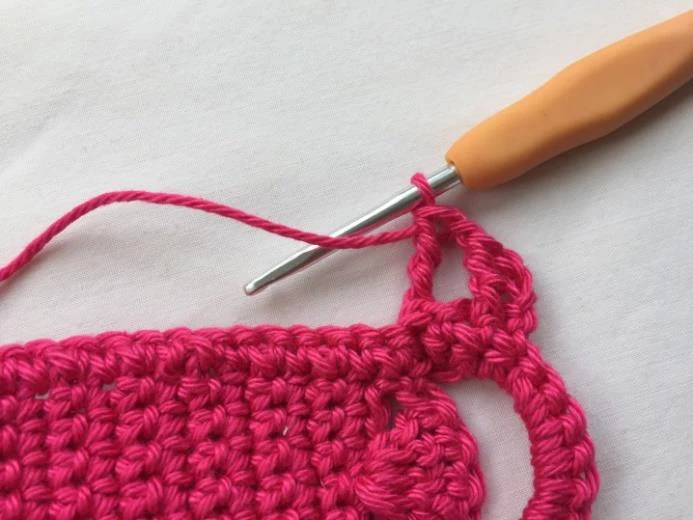
If you have made adapted the cups and therefore have a different st count, simply
count back and st mark every 6th st from the ch 1 sp. This will allow you to calculate
how many shells you need to do.
After you have done this count
back 2 sts from the last st marker.
This st is where you will need to sc
to from the beginning of the row.
For example this cup will follow the
same pattern as the small cup but
with an extra 3 sc at each end of
row.
Attach yarn here
©entirelyemma
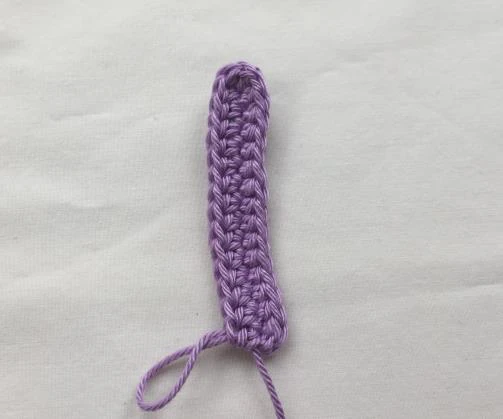
Back Tie:
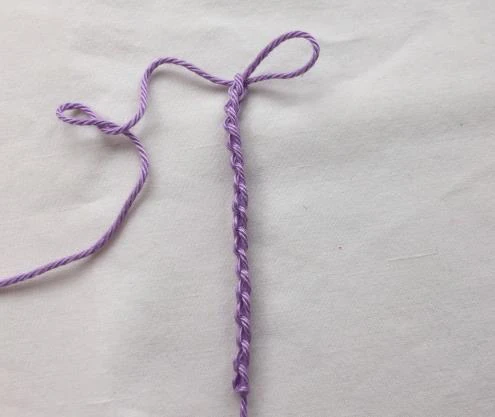
Make a chain to your desired length of a back tie ( for reference for a 32”
back I chained 250). Then simply sc along ch, fasten off and weave in
ends. You can also use an old bikini back tie for this if you wish.
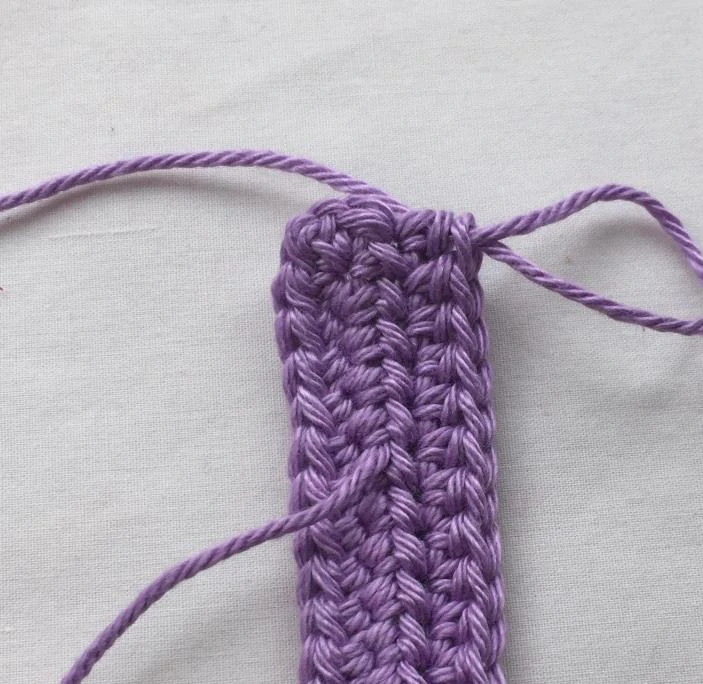
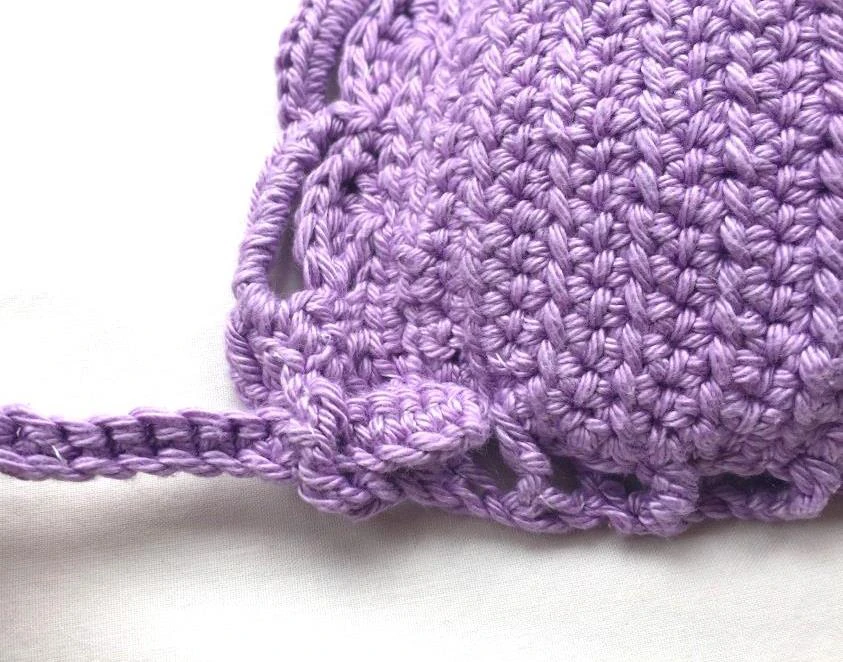
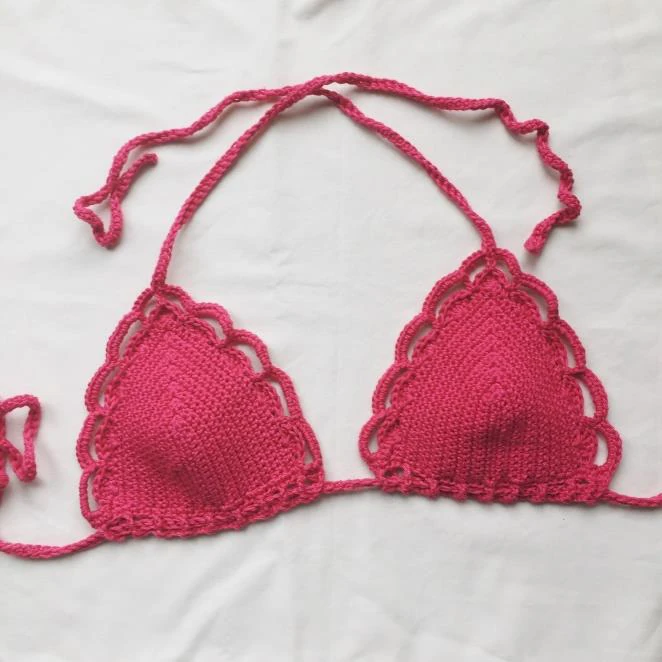
When finsihed simply weave the back tie through the FPtr and BPtr at
the base of cup. See pictures below.
Hope you enjoyed this pattern!
would love to see your finished items so please feel free to tag me!
You may sell finished products made with this pattern however please credit me as
the designer, reference my shop entirelyemma and the pattern you have used. Do
not alter, share or sell this pattern, it is for your personal use only.
Recommended Digital Products
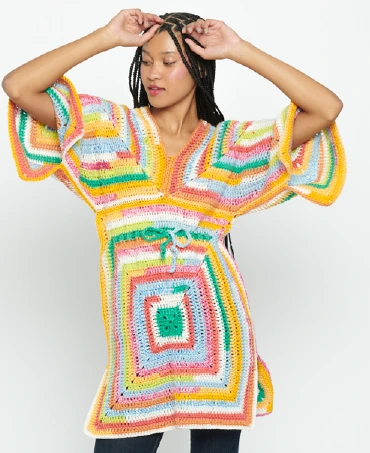
Handmade Crochet Tunic Pattern | Beginner-Friendly Colorful Striped Beach Cover-Up & Top PDF Pattern
$4.99
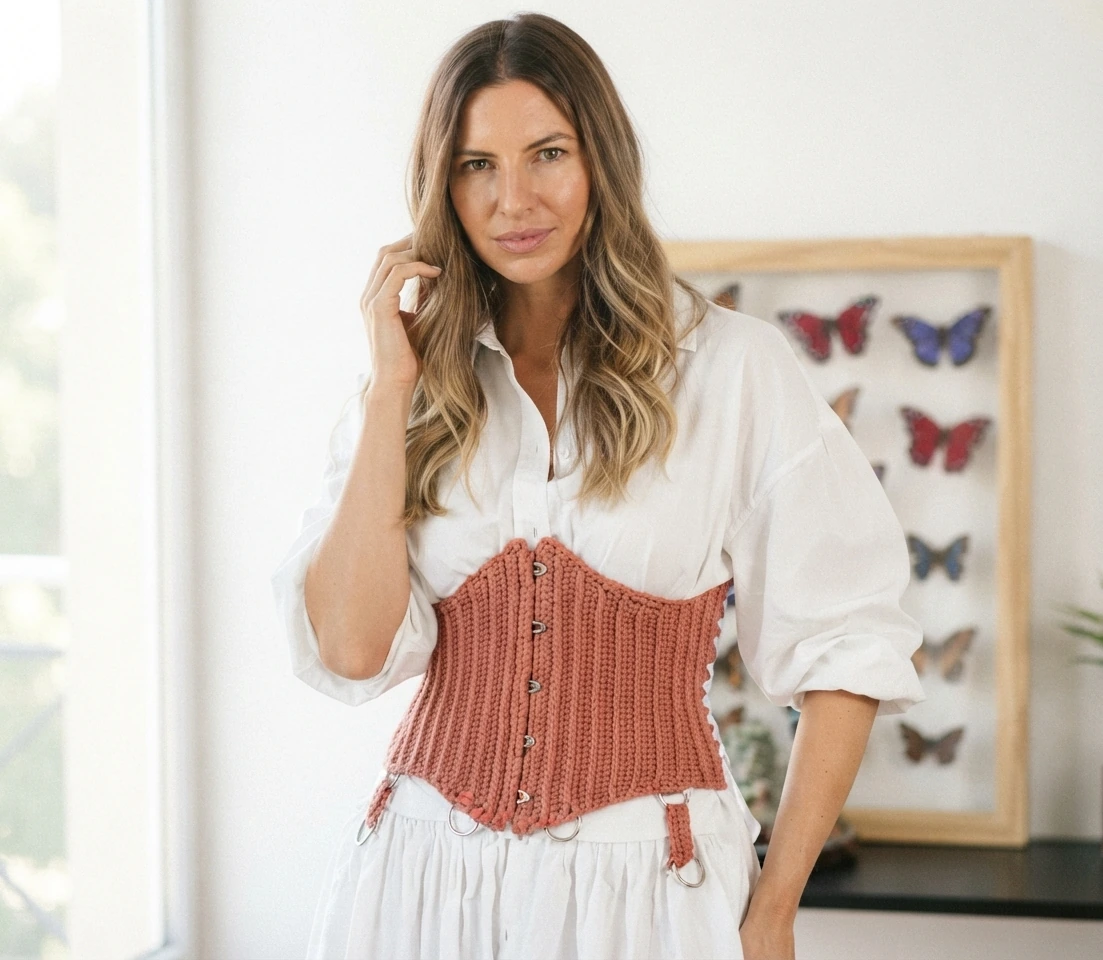
Handmade Crochet Corset Belt Pattern Boho Chic Waist Cincher with Busk & Ribbon Lacing Intermediate Crochet PDF Pattern
$4.99
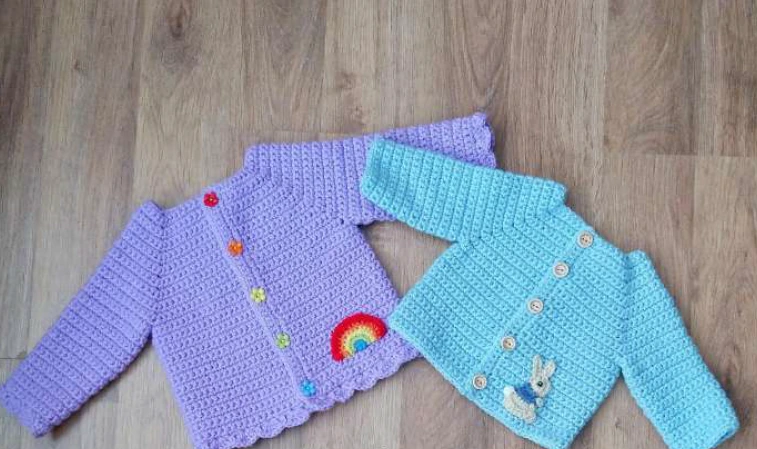
Simple Playdays Baby Cardigan Crochet Pattern PDF | Easy Unisex Newborn to 4 Years Sweater with Rainbow & Bunny Appliques
$4.99

The Ultimate Beginner’s Crochet Guide: Master 45+ Essential Techniques & Practical Projects
$5.99
Get this Crochet Pattern as a Free PDF
Enter your email to receive the PDF associated with this article.
Leave a Reply