
Boho bag UK
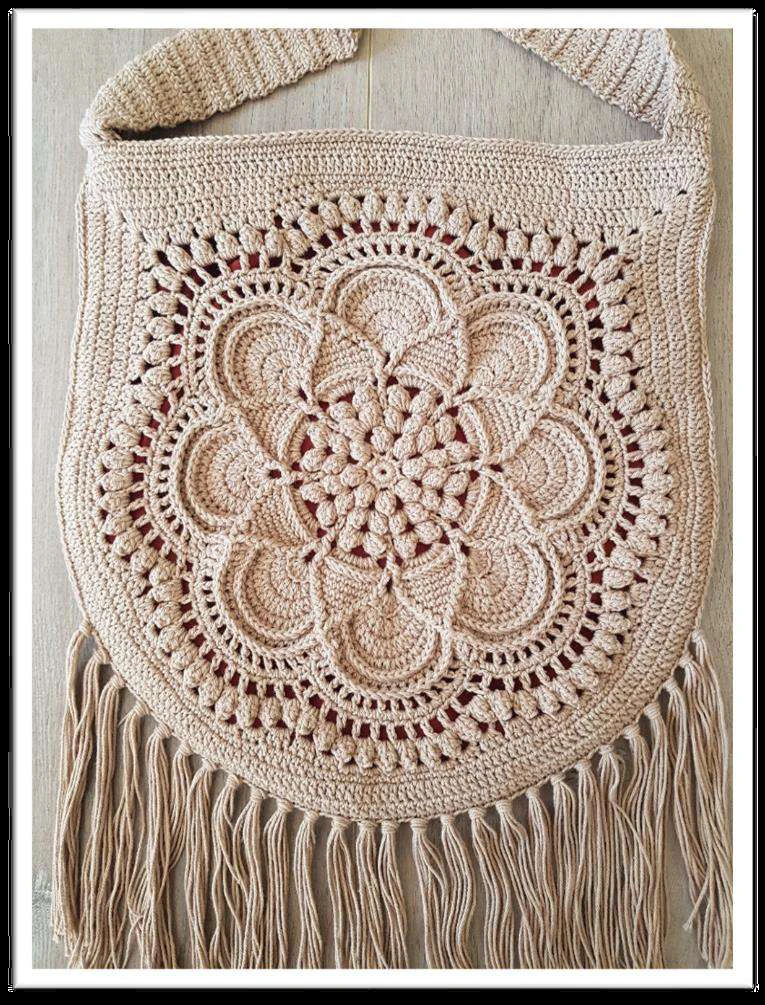
Delilah Boho Bag
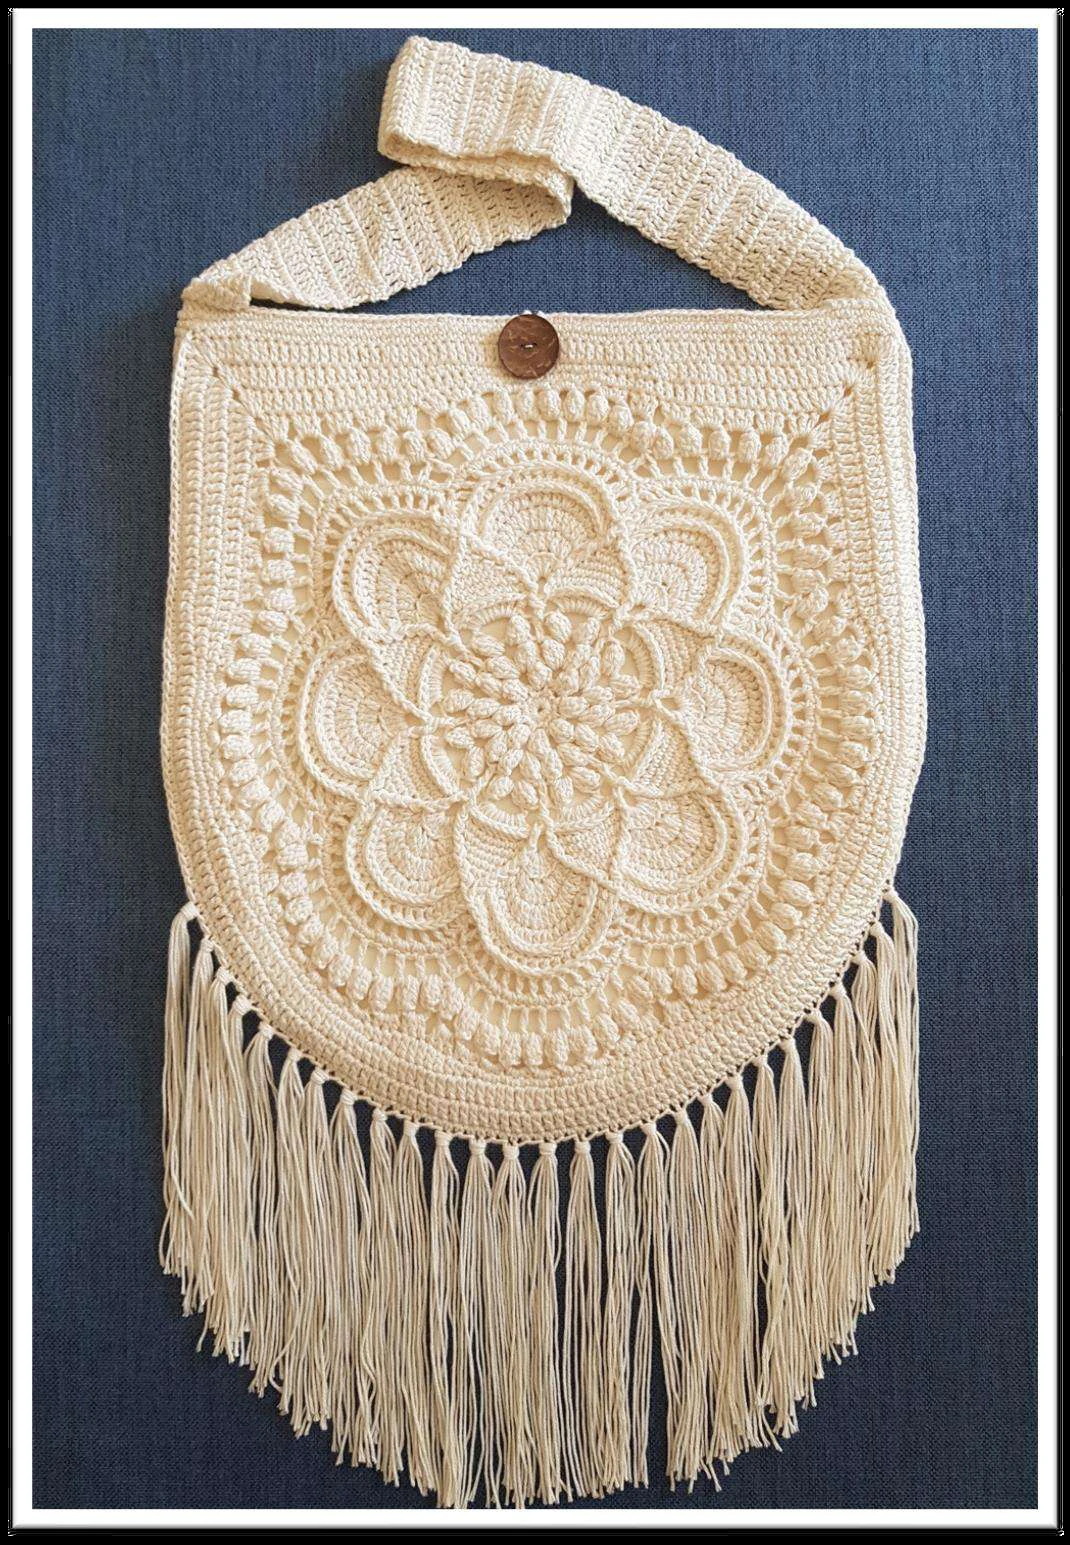
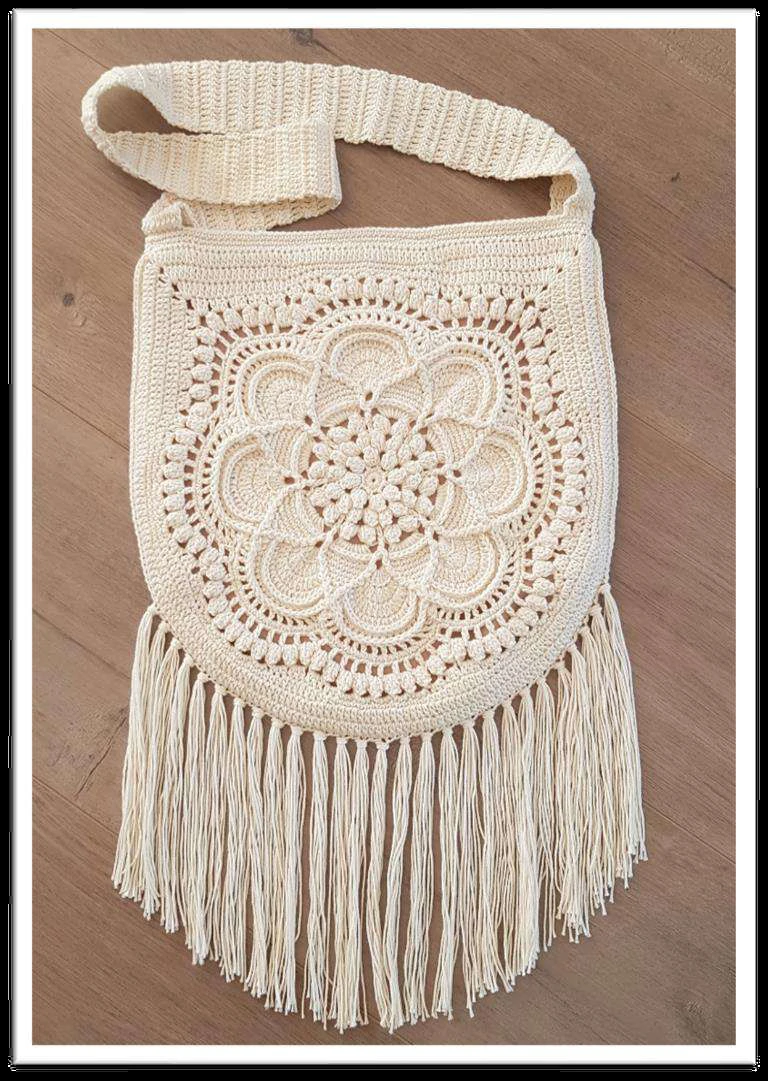
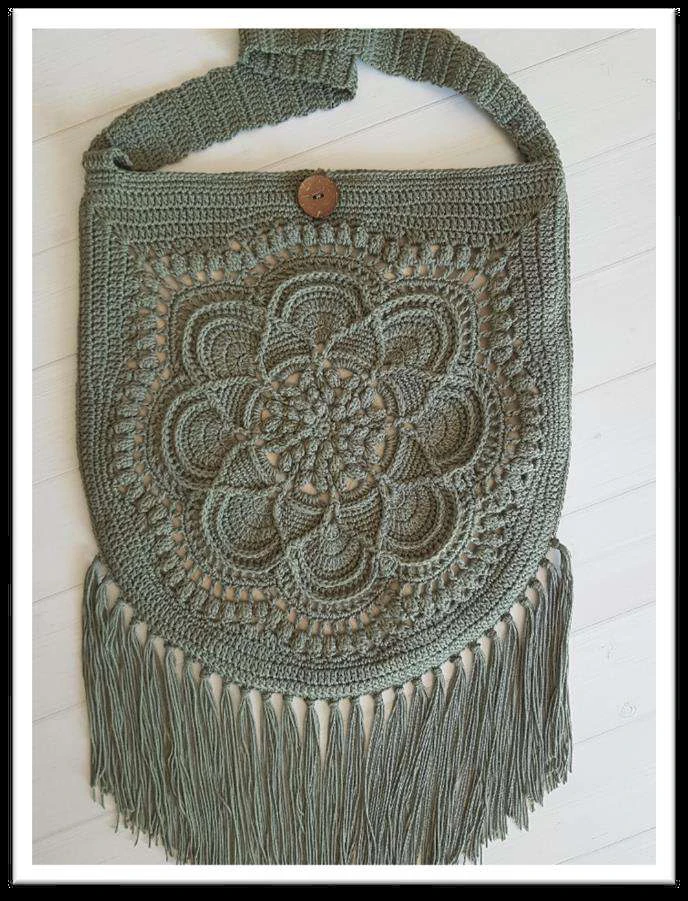
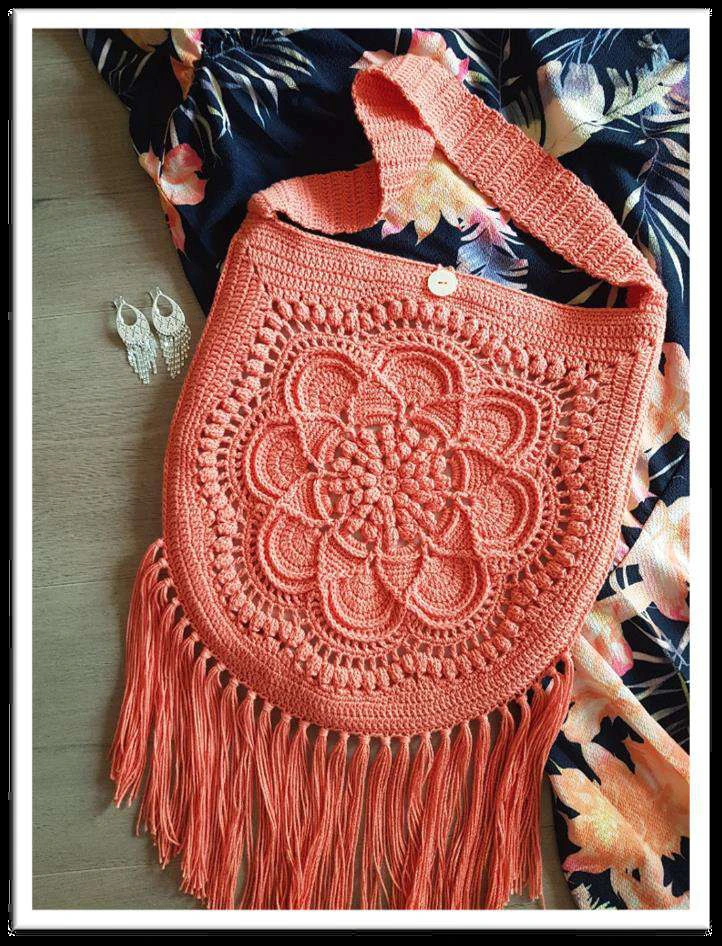
Yarn Selection
I understand that not everyone will be able to use the yarn that I have chosen for this design.
Availability of stock, cost, country of residence, personal choice, postage… are just some of
reasons that you may want to use a different yarn.
The following is some information to help you in making a choice of yarn that will produce the
best results.
Keep in mind that when using a different yarn than listed in the table below, the size of the
project and the quantity of yarn may vary.
Yarn category: I recommend using a Sport/Baby/4ply category yarn. This will create a bag that
is approximately 30cm x 30cm (12in x 12in), excluding the strap and the fringe.
If you want a larger bag, I recommend using a DK/Light Worsted/8ply yarn, however yarn
quantity will vary.
Yarn composition: This design works best with a 100% cotton or cotton/acrylic blend. This will
ensure that the bag will keep its shape when it is in use.
I do not recommend using an acrylic or wool yarn as this will change shape and stretch over
time.
Yarn colour: I like making this bag in one colour so that the texture is the star of the show.
However, if a variegated yarn or multiple colours is your thing, then go for it!
Samples
Below is a table that lists the project information. This table as a guide only. Yarn quantities and
finished project size will vary depending on the yarn and hook size chosen.
Yarn Category
Yarn
Qty
Hook
Size
Sport/Baby/4ply
Bendigo Woollen Mills 4ply
100% cotton, 200g ball
180g/660yds
(1 Ball)
2mm
32cm x 32cm
(12.6in x 12.6in)
Other supplies
For this bag you will need a 2cm diameter button and lining fabric. For more information about
the lining fabric see the Lining section.
Gauge
I have listed my measurements for each round in the pattern section.
For measuring, flatten the piece with your hands onto a flat surface. Measurements are taken
across the widest diameter or as indicated in the pattern.
The listed measurements are a guide when using Sport/Baby/4ply cotton. If your
measurements are different, adjust your hook size or tension as needed.
You can still make the bag if your measurements are different to mine, but the finished bag
size, blocking size and the amount of yarn used may vary.
It is important that you block both panels to the same size.
Measurement

Abbreviations – UK stitches
BL ………………………………………. Back Loop
BP ……………………………………… Back Post
ch ………………………………………. chain
CStr ……………………………………. Chainless Starting treble crochet
dc ………………………………………. double crochet
dtr ………………………………………. double treble crochet
FP ………………………………………. Front Post
htr ………………………………………. half treble crochet
slst ……………………………………… slip stitch
sp(s) …………………………………… space(s)
st(s) ……………………………………. stitch(es)
tog ……………………………………… together
tr ………………………………………… treble crochet
Symbols
( )
Work enclosed instructions in the next stitch/space or in the stitch/space
indicated.
* * or [ ]
Repeat enclosed instructions as many times as specified.
Underlining
Some instructions are underlined to highlight instructions that may be
unexpected or that may be easily missed.
Special Stitches
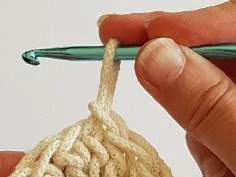
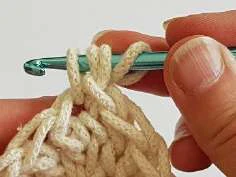
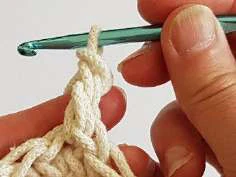
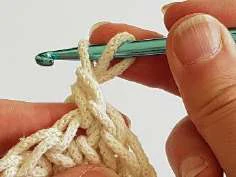
Chainless Starting Treble Crochet (CStr) – CStr counts as a treble crochet.
CStr replaces the traditional ch3 at the start of a round and produces a consistent look to all
treble crochet stitches as well as disguising the start of the round better.
This stitch is used at the start of every round when the round starts with a treble crochet. This
includes the first treble crochet of every popcorn stitch at the start of the round.
If you find it difficult to master then I recommend you start the round with ch2 then crochet a
regular treble crochet into the stitch. At the end of the round, skip the ch2 and stitch into the
treble crochet to join the round.
1.
Lengthen the active loop to the height of a treble crochet.
2.
Place your finger on top of the loop to hold it in place.
3.
Wrap the hook counter clockwise around the lengthened loop. (The hook will come
towards you then continue around the back of the active loop.)
4.
Hook into the stitch.
5.
Yarn over, pull through the stitch.
6.
Yarn over, pull through 3 loops on the hook.
7.
Yarn over, pull through 2 loops on the hook.
8.
The CStr is complete. Mark the CStr stitch loops to make it easier to find at the end of
the round.
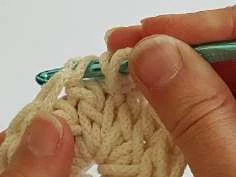
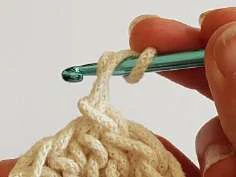
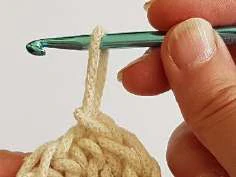
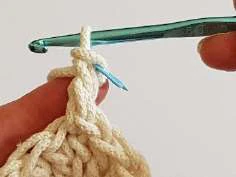
Popcorn (PC) – 4 treble crochet in the same stitch, drop the loop from the hook, insert hook
into the first treble crochet, grab the dropped loop and pull it through the stitch on the hook,
ch1 to close. Ch1 is not counted as a stitch.
Use a CStr for the first treble crochet of all PC at the start of a round.



Notes
Ch1 at the start of the round does not count as a stitch.
The first stitch of the round goes into the same stitch as the last slip stitch of the previous
round unless otherwise indicated.
If the first stitch of the round is a treble crochet, replace it with a Chainless Starting Treble
(CStr, see Special Stitches).
If the first stitch of the round is a popcorn stitch, replace the first treble crochet with a CStr.
Stitches are separated by a comma. Crochet into the next stitch unless otherwise
indicated.
The number before the stitch name indicates to crochet that number of stitches into the
same stitch/space. For example, 2tr means to crochet 2 treble crochet into the same
stitch/space.
The number after the stitch name indicates to crochet the stitch into the next number of
stitches. For example, tr x 2 means to crochet a treble crochet into the next 2 stitches.
Joining stitches (double or treble crochet stitches that join the end of the round to the start
of the round, NOT including slip stitches) are counted as the stitches they replace. For
example, ch1, dc in first tr counts as a ch2 space.

Pattern
Round
Instructions
Stitch Count
Gauge
Magic ring
Ch1, 16dc into ring, slst in dc
16 dc
2cm
Ch1, *dc, ch2, skip 1 dc* x 8, slst in dc, slst in ch2
sp
8 dc, 8 ch2 sps
2.5cm
See Special Stitches for PC stitch.
(PC, ch2) in each ch2 sp, slst in PC, slst in ch2 sp
8 PC, 8 ch2 sps
4.5cm
(PC, ch3, PC) in each ch2 sp, slst in PC, slst in
ch2 sp
16 PC, 8 ch2 sps
6cm
*(PC, ch5, PC) in ch3 sp, tr between next 2 PC* x
8, slst in PC, slst in ch5 sp
16 PC, 8 tr,
8 ch5 sps
8cm
*9tr in ch5 sp, FPdtr around tr* x 8, slst in tr
72 tr, 8 FPdtr
10.5cm
Ch1, *BPdc x 9, (FPdtr, ch3, FPdtr) around FPdtr*
x 8, slst in BPdc
Stitch counts are per
side for rounds 7-17.
9 BLdc, 2 FPdtr,
1 ch3 sp
Measured
ch3 to ch3
12cm
Ch1, *dc x 9, FPtr around FPdtr, 5tr in ch3 sp,
FPtr around FPdtr* x 8, slst in dc, slst in next dc
9 dc, 2 FPtr, 5 tr
13.5cm
Ch1, *dc x 7, skip 1 dc, FPtr, 2BLtr x 5, FPtr, skip
1 dc* x 8, slst in dc, slst in next dc
7 dc, 2 FPtr,
10 BLtr
15.5cm
Ch1, *dc x 5, skip 1 dc, FPtr, [2tr, tr] x 5, FPtr,
skip 1 dc* x 8, slst in dc, slst in next dc
5 dc, 2 FPtr, 15 tr
17.5cm
Ch1, *dc x 3, skip 1 dc, FPtr, [tr x 2, 2tr] x 5, FPtr,
skip 1 dc* x 8, slst in dc, slst in next dc
3 dc, 2 FPtr, 20 tr
19.5cm
Ch1, *dc, skip 1 dc, FPtr, BPdc x 20, FPtr, skip 1
dc* x 8, slst in dc, slst in FPtr, slst in BPdc
1 dc, 2 FPtr,
20 BPdc
19.5cm
*tr x 20, FPtr2tog using next 2 FPtr (skipping dc)*
x 8, slst in tr, slst in next 3 tr
20 tr, 1 FPtr2tog
21cm
Replace the first BPtr of the round with (BPdc,
ch2)
Ch1, *[BPtr, ch1] x 14, BPtr6tog using next 6 tr
(skipping tr2tog), ch1* x 8, slst in top ch2, slst in
ch1 space
14 BPtr,
1 BPtr6tog,
15 ch1 sps
24cm
Mark the 3 rd dc in each set.
Ch1, *dc in ch1 sp, 2dc in next 11 ch1 sps, dc in
ch1 sp, skip BPtr, skip ch1 sp, skip BPtr6tog, skip
ch1 sp, skip BPtr* x 8, slst in dc, slst in next 4 dc
24 dc
24cm
*[tr, ch2, skip 1 dc] x 9, tr2tog using next dc and
next marked stitch, ch2* x 8, replace last ch2 with
tr in first tr
9 tr, 10 ch2 sps,
1 tr2tog
26cm
First PC goes into the sp created by the joining tr.
Note that there is no chain space between the 2
PC either side of the tr2tog.
*[PC in ch2 sp, ch3] x 9, PC in ch2 sp, skip
tr2tog* x 8, slst in PC
Fasten off.
10 PC,
9 ch3 spaces
29cm
2 1
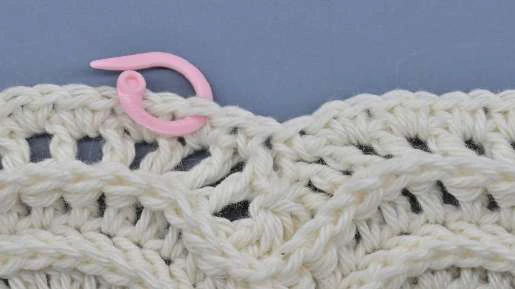


Attach yarn to the 5th space of any 'petal'.
There is no ch3 space between the 2 PC either
side of the tr2tog.
Skip all PC.
I have broken this round down into steps to make
it easier to understand.
3tr in next 6 ch3 sps (photo 18a),
*3htr in next ch3 sp, 3dc in next 5 ch3 sps, 3htr in
next ch3 sp, 3tr in next 2 ch3 sps* x 5 (photo
18b),
3tr in next 3 ch3 sps, (3tr, ch2, 3tr) in next ch3
space (photo 18c),
3tr in next 5 ch3 sps, 3htr in next ch3 sp, 3dc in
next 5 ch3 sps (photo 18d),
3htr in next ch3 sp, 3tr in next 5 ch3 sps, 3tr in
first ch3 sp, ch1, dc in first tr (counts as ch2 sp)
(photo 18e)
Total stitch counts
for rounds 18-21.
96 tr, 36 htr,
90 dc, 2 ch2 sps
Measured
as shown
for rounds
18-21.
29cm
3tr into space created by joining dc, tr x 18, htr x
3, *dc x 15, htr x 3, tr x 6, htr x 3* x 4, dc x 15, htr
x 3, tr x 18, (3tr, ch2, 3tr) in ch2 space, tr x 15, htr
x 6, dc x 15, htr x 6, tr x 15, 3tr in first space, ch1,
dc in first tr
102 tr, 42 htr,
90 dc, 2 ch2 sps
30cm
3tr into space created by joining dc, tr x 21, htr x
3, dc x 15, htr x 3, tr x 87, htr x 3, dc x 15, htr x 3,
tr x 21, (3tr, ch2, 3tr) in ch2 space, tr x 18, htr x 3,
dc x 21, htr x 3, tr x 18, 3tr into first space, ch1,
dc in first tr
177 tr, 18 htr,
51 dc, 2 sps
31cm
No ch3 space
No ch3 space
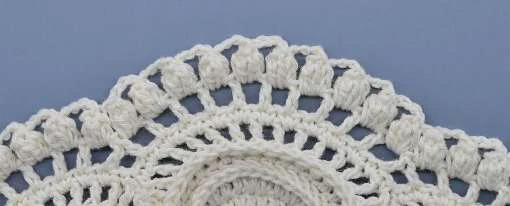




3tr in sp created by joining dc (mark first tr), tr x
177, 5tr in ch2 sp (mark 3rd tr), tr x 69, 2tr in first
sp, slst in tr
Fasten off.
256 tr
32cm
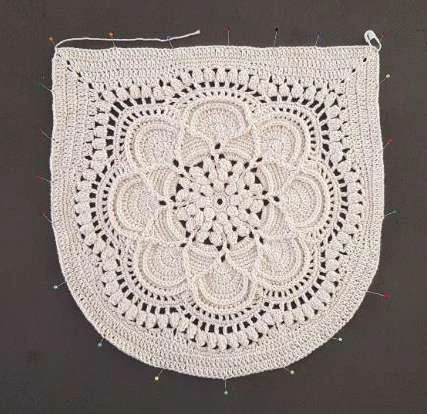
Repeat the pattern for the second panel then block both panels to the same size.
Blocking
Blocking will give a neat, flat, even look to your project while making it easier to keep the
correct shape.
You can either dip your project in cold water, or spray it with clean water. Squeeze it gently to
remove any excess water, but do not wring or twist it. Pin your project out to the desired shape
and size on blocking boards or foam mats. Allow it to dry completely before unpinning.
I blocked my panels to 32cm x 32cm (12.6in x 12.6in). The size you block your panels to
doesn’t have to be the same as mine, just make sure both panels are blocked to the same size.
32cm (12.6in)
32cm (12.6in)


Joining the panels together
With the wrong sides of the panels facing each other, and the corners aligned, attach the yarn
to the left-hand marked stitches of both panels.
Ch1, dc in corresponding stitches of both panels of the bag all the way around the curved
edge, stopping at the right-hand corner marked stitch. 183 dc
Do not fasten off, continue on to top edge.
Start here
End here
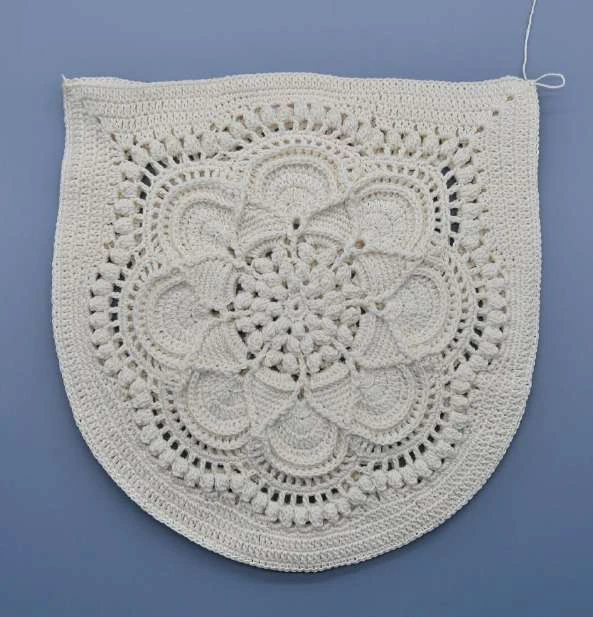


Top Edge
Turn the bag to work along the right side of the top edge of the opening.
When crocheting the top edge, use tension to create an opening that is the same width as the
bag.
Too tight
Too loose
Just right 🙂
Round
Instructions
Stitch Count
Mark the first st of each round.
Ch1, dc x 73 starting with the next tr, dc in the first dc of the
joining row, dc x 37, ch20 (button loop), dc x 36, dc in the
last dc of the joining row
148 dc, 1 ch20
Dc x 148 (moving the button loop to the outside of the bag)
148 dc
Dc x 143 (finishing with 5 stitches left)
Do not fasten off, continue on to the strap.
143 dc
Strap
The strap will stretch once weight is placed in the bag. I have taken this into consideration
when calculating the length of the shoulder strap.
Row
Instructions
Stitch Count
Ch2 at the start of the row does not count as a stitch.
Ch2, tr in same stitch as last dc, tr x 11, turn
12 tr
2 – 61
Ch2, tr in first tr, tr x 11, skip ch2, turn
Approximately 60cm (24in) long.
12 tr
With no twists in the strap, place the right side of the strap against the right side of the bag.
Ch1, slst the strap to the bag with 6 slst either side of the seam.
Fasten off and weave in the ends.
Lining
Basic sewing knowledge and skills assumed.
Supplies
crochet bag
paper, bigger than the bag
pencil
ruler
scissors
pins
lining fabric (See below for details.)
thread to match the bag
sewing machine
Lining fabric
Choose a fabric that you are happy with if the wrong side shows through the crochet.
I like to use de-lustered satin for lining my bags. It is a thick, luxurious satin that is easy to sew
and gives some structure to the bag. You may also use regular satin, although I don’t
recommend this for beginner sewers as it is thinner and more difficult to sew.
Cotton fabric is also suitable and is great for beginner sewers.
Do not use fabric that has stretch such as lycra or t-shirt material.
The amount of lining fabric you need depends on the size of your bag.
Measure the width and height of your bag.
The width of the fabric needs to be twice the width of your bag, plus 10cm (4in).
The length of the fabric needs to be the height of your bag, plus 5cm (2in).
If you are unsure, I recommend you make your pattern before buying your lining fabric.
Bag height (h)
Bag width (w)
Fabric width (cm) = (w x 2) + 10
Fabric length (cm) = h + 5



Pattern
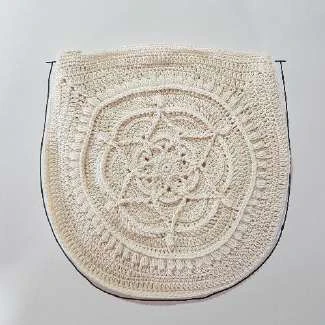
1. Fold the strap to the back of the bag. Place the bag in the
centre of the paper and press the bag flat with your hands.
(The photo shows a different bag, but the instructions are the
same.)
Mark the top edge on both sides where the strap joins the bag.
Draw around the curve of the bag. (I used a marker so that it
shows better in the photo, but you should use a pencil so that
you don’t mark your bag.)
2.
Remove the bag and draw a straight line joining the marks
at the top edge (shown in red).
3. Add 2cm (0.8in) above the red line and 1cm (.4in) around
the curved edge.
4. In order to create a symmetrical pattern, fold the pattern in
half sideways and cut through both layers along the green line
that gives the largest pattern.
Draw a grainline along the fold.
2cm
1cm
1cm
Grainline


Cutting
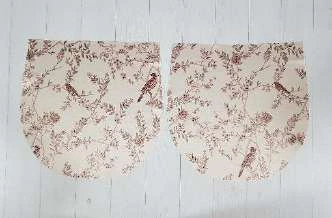
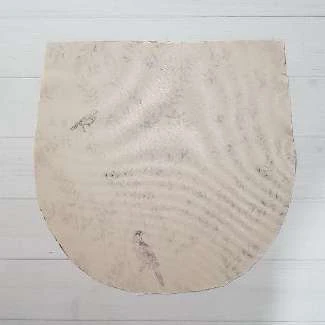
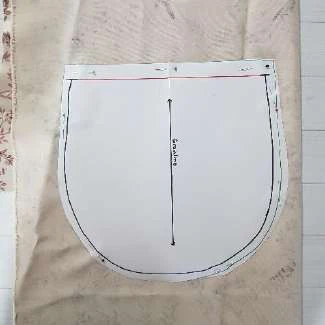
5. Pin the pattern onto your fabric with the selvedge parallel to
the grainline. I have doubled my fabric so I only need to cut once
to get 2 pieces. If necessary, pin and cut 2 separate pieces.
Sewing
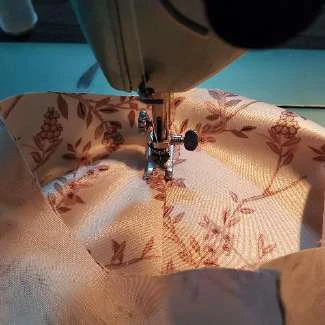
6. With right sides of the fabric facing each other, sew around
the curved edge with a 1cm (.4in) seam allowance.
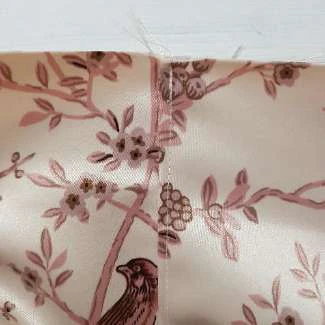
7. Top stitch the seam.
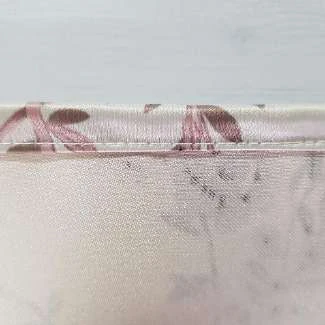
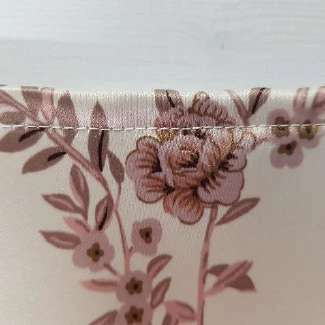
8. Fold the top edge over to
the wrong side by 1cm (0.4in)
then again by another 1cm
(0.4in) and pin it. Sew close to
the first fold.
selvedge
Grainline


9. Fold the button loop down and secure it out of the way.
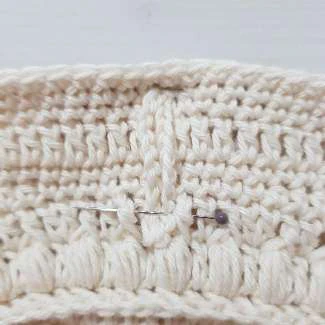
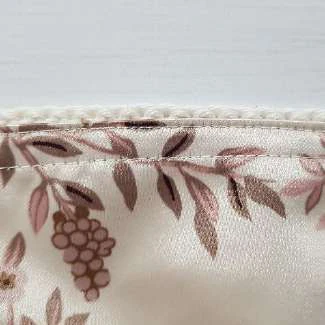
10. Place the lining inside the bag with the right side facing
inwards, and the side seams aligned.
Pin the lining to the bag just below the top edge adjusting the
crochet as necessary to get a neat fit with the lining.
Sew close to the fold of the lining, being careful not to sew the
button loop or the straps.
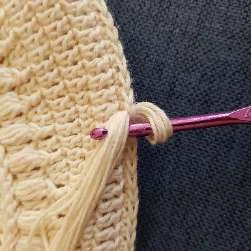
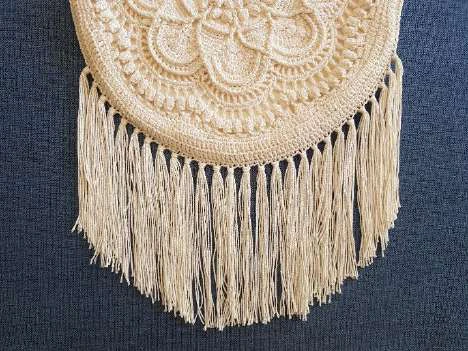
Fringe
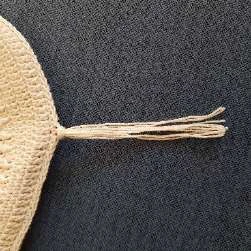
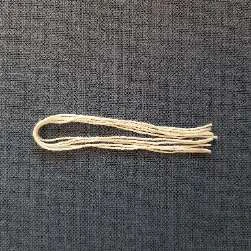
Cut 135 strands of yarn at 30cm (12in) each. (27 tassels with 5 strands in each = 135
strands).
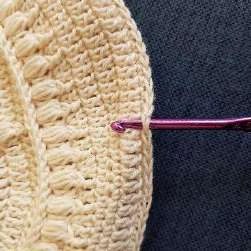
Attach the first tassel to the 53rd dc of the joining row by following these instructions.
1.
Fold 5 strands in half.
2.
Place a hook through the indicated stitch from the back to the front.
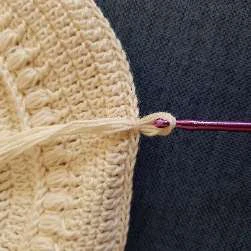
3.
Place the folded end of the strands over the hook and pull them through the stitch.
4.
Yarn over with the strands.
5.
Pull through the stitch and tighten the strands as necessary.
Repeat for the remaining strands in every 3rd stitch around the bottom curve of the bag.
There should be 27 tassels.
Iron the fringe and trim the ends with sharp scissors as needed.

Button
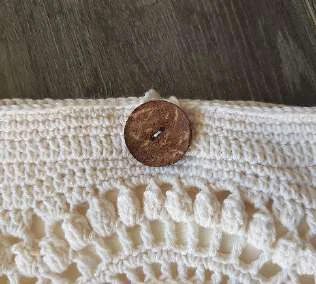
Attach the button to the top centre of the front of the bag.
Well done! You have finished!
Recommended Digital Products
Handmade Crochet Corset Belt Pattern Boho Chic Waist Cincher with Busk & Ribbon Lacing Intermediate Crochet PDF Pattern
$4.99
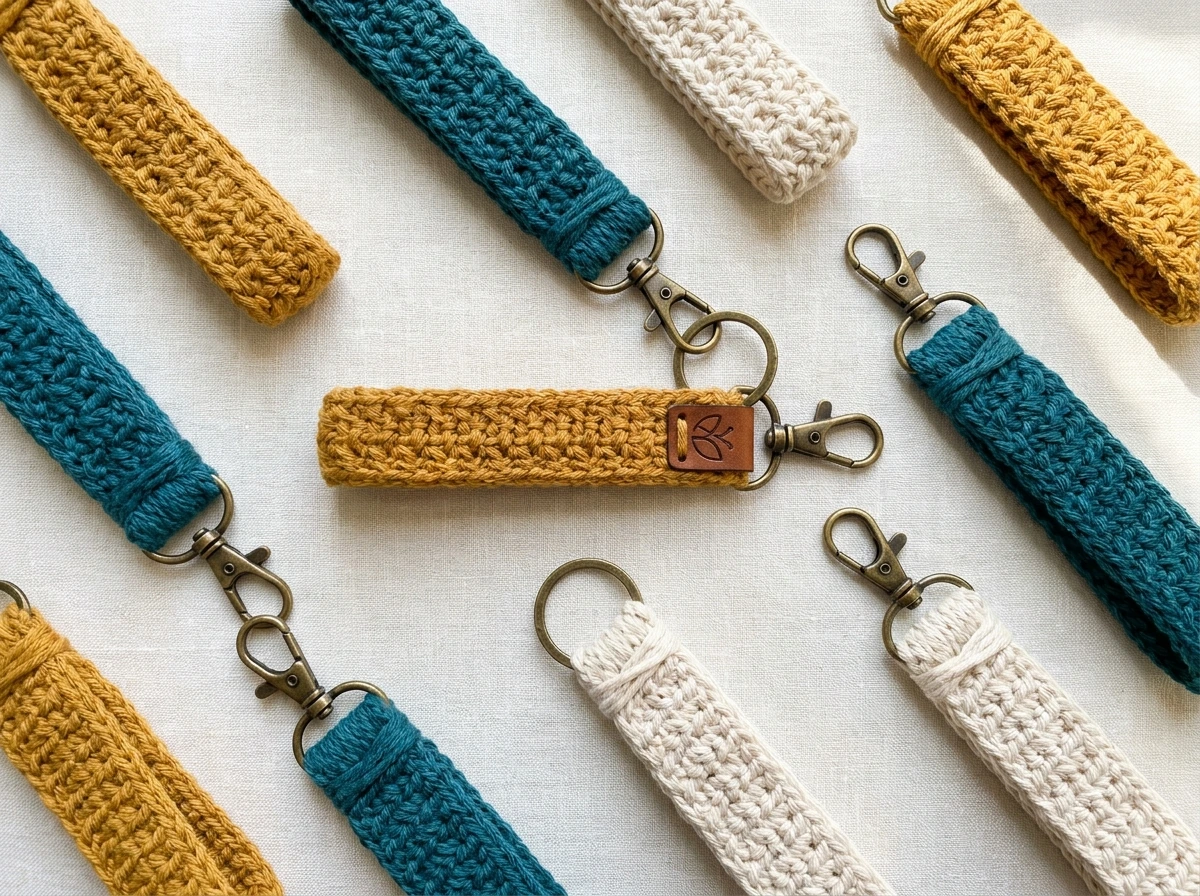
The Highline Wristlet Keychain Crochet Pattern: Quick, Textured & Market-Ready Accessory
$3.99

The Ultimate Beginner’s Crochet Guide: Master 45+ Essential Techniques & Practical Projects
$5.99

From Loop to Perfection: The Ultimate Step-by-Step Crochet Master Guide
$9.99
Get this Crochet Pattern as a Free PDF
Enter your email to receive the PDF associated with this article.
Leave a Reply