
Lamp Summer
Crochet Pattern
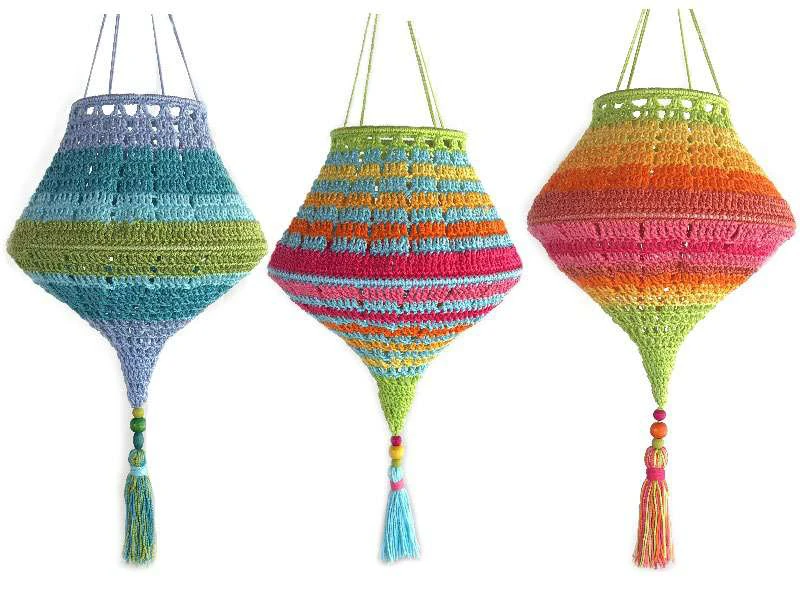
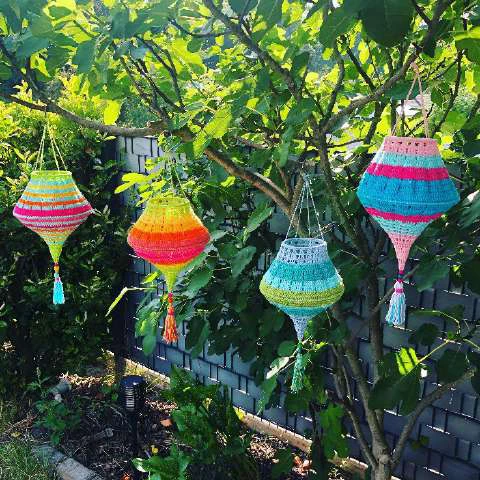
„Boho Summer Lampion“
Let‘s bring some color and lights in our
gardens and houses –
with these fancy Boho-style lanterns!
Since last year they are a Must-have in our garden
on warm summer evenings and
they create a unique atmosphere!
Page | 2
Required materials:
– Crochet hook 3 mm
– Mercerized Cotton yarn (sport/fine) in different colors
(my recommendation: i.e. Catania Solids/Schachenmayr, Capri/Katia or similar)
– metal rings: for each lampion you need 2 rings:
1 x 10-cm-diameter rings
1 x 20-cm-diameter ring
– optional: LED lights with remote control, solar light, wire fairylights, electric tealights …
– optional: wooden or other beads
Abbreviations:
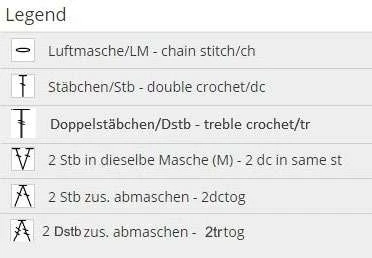
st(s) = stitch(es)
ch = chain stitch
sl st = slip stitch
sc = single crochet
hdc = half double crochet
dc = double crochet
tr = treble crochet
2dctog = double crochet two together = 1 decrease
2trtog = treble crochet 2 together = 1 decrease
2 dc in s. st = crochet 2 double crochet in same stitch = 1 increase
in n. st. = in next stitch
ch-sp = chain space = ch or space between sts of previous round
dcg = double crochet group = group of (various) quantity of dc between ch
cont. = continuously
rd. = round
prev. rd. = previous round
Page | 3
Introduction/Crochet symbols
Since I have always added additional photos
with crochet symbols to the detailed step-by-
step photos to better illustrate the working
steps, I found a complete crochet chart
expendable.
The lantern is crocheted from top to bottom –
you start at the upper lamp opening, where the
suspension will be attached later, and end at
the tip, where the tassel will be attached.
A total of 2 metal rings will be implemented for
shape and stability. You start with a 10-cm
ring, then in the middle you need a 20-cm ring.
This results in a very stable shape.
The color scheme is entirely up to you! When I
speak of „change color“ in the following
instructions, it is only because I actually
changed the color in the lantern shown. This is
not mandatory!
Please read the instructions completely, before you start!
Important: The pattern is worked in rounds. Each round begins with ch, i. e. ch 1 for 1 sc, ch 2
for hdc, ch 3 for dc and so on. Each round ends with slip stitch into the ch at the beginning of the
round. This might not be explicitly mentioned in each round!
Tip: When changing colors, always start the new color at another position (but pay attention to
the starting position given in the instructions!) in order to avoid an unsightly "seam line".
It goes without saying that multi-colored crochet means that many threads have to be woven-in.
This is not explicitly mentioned and it should always be done during crocheting after individual
rounds rather than at the end, especially since the turning of the lantern for weaving-in threads
might be difficult due to two metal rings!
Page | 4
Crochet Pattern Boho Summer Lampion
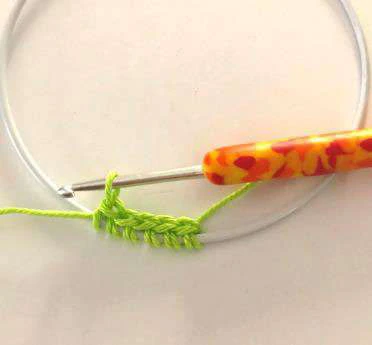
Start to crochet sc around the ring.
For this, hold the ring in your left hand like a crochet
piece, go with the hook under the ring, get thread,
then go with hook above ring, get thread and pull it
through the loops on the hook.
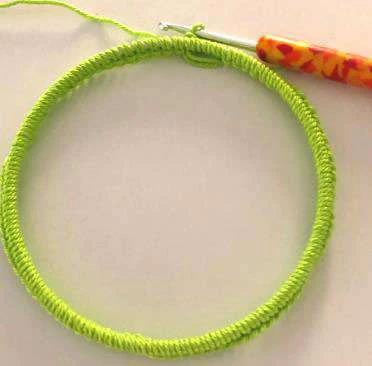
Crochet a total of 95 sc in this way and finally end
with 1 sl-st in first sc.
We now have a closed circle.
From here we continue directly with the first round.
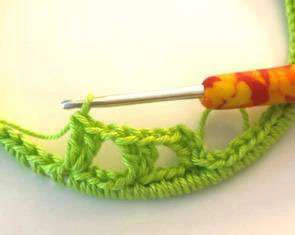
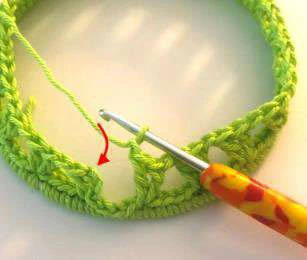
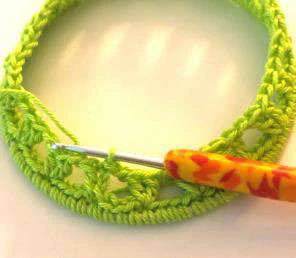
1st rd:
Start with ch3,
then 1 dc in same st,
* ch1, skip 4 sts,
2 dc in same st,
repeat from * continuously.
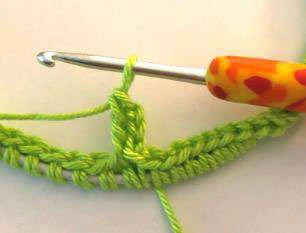
End round with 1 sl-st in
uppermost ch (see red arrow in
left picture).
(= 57 sts)
Page | 5
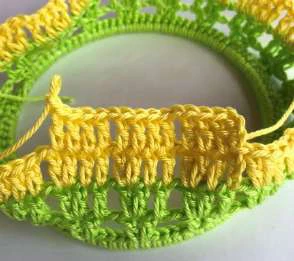
2nd rd: Start with ch3, then
2 dc in n. st, ch1,
* skip 1 st, 1 dc in n. st,
2 dc in n. st, ch1,
repeat from * cont.
End rd with 1 sl-st.
Change color.
(= 76 sts)
3rd rd:
Start on the right dc of any dcg of
prev. rd with ch3, then
1 dc in n. st, 2 dc in n. st,
ch1, skip 1 st,
* 2 dc, 2 dc in n. st,
ch1, skip 1 st,
repeat from * cont.
End rd with 1 sl-st.
(= 95 sts)
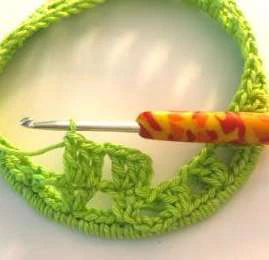
As you can see, the chain stitches
between the dc groups are always one
above the other. You can always orient
yourself on this.
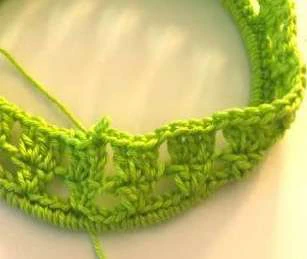
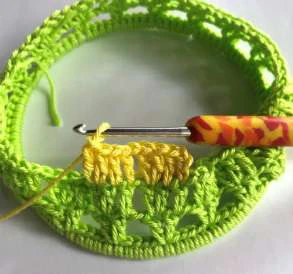
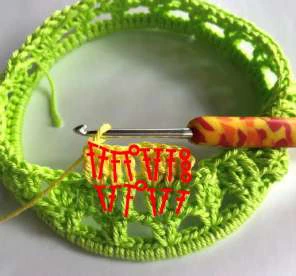
4th rd:
1 dc on each dc of prev. rd and ch1
above each ch1/ch-sp of prev. rd.
In detail: Start with ch3, then
3 dc, ch1, skip 1 st,
* 4 dc, ch1, skip 1 st,
repeat from * cont.
End rd with 1 sl-st.
Change color.
(= 95 sts)
Page | 6
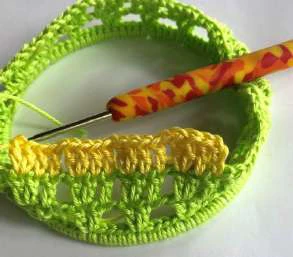
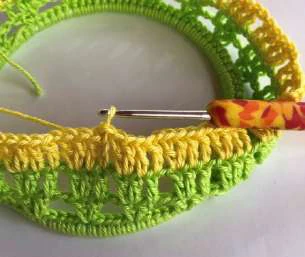
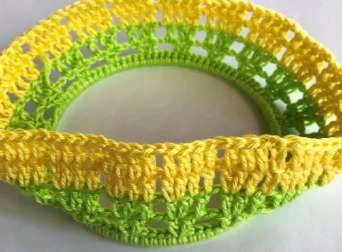
5th rd: Start on the right dc of any dcg of prev. rd
with ch3, then crochet exactly as 4th rd.
(= 95 sts)
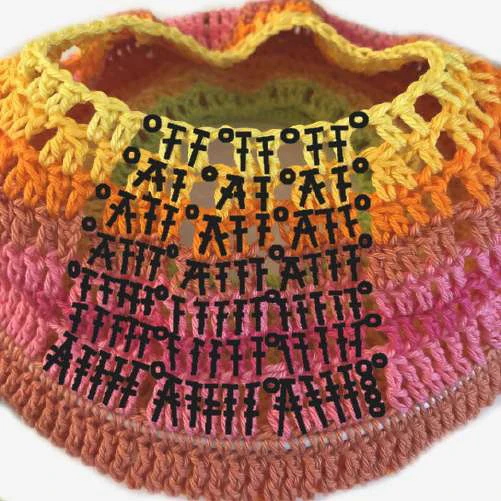
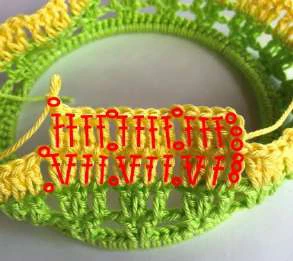
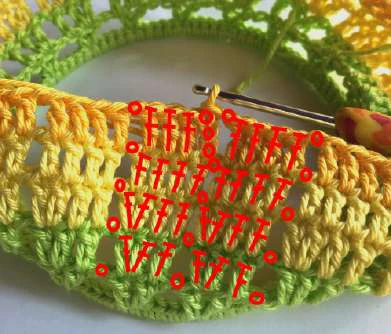
In this picture, rounds 2 to 5 are shown again in summary
with symbols. Here you can see very well the increases
and the overlying chain stitches and dc groups.
6th rd:
Start with ch3, then
2 dc, 2 dc in n. st,
ch1, skip 1 st,
* 3 dc, 2 dc in n. st,
ch1, skip 1 st,
repeat from * cont.
End rd with 1 sl-st.
Change color.
(= 114 sts)
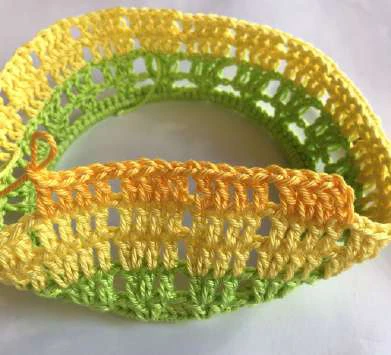
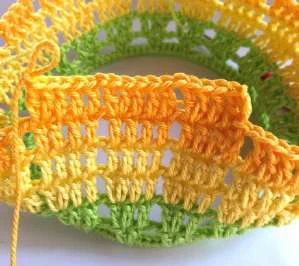
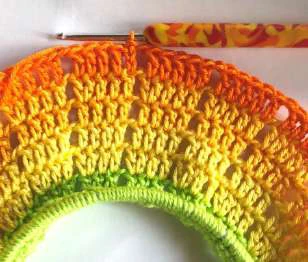
7th rd: 1 dc on each dc of prev.
rd and ch1 above each ch1/ch-sp
of prev. rd.
In detail: Start with ch3, then
4 dc, ch1, skip 1 st,
* 5 dc, ch1, skip 1 st,
repeat from * cont.
End rd with 1 sl-st.
(= 114 sts)
Page | 7
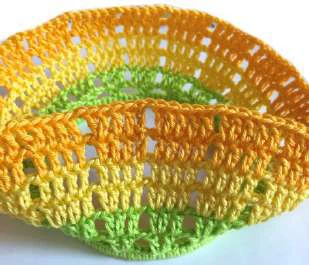
8th rd: Start with ch3, then
3 dc, 2 dc in n. st,
ch1, skip 1 st,
* 4 dc, 2 dc in n. st,
ch1, skip 1 st,
repeat from * cont.
End rd with 1 sl-st.
Change color.
(= 133 sts)
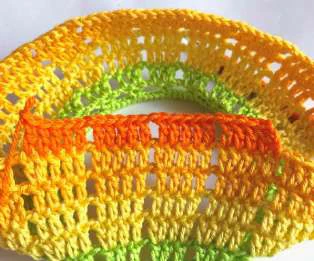
9th rd: Begin with ch4,
then crochet 1 tr on each dc of prev. rd and 1 tr in
each ch-sp.
End rd with 1 sl-st.
(= 133 sts)
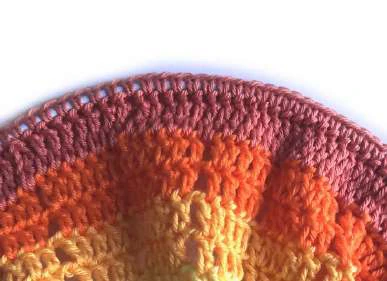
10th rd: Crochet sc all
around, embracing the
20 cm ring now (as
already described above
for the first ring).
Crochet 1 sc on each st
of prev. rd. End round
with 1 sl-st.
(= 133 sts)
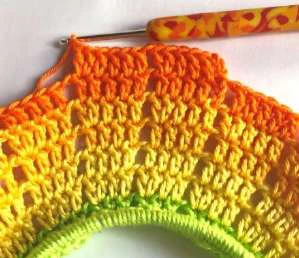
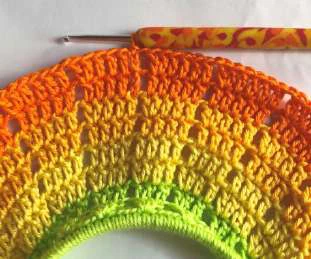
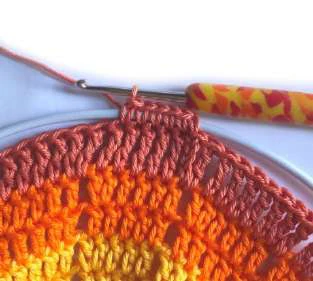
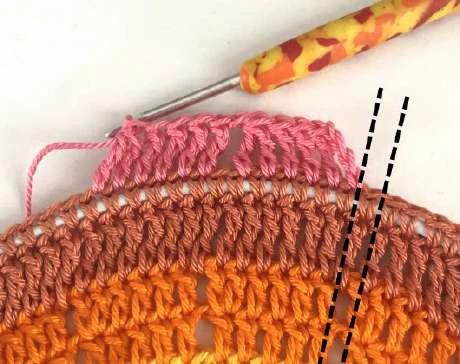
11th rd: Start above the right dc of any dcg of rd
8 (the ch-sp „line“ of rounds 2 to 8 should be
continued here in the same direction – see dashed
lines in left picture).
Start with ch4, then
3 tr, 2trtog,
ch1, skip 1 st,
* 4 tr, 2trtog,
ch1, skip 1 st,
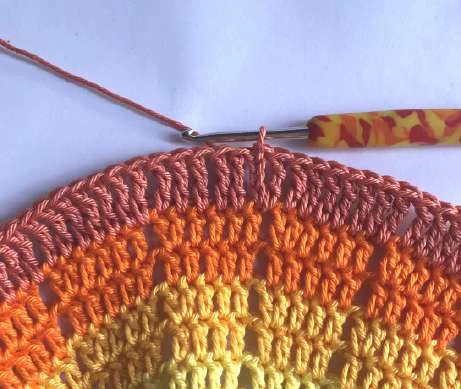
Page | 8
repeat from * cont.
End round with 1 sl-st.
Change color.
(= 114 sts)
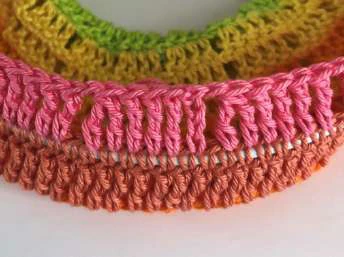
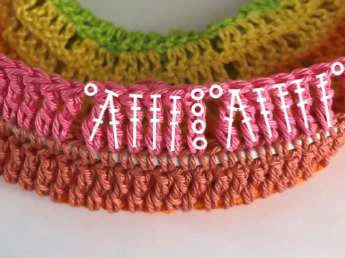
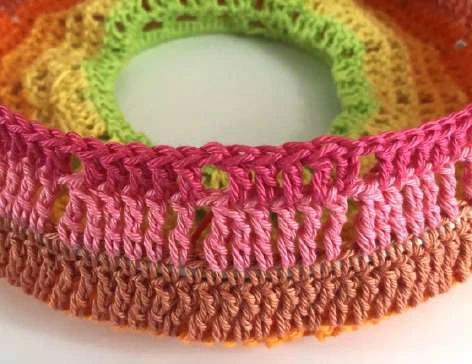
12th rd: 1 dc on each tr of prev. rd and ch1
above each ch1/ch-sp of prev. rd.
In detail: Start on the right dc of any dcg of prev.
rd with ch3, then
4 dc, ch1, skip 1 st,
* 5 dc, ch1, skip 1 st,
repeat from * cont.
End rd with 1 sl-st.
Change color.
(= 114 sts)
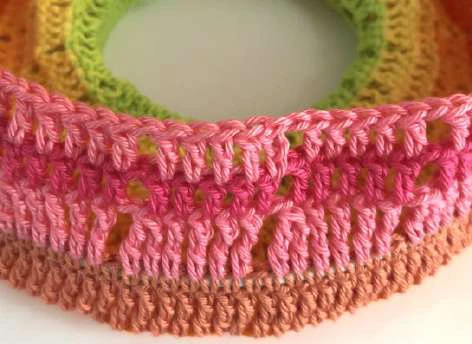
13th rd:
Start on the right dc of any dcg of prev. rd with
ch3, then crochet exactly as 12th rd.
Change color.
(= 114 sts)
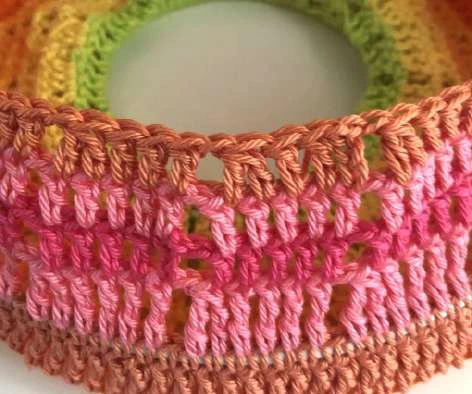
14th rd:
Start on the right dc of any dcg of prev. rd
with ch3, then
2 dc, 2dctog,
ch1, skip 1 st,
* 3 dc, 2dctog,
ch1, skip 1 st,
repeat from * cont.
End rd with 1 sl-st.
Change color.
(= 95 sts)
Page | 9
15th rd:
Start on the right dc of any dcg of prev. rd
with ch3, then
1 dc, 2dctog,
ch1, skip 1 st,
* 2 dc, 2dctog,
ch1, skip 1 st,
repeat from * cont.
End rd with 1 sl-st.
Change color.
(= 76 sts)
16th rd:
Start on the right dc of any dcg of prev. rd
with ch3, then
2dctog, ch1, skip 1 st,
* 1 dc, 2dctog,
ch1, skip 1 st,
repeat from * cont.
End rd with 1 sl-st.
Change color.
(= 57 sts)
17th rd:
Start on the right dc of any dcg of prev. rd
with ch3, then
1 dc, ch1, skip 1 st,
* 2 dc, ch1, skip 1 st,
repeat from * cont.
End rd with 1 sl-st.
Change color.
(= 57 sts)
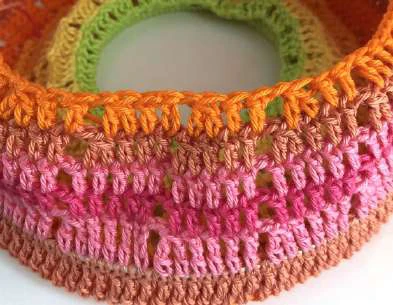
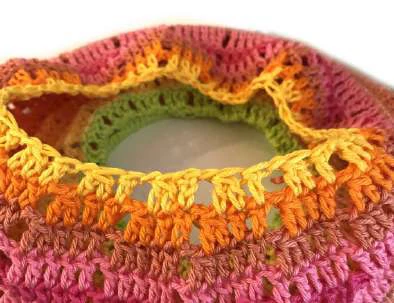
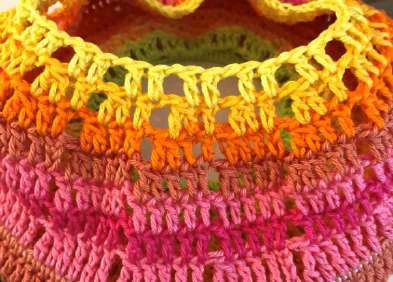
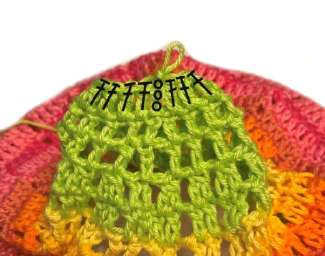
It will soon be done!
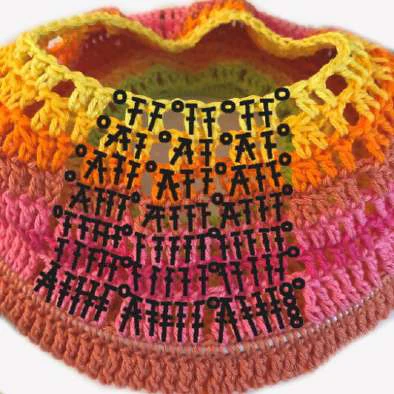
Here you can see rounds 11 to 17 in summary with
symbols.
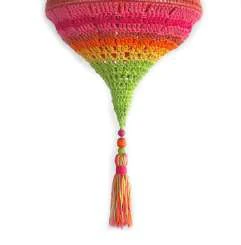
The missing part is now the long tip where the tassel will
finally be attached. I will work this part in a last new color
so that there won’t be any more color changes.
Page | 10
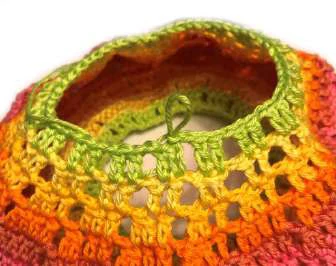
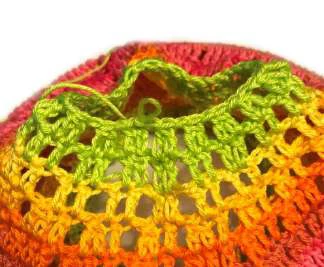
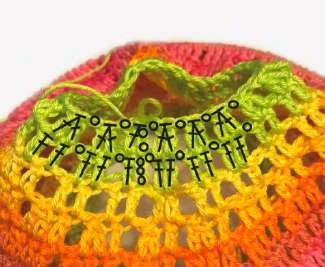
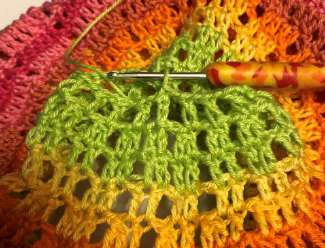
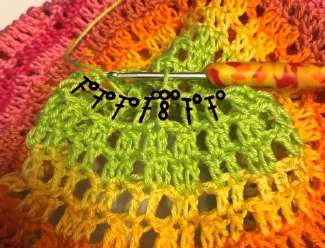
18th rd:
Start on the right dc of any dcg of prev. rd
with ch3, then work exactly as prev. rd 17.
(= 57 sts)
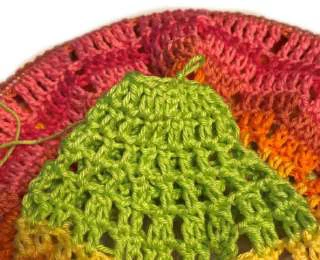
19th rd:
Start with ch2,
then start to crochet 1 dc and
finish it by making 2dctog with
the ch2,
ch1, skip 1 st,
*2dctog, ch1, skip 1 st,
repeat from * cont.
(= 38 sts)
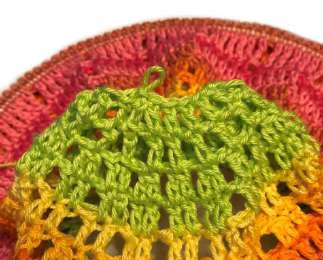
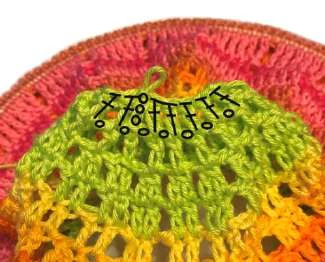
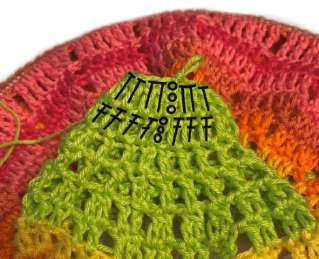
20th rd:
Start with ch4,
skip 1st,
* 1 dc, ch1, skip 1st,
repeat from * cont.
(= 38 sts)
21st rd:
Start with ch3,
* skip 1 st (the ch of prev. rd),
1 dc above dc of prev. rd,
repeat from * cont.
(= 19 sts)
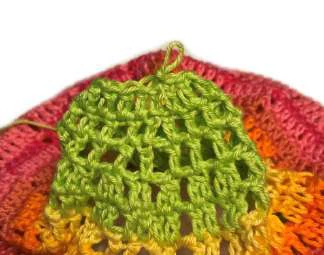
22nd rd:
Start with ch3,
1 dc above each dc of prev. rd.
(= 19 sts)
Page | 11
23rd rd:
Crochet exactly as 22nd rd.
(= 19 sts)
24th rd:
Start with ch3,
*skip 1 st, 1 dc,
repeat from * cont.
This results in 9 final decreases.
(= 10 sts)
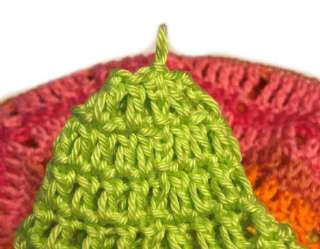
25th (last) rd:
Start with ch3, then
1 dc above each dc of prev. rd.
(= 10 sts)
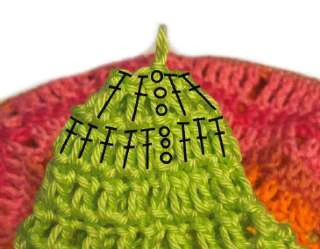
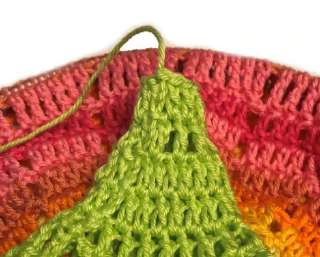
Then cut thread with a length of
approx. 15 centimeters, pull it
onto a darning needle, thread it
through the remaining stitches
and close the opening by pulling
thread.
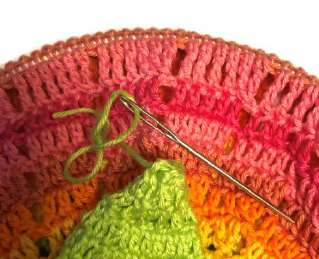
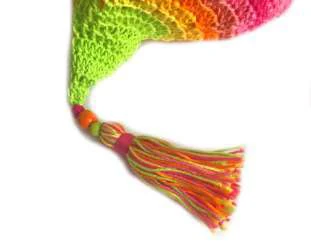
Now pull the remaining thread to the inner side of the lampion – you will need it to attach the
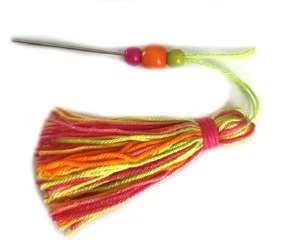
threads of the tassel (how to make these see page 12)
Pull threads of the tassel onto a darning needle, add some beads (optionally), then bring tassel
threads to the inner of the lampion with the darning needle. Now knot all threads well and firmly
together, then shorten ends and weave in well. FINISHED!
Page | 12
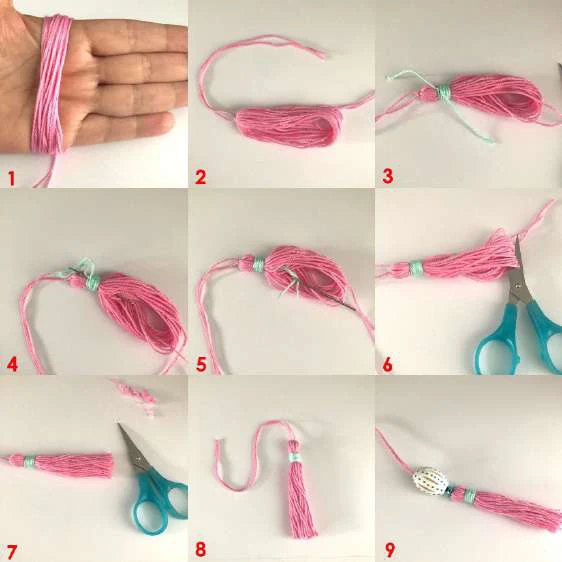
How to make tassels
1Wrap thread around the open palm
about 30 times (you can also use a piece
of cardboard or smartphone, etc.). Cut
the thread.
2 Pull off your hand and secure the
strand on the upper side with two to three
knots with a piece of yarn about 30 cm
long.
3 Now wrap with contrasting yarn about 1
cm below the fixed strand about 15 times,
then knot well.
4 Use a darning needle 5 to pull the ends
of this fixing thread through the wrapped
area into the inside of the thread strand.
6 Now cut through the loops on the
opposite side and 7 trim to the same
length.
8 Done! 9 Now you can add any beads
on the long threads above.
Suspension
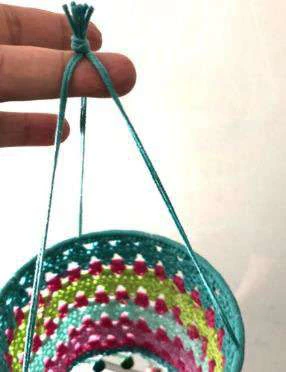
The suspension for the
lanterns without roof is
simply made of three
threads of the same length
(approximately 40 cm
each), which I thread at
about the same distance
from each other on the ring
(between 2 sc).
At the top, I knot all the
threads together and
shorten the ends.

Page | 13
Illumination/„installation“ of lights
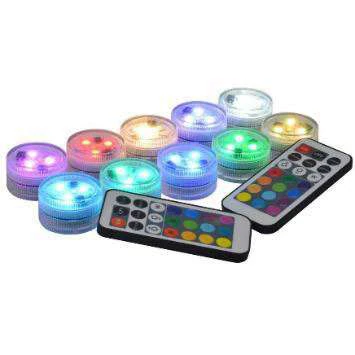
Color-changing LED lamps with remote control
Such kind of LED lights are perfect for me, because I
can turn off all at once with the remote control when I
leave garden to go to bed instead of having to fumble
around in every single lantern to turn it off.
Therefore, these lights are my warmest
recommendation.
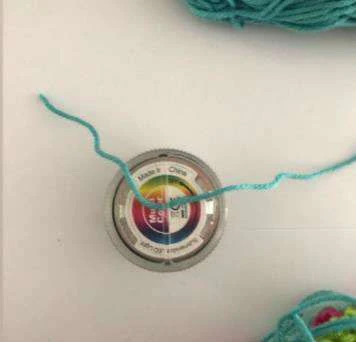
Pull a thread through the small eyelet of the LED lamp.
The thread must be at least 3 times the length of the
ring diameter.
For a 10 cm ring that is about 30 centimeters.
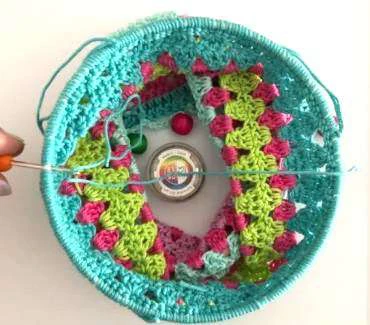
Now pull the thread on two opposite sides through two
sc on the ring …
The pictures here are from my
other lantern pattern – but the
installation of the lights is
identical.
Page | 14
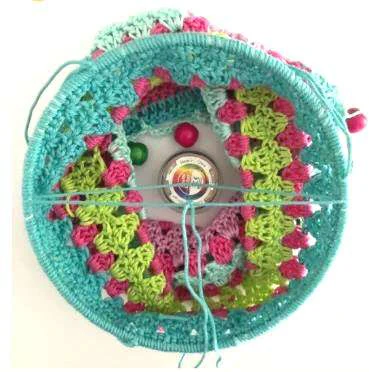
… and knot the two thread ends well.
Shorten the thread ends and move the knot to one side
of the ring.
That's it. Light on and enjoy!
Tip: In rainy weather, of course, the lanterns
should not stay outside. Some thread colors can
bleed out if they come into contact with water for
a time, and the crochet work would become
unsightly.
And please turn the lights open slightly if you are
not going to use them for a long time – this
prevents the batteries from being used up. This is
the case when the lights are only switched off by
the remote control.
Recommended Digital Products

The Ultimate Beginner’s Crochet Guide: Master 45+ Essential Techniques & Practical Projects
$5.99

From Loop to Perfection: The Ultimate Step-by-Step Crochet Master Guide
$9.99
The Ultimate Crochet Handbook: Essential Techniques, Color Theory & 80+ Step-by-Step Patterns
$19.99
Master the Art of Crochet from Scratch – Ultimate Digital Guide with 8 Step-by-Step Projects!
$19.99
Get this Crochet Pattern as a Free PDF
Enter your email to receive the PDF associated with this article.
Leave a Reply